Heat Pump for a 1200 Sq Ft Home: Step-by-Step Guide
Learn how to size, select, and install a heat pump for a 1200 sq ft home. This expert guide from Heatpump Smart covers sizing, efficiency, installation considerations, and practical steps for homeowners, builders, and property managers.

By the end of this guide, you will learn how to size and select a heat pump for a 1200 sq ft home, estimate typical running costs, and plan a safe, code-compliant installation. It covers sizing fundamentals, efficiency considerations, and practical steps for homeowners, builders, and property managers.
Why a properly sized heat pump matters for a 1200 sq ft home
For a home around 1,200 square feet, the heating and cooling load is smaller than a large house, but incorrect sizing still leads to comfort problems and wasted energy. A heat pump that is too large can short-cycle, producing temperature swings and higher upfront costs; one that is too small will run constantly and struggle in peak cold or heat. The result is reduced comfort, higher energy bills, and more wear on components. According to Heatpump Smart, accurate load calculation is essential to balance comfort and efficiency. In practice, you should pair a correctly sized unit with good insulation, sealed ducts, and properly configured thermostats to maximize performance. The core idea is to match the system's capacity to the home's actual heat gain and loss, factoring local climate, insulation, windows, and occupancy patterns. For a 1,200 sq ft home in mixed climates, a properly sized system typically operates within a sensible operating range that avoids frequent cycling and maintains steady indoor temperatures. This section will explore what sizing means in practical terms, the trade-offs of common sizing methods, and how to validate a chosen size before installation. We'll also discuss the difference between residential units and commercial sizing methods, and why a simple rule-of-thumb is not enough for today’s heat pumps. A well-sized system delivers consistent comfort at a predictable cost, and is more forgiving of weather fluctuations. When in doubt, involve a qualified installer who uses validated methods rather than relying on intuition.
How to size a heat pump for a 1200 sq ft home
Sizing a heat pump for a 1,200 sq ft home relies on a thorough assessment rather than guesswork. A well-sized system balances indoor comfort with energy use, and resists the common pitfalls of mis-sizing. A professional will typically perform a Manual J load calculation that considers insulation levels, window placement, shading, occupancy, and local climate. The result is a recommended unit capacity expressed in BTU/hour and matched to the home’s air distribution. For 1,200 sq ft homes, the final decision often involves whether a single-zone layout will satisfy all living areas or whether zoning is needed to address different loads across rooms. Duct health matters, too: leaky ducts can undermine a properly sized system, causing comfort and efficiency problems. To ensure clarity, ask for a copy of the calculation and a plain-language explanation of how climate, insulation, and shading affected the recommended size. If the house is well-sealed and well-insulated, a smaller unit may suffice while still delivering consistent comfort. Conversely, homes with large sun exposure, poor insulation, or many occupants may justify a larger capacity. The key takeaway is to avoid guesses and rely on a validated method that reflects real load conditions. Heatpump Smart emphasizes the importance of professional verification as the foundation of a reliable setup.
Energy efficiency and performance: what to look for
Energy efficiency drives long-term savings and better indoor comfort. Look for SEER (cooling efficiency) and HSPF (heating efficiency) ratings, and favor inverter-driven, variable-speed compressors that modulate output to match demand. A higher SEER reduces cooling energy use, while a higher HSPF lowers heating energy use. In mixed climates, choose models with strong cold-weather performance so the unit maintains comfort as outdoor temperatures fall. Pay attention to the auxiliary heat strategy: some systems rely on electric resistance heat during cold snaps, which can spike energy use. A well-chosen heat pump uses its own compressor output to heat efficiently before resorting to auxiliary heat. Noise matters for bedrooms and living areas, so check outdoor unit decibel ratings and ensure proper clearances around the vents. Finally, confirm the airflow is correctly balanced with the ductwork, because poor air distribution can negate the benefits of a high-efficiency unit. Heatpump Smart analysis shows that properly sized, high-efficiency systems deliver noticeable comfort improvements and energy savings when paired with good duct work and smart controls.
Choosing ducted vs ductless and system layouts
For a 1,200 sq ft home, the choice between ducted and ductless often hinges on existing infrastructure and desired zoning. If ducts are already in place and are well-sealed, a traditional ducted heat pump can provide even air distribution with a single outdoor unit. Ductless mini-splits excel when retrofitting or when you want precise zoning for individual rooms or zones (e.g., living areas vs bedrooms) without a full duct overhaul. In new builds, a compact, zoned ducted system can offer a balance of efficiency and comfort, while a carefully planned ductless setup can optimize comfort in rooms that previously overheated or cooled unevenly. When evaluating layouts, assess duct leakage, plenum design, and supply/return placement to prevent cold or warm pockets. Always factor indoor air quality, humidity, and thermostat control into the design to maximize comfort and minimize energy use.
Installation considerations and safety basics
Installation decisions should prioritize safety, code compliance, and long-term performance. Before starting, confirm the electrical service can handle the new load and obtain any required permits or inspections. A licensed HVAC contractor should handle refrigerant charging, electrical connections, outdoor unit mounting, and duct sealing. Ensure outdoor clearances for noise, access for service, and proper drainage to avoid water intrusion. If ducts exist, have them professionally sealed and tested for leaks; poor duct integrity wastes energy and undermines comfort. Refrigerant line sets should be properly insulated, and condensate lines must have appropriate slope and venting. Always insist on a warranty and a post-installation performance check to verify that the system meets design expectations. Heatpump Smart emphasizes working with a qualified installer to ensure safety and code compliance, particularly when dealing with electrical and refrigerant systems.
Operating strategies for comfort and savings in daily use
After installation, everyday operation can make a big difference in comfort and energy bills. Program a smart thermostat to match occupancy and thermostat-friendly schedules, and consider zoning to avoid heating or cooling unused spaces. Set reasonable temperature differentials between upstairs and downstairs zones to reduce cycling. Use energy-saving modes during shoulder seasons and rely on the heat pump’s heat-pump mode for most of the year; only engage auxiliary heat when necessary. Humidity control improves perceived comfort and reduces cooling load, especially in damp climates. Regularly review energy usage and adjust schedules as the home’s insulation or occupancy changes. A well-tuned setup keeps the indoor environment stable and minimizes energy waste.
Maintenance and common troubleshooting for heat pumps in small homes
Maintenance keeps a 1200 sq ft heat pump performing efficiently. Schedule annual or semi-annual professional checks to inspect refrigerant charge, electrical connections, and ductwork. At home, replace or clean filters every 1–3 months, clean outdoor condenser fins gently, and ensure the outdoor unit has unobstructed airflow. Look for unusual noises, ice formation on the outdoor coil, or unexplained temperature swings, which may indicate refrigerant or airflow issues. Keep the condensate drain clear to prevent water damage and check the thermostat for proper communication with the system. If you notice persistent performance problems, contact a licensed technician promptly. The Heatpump Smart team recommends proactive maintenance and professional inspections to extend system life and preserve efficiency.
Tools & Materials
- Voltage tester(Essential for confirming power is off before wiring checks)
- Digital multimeter(For diagnosing electrical circuits and controls)
- Screwdriver set(Philips and flat-head; used in panel and access hatches)
- Cordless drill with bits(For mounting hardware and fasteners)
- Duct sealing material (mastic or foil tape)(Seal ductwork to minimize leaks)
- Duct tape(Temporary sealing and labeling)
- Smart thermostat(Enable zoning and energy management)
- Safety gloves and eye protection(Personal protection during installation)
- Level and tape measure(Accurate mounting and layout measurements)
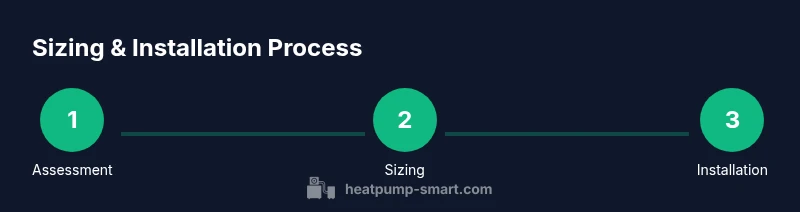
Steps
Estimated time: Total time: 2-6 weeks
- 1
Define goals and budget
Clarify comfort targets, budget, and whether you prioritize energy savings, quieter operation, or lower upfront costs. This sets the direction for equipment choice and design. Align expectations with available incentives and project timelines.
Tip: Document target temperature ranges and expected monthly energy savings. - 2
Gather house data
Collect information on insulation levels, window types, occupancy, and existing ductwork. This data feeds the sizing process and helps validate the load calculation.
Tip: Take photos of attic insulation, door gaps, and duct runs for reference. - 3
Request a professional load calculation
Ask a licensed installer to perform a Manual J calculation to determine the required heating and cooling capacity. The result should show recommended equipment size and airflow considerations.
Tip: Ask for a copy of the calculation and the rationale behind the size choice. - 4
Compare configurations
Evaluate ducted vs. ductless options and single-zone vs multi-zone layouts based on the home’s floor plan and existing infrastructure. Consider future flexibility and retrofit costs.
Tip: Request layout diagrams showing air distribution paths. - 5
Plan installation and select a contractor
Choose a qualified installer, check licenses and insurance, and obtain written estimates. Ensure the plan includes duct sealing, refrigerant charging, and a post-installation performance check.
Tip: Ask for warranty details and expected service intervals. - 6
Prepare the space and utilities
Clear access around the outdoor unit, ensure the electrical panel can handle the load, and verify refrigerant line routing. Prepare the space for a precise installation and safe operation.
Tip: Coordinate with other trades to avoid conflicts with wiring or plumbing. - 7
Install and verify
Have the contractor install the system, seal ducts, and perform initial charging and commissioning. Confirm the system operates in heating and cooling modes under normal conditions.
Tip: Request a commissioning report and test results from the installer. - 8
Program and test
Set up the thermostat schedules, test zone controls, and run performance tests across seasons. Adjust settings to balance comfort with energy savings and log any issues for follow-up.
Tip: Document settings and share them with the building manager for ongoing adjustments.
Your Questions Answered
What size heat pump do I need for a 1,200 square foot home?
The exact size requires a load calculation; climate, insulation, and window exposure affect the result. A licensed installer should perform a Manual J calculation and present a recommended capacity.
The right size requires a professional load calculation; a licensed installer should perform a Manual J assessment and provide a capacity recommendation.
Can I install a heat pump myself to save on labor costs?
Installing a heat pump involves electrical work, refrigerant handling, and codes that require licensed professionals. DIY installation is not recommended due to safety and warranty concerns.
We don’t recommend installing a heat pump yourself because of electrical and refrigerant safety and warranty issues.
Are ductless mini-splits a good option for 1,200 sq ft homes?
Ductless minisplits are great for zones and retrofit projects without ducts. They work well in smaller spaces or split layouts where zoning improves comfort and efficiency.
Yes, ductless minisplits can be a smart choice for zoning and retrofits in a 1200 sq ft home.
How do cold climates affect heat pump performance?
Heat pumps perform best when rated for cold-weather operation. Choose models with good cold-weather ratings and an efficient defrost cycle to maintain comfort during low outdoor temperatures.
In cold climates, pick a model with strong cold-weather performance and efficient defrost.
What maintenance should I perform annually?
Replace or clean filters regularly, have a professional inspect refrigerant levels and ductwork, and check the condensate drainage system for blockages or leaks.
Perform regular filter changes and schedule annual professional checks for refrigerant and ducts.
How long does a heat pump typically last?
With proper maintenance, heat pumps can provide many years of service. Durability depends on usage, climate, and how well a system is maintained.
Proper maintenance helps extend the life of a heat pump over many years.
Watch Video
Top Takeaways
- Size matters more than brand in a 1200 sq ft home.
- Professional load calculation is essential for comfort and efficiency.
- Ducted vs. ductless depends on existing ducts and zoning goals.
- Invest in high-efficiency models and smart controls for long-term savings.
- Regular maintenance extends system life and preserves performance.