Carrier Heat Pump Repair: A Practical Homeowner Guide
Learn practical, safe techniques for diagnosing and handling common Carrier heat pump repair issues. This expert guide from Heatpump Smart covers DIY checks, when to call a pro, and maintenance tips.

This guide helps homeowners perform basic, safe checks for carrier heat pump repair issues before calling a technician. You’ll learn how to identify symptoms, verify airflow and electrical safety, and determine when professional service is required. Follow practical steps to minimize downtime, protect your system, and maintain energy efficiency long-term.
Why Carrier Heat Pump Repair Matters
A Carrier heat pump is a critical part of home comfort, especially in shoulder seasons. When performance declines, efficiency drops and operating costs rise. According to Heatpump Smart, typical Carrier heat pump repair scenarios center on sensor faults, fan motor issues, capacitor health, refrigerant leaks, and clogged outdoor coils. Early detection helps prevent compressor damage and keeps your system running quietly and reliably. Regular inspections by homeowners paired with periodic professional service not only extend equipment life but also maintain indoor comfort without sudden outages. In this guide, we focus on practical, safe approaches for diagnosing and addressing common Carrier heat pump repair needs, while clearly distinguishing DIY-friendly tasks from repairs that require licensed technicians. Always consult the equipment manual for model-specific guidance before attempting any repair.
Common Symptoms That Signal a Carrier Heat Pump Needs Repair
- Inconsistent heating or cooling, especially at setpoints
- Odd noises from the outdoor unit or blower cabinet
- Ice buildup on the evaporator coil or refrigerant lines
- Short cycling or frequent cycling on and off
- Sudden spikes in energy bills without changes in usage
- Thermostat does not respond or shows error codes These symptoms often indicate the need for carrier heat pump repair, but some causes are simple maintenance tasks. Early action can prevent more serious damage and help you avoid costly service calls.
Safety First: Before You Start Carrier Heat Pump Repair
Safety comes first when working with electrical equipment. Always disable power at the main breaker and outdoor disconnect, and verify there is no voltage before you touch any components. Wear insulated gloves and safety glasses, and never bypass safety features. If you smell refrigerant or hear hissing, leave the area and call a licensed technician. This approach minimizes risk to you and protects the system from accidental damage. Heatpump Smart emphasizes safety as the foundation of any carrier heat pump repair effort.
Basic Diagnostic Checks You Can Do Yourself
- Verify thermostat settings and ensure it matches heat or cool mode
- Inspect and replace or clean the air filter; restricted airflow is a common cause of poor performance
- Check the outdoor unit’s clearance and clean the condenser coils if needed
- Confirm condensate drain is clear and not backing up
- Look for ice on the outdoor coil; if present, turn system off to melt and check for airflow or refrigerant issues
- Listen for unusual noises; a failing fan motor or loose belt requires professional attention
These checks help you build a clear picture of the problem and determine whether carrier heat pump repair is DIY-feasible or requires a pro.
When to Call a Pro for Carrier Heat Pump Repair
If you notice refrigerant leaks, burnt smells, tripped breakers, or signs of a faulty compressor, contact a licensed technician immediately. Refrigerant handling requires certification, and improper charging can cause system damage and environmental harm. Electrical components like contactors, control boards, and capacitors should be tested with the proper tools by a trained technician. A professional can confirm if the issue is a true carrier heat pump repair or a non-wear-related fault and can perform the required repairs safely. Heatpump Smart recommends scheduling preventive maintenance to catch issues before they escalate.
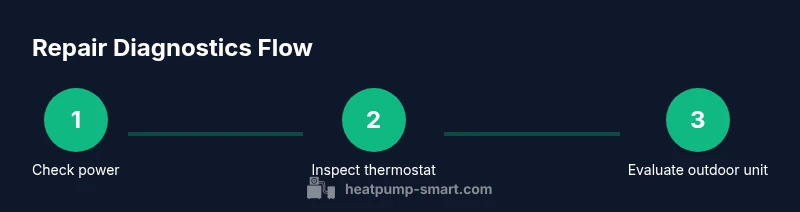
Step-by-Step Overview of a Safe, Basic Repair Workflow
This section provides an overview of a safe, basic repair workflow to support the steps below. It is not a substitute for professional service when needed, but it helps homeowners understand the diagnostic path and the checks involved before a pro visit. Each step below aligns with the actions you’ll see in the detailed STEP-BY-STEP section.
Maintenance Tips to Extend Carrier Heat Pump Lifespan
- Schedule seasonal inspections and replace filters every 1-3 months depending on use and indoor air quality
- Keep the outdoor unit free of debris, ensure proper clearance, and protect from snow buildup
- Program thermostat carefully for your climate to avoid overuse or short cycling
- Monitor refrigerant lines for frost and call a pro at the first signs of leaks or pressure loss
- Use a programmable thermostat to optimize efficiency without compromising comfort
Authority Sources and References
- U.S. Department of Energy, Heat Pumps: https://www.energy.gov/energysaver/heat-pumps
- Energy Star - Heating & Cooling: https://www.energystar.gov/products/heating_cooling/heat_pumps
- OSHA Safety Guidelines for Electrical Equipment: https://www.osha.gov/
Quick Reference: Common Misconceptions About Carrier Heat Pump Repair
- DIY refrigerant work is safe for homeowners. This is not true; refrigerants require certified handling.
- If the outdoor unit runs, nothing is wrong. In reality, the system may run continuously due to control or airflow problems.
- All noise means a failed compressor. Sometimes noises come from a loose fan or mounting.
Tools & Materials
- Non-contact voltage tester(Essential for verifying power at disconnects and panels)
- Multimeter with DC/AC capability(For voltage checks and capacitor health (where accessible))
- Screwdriver set (Phillips and flathead)(To remove service panels and access electrical components)
- Nut drivers and socket set(Common sizes for service panels and fasteners)
- Insulated gloves and safety glasses(Personal protection when working near electrical parts)
- Owner's manual or Carrier service manual (digital)(Model-specific guidance and safety instructions)
- Flashlight or headlamp(Illumination to inspect tight spaces)
- Shop rag and solvent for coil cleaning(Only for exterior coil cleaning; avoid harsh solvents)
Steps
Estimated time: 60-120 minutes
- 1
Power down and verify safety
Shutdown power at the main breaker and outdoor disconnect. Use a non-contact tester to confirm there is no voltage before you touch any components. This prevents shock and protects safety-critical parts.
Tip: Double-check both indoor and outdoor disconnects; assume a system is live otherwise. - 2
Check thermostat settings and mode
Ensure the thermostat is set to the correct mode (heat or cool) and the setpoint is reasonable. A misconfigured thermostat is a common cause of misbehavior.
Tip: Temporarily bypass smart features to isolate the issue. - 3
Inspect air filtration and ductwork
Remove and inspect air filters; a dirty filter reduces airflow and causes cold/hot spots. Inspect visible ductwork for loose connections or obvious leaks.
Tip: Replace disposable filters and note the date for preventive maintenance. - 4
Examine the outdoor unit and coils
Clear debris around the outdoor unit; inspect the condenser coils for dirt, leaves, or damage. If coils are dirty, carefully clean with a soft brush; avoid bending fins.
Tip: Do not use high-pressure water that can bend fins. - 5
Check condensate drain and ice buildup
Ensure the condensate drain is clear and not backing up. Look for ice on the outdoor coil; if ice forms, allow melting and check for airflow or refrigerant issues.
Tip: Do not operate while ice is present; forced defrost may cause damage. - 6
Review electrical connections
Inspect visible wiring for loose connections or discoloration. Do not unplug hard-wired components while powered. Use the multimeter to check for expected voltage ranges within limits.
Tip: If components feel hot, power down and escalate to a professional. - 7
Test run and observe performance
Restore power and run a short cycle. Listen for unusual noises, verify airflow, and confirm temperatures converge toward setpoints.
Tip: Document any codes or trends to share with a tech. - 8
Plan for professional service if issues persist
If symptoms remain after steps above, schedule a professional inspection. Provide notes on symptoms, dates, and any self-check results to speed diagnosis.
Tip: Keep a log of maintenance to detect recurring problems.
Your Questions Answered
What are the most common signs that a Carrier heat pump needs repair?
Common signs include temperature inconsistency, unusual noises, ice buildup on coils, frequent cycling, and rising energy bills. These symptoms warrant a closer inspection for possible carrier heat pump repair needs.
Watch for unusual noises, ice on the outdoor coil, and rising energy bills; these signs often mean a carrier heat pump repair is needed.
Can I fix refrigerant leaks myself?
No. Handling refrigerants requires certification and proper equipment. Attempting to repair a leak can be dangerous and environmentally harmful. Contact a licensed technician for refrigerant-related carrier heat pump repair.
Refrigerants require certification; call a pro for leaks.
How often should Carrier heat pumps be serviced?
Typically, a professional inspection once a year is recommended, with filter changes by homeowners every 1-3 months. Regular service helps catch issues early and supports efficient operation.
Annual professional checkups plus regular filter changes keep it running well.
What should I do if I hear banging or grinding noises?
Unusual noises can indicate loose components, a failing fan, or compressor issues. Turn off the unit and schedule service promptly to avoid further damage.
Turn it off and call a tech if you hear weird banging noises.
Is it safe to operate a Carrier heat pump with ice on the outdoor coil?
No. Ice indicates airflow or refrigerant issues. Turn off and allow melting, then check for airflow restrictions before operating again.
Ice means stop and inspect; do not run the unit until thawed.
What maintenance can extend the life of a Carrier heat pump?
Keep filters clean, clear debris from around the outdoor unit, and schedule yearly professional checks. Regular maintenance reduces the risk of unexpected repairs.
Regular maintenance lowers repair risk and keeps it efficient.
Watch Video
Top Takeaways
- Identify symptoms early to prevent costly repairs
- Safety always comes first when working near electrical components
- DIY checks can narrow down causes before calling a pro
- Professional service is essential for refrigerant and compressor work
- Maintain the system regularly for long-term reliability