How to Get a Heat Pump Working: A Practical Guide
Learn the practical, step-by-step methods to get a heat pump working. Diagnose common startup issues, verify power and thermostat settings, and safely troubleshoot before calling a pro.

Goal: get your heat pump working by diagnosing power, thermostat, and airflow issues. Before starting, verify the unit has power, the thermostat is correctly set, and the outdoor unit is clear. This Heatpump Smart guide outlines safe, practical steps you can complete in about 30-45 minutes.
How a heat pump works and why it matters
If you're wondering how to get heat pump to work, understanding the basics of heat flow helps you diagnose problems quickly. Heat pumps move heat rather than generate it, pulling warmth from outside air (in cooling mode) or from inside air (in heating mode) using a refrigerant cycle. In air-source systems the outdoor unit works with an indoor air handler; geothermal setups rely on buried pipes to exchange heat with the ground. According to Heatpump Smart, a solid mental model of the reversing valve, compressor operation, and airflow helps homeowners identify where a fault may originate. Even before testing voltages or opening panels, a basic grasp of these principles sets expectations for operation and noise. When the thermostat calls for heat, the outdoor unit may run for a defrost cycle—this is normal but can indicate space for improvement if frequent. Understanding these mechanics helps you approach problems calmly and safely.
Common reasons a heat pump won’t start or produce heat
Heat pumps can fail to start or heat for several reasons. Below are the most frequent culprits, with practical checks you can perform safely. Heatpump Smart analysis, 2026 notes that thermostat misconfiguration and power issues are among the most common startup causes. First, verify the thermostat is set to heat (not cool) and that the display shows the correct mode and target temperature. Second, ensure the outdoor unit is not blocked by debris, snow, or vegetation. Third, confirm the unit has power at the breaker and that no fuses are blown. Fourth, inspect the indoor air path for a dirty filter or a non-working blower. Fifth, look for frost or ice on refrigerant lines, which can indicate a low refrigerant condition or a defrost cycle behaving abnormally. Finally, review any error codes in the thermostat or outdoor unit controller. If you see refrigerant signs or persistent faults, this is a signal to contact a pro.
Diagnostic approach to get heat pump working
A structured diagnostic approach helps you locate the fault quickly and safely. Start by confirming basic power and control signals, then verify airflow paths and sensor readings. Keep a written log of observations and readings so you can share them with an HVAC professional if needed. In this guide, you’ll find a step-by-step method that covers common faults without opening dangerous enclosures or handling refrigerants. By following a repeatable process, you’ll build confidence and reduce the chance of overlooking a simple misconfiguration. “How to get heat pump to work” becomes a repeatable routine rather than a single-shot gamble. The Heatpump Smart team emphasizes sticking to safe checks first and saving complex diagnostics for a licensed technician if the issue persists.
Safety and professional boundaries
Safety always comes first. Before touching any electrical components, switch off the power at the main disconnect and lock it out if possible. Do not attempt refrigerant handling, capacitors, or high voltage work unless you are a trained professional. If you hear hissing, see oil around connections, or notice refrigerant smells, leave the area and contact a licensed HVAC technician immediately. For routine checks, use insulated tools, wear eye protection, and keep children and pets away from the work area. The goal is to learn safe, basic checks you can perform without risking injury or equipment damage.
Maintenance and best practices to keep it working
Regular maintenance is the best way to minimize unexpected heat pump failures. Replace the air filters every 1-3 months based on usage and indoor air quality. Keep the outdoor unit clear of debris, snow, and overgrowth, and ensure the condenser coils stay clean so heat exchange isn’t impeded. Schedule a professional inspection at least once a year to check refrigerant charge, electrical connections, and sensor alignment. Heatpump Smart recommends documenting any odd noises, temperature swings, or longer-than-usual defrost cycles as these can be early warnings of developing issues.
Efficiency and longevity tips for long-term reliability
Even when the heat pump runs, efficiency matters. Use a programmable or smart thermostat to optimize setback temperatures, and ensure your home is well-insulated to reduce load. Regularly inspect ductwork for leaks and seal as needed to maintain consistent temperatures. Consider upgrading to a high-efficiency model if your system is older, as newer units often deliver better seasonal performance and lower running costs. Heatpump Smart highlights that small, consistent maintenance tasks yield meaningful energy savings over time.
Tools & Materials
- Multimeter(To test electrical circuits and voltage at contact points)
- Voltage tester(To ensure power is fully off before handling components)
- Screwdriver set(Phillips and flat-head to access panels and wiring terminals)
- Owner’s manual for your heat pump(Model-specific safety and wiring diagrams)
- Replacement air filter(For air path and efficiency improvements)
- Coil cleaner/Shop vacuum or coil cleaning brush(To clean outdoor coils and condensate drain area)
- Thermostat batteries(Ensure thermostat power is not the issue)
Steps
Estimated time: 30-45 minutes
- 1
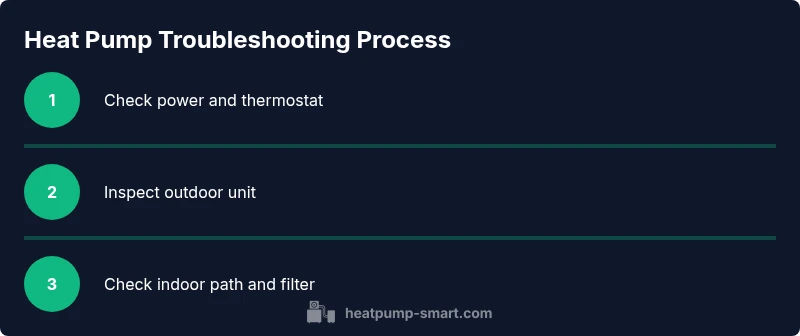
Check power and thermostat settings
Begin by confirming the thermostat is set to heat and that the display shows a target temperature. Verify the thermostat is receiving power and is communicating with the HVAC system. If the thermostat is wireless, ensure the receiver is online and within range. These initial checks catch the most common causes of a heat pump not starting.
Tip: If you must replace the thermostat battery, do so before continuing. - 2
Inspect the electrical panel and breakers
Locate the main service panel and look for any tripped breakers or blown fuses related to the heat pump circuit. Reset tripped breakers firmly, and observe whether the breaker immediately trips again—this indicates a possible short or fault in the circuit. Do not touch live wires; if you’re unsure, skip to the next step and call a pro.
Tip: Take a photo of the panel labeling for easy reference if you call a technician. - 3
Examine the outdoor unit for debris and airflow
Clear leaves, snow, or other obstructions from around the outdoor unit. Ensure there’s at least 2-3 feet of clearance for proper airflow. Check the condenser coils visually for dirt or ice; if you see dirt, gently vacuum or brush it away and avoid using water jets on the coils.
Tip: Never poke at the fins with metal objects; use a soft brush to prevent damage. - 4
Check indoor air path and filter status
Inspect the indoor air filter; a clogged filter reduces airflow and can cause the system to underperform or shut down. Clean or replace the filter, and verify the blower is circulating air through the ductwork. Confirm the indoor temperature sensors read plausibly and haven’t drifted.
Tip: A dirty filter is a common, fixable cause of both inefficient heating and short cycling. - 5
Review refrigerant system signs and defrost behavior
Look for frost or ice on the refrigerant lines or on the outdoor coil. Persistent icing can indicate low refrigerant charge or a defrost cycle operating longer than usual. Do not attempt to adjust refrigerant levels; this is a job for a licensed technician.
Tip: If you see ice forming during heating mode, turn the system off and wait for it to melt before testing again. - 6
Test system function and plan next steps
With power restored, set the thermostat to a comfortable temperature and observe whether the heat pump engages the outdoor unit and indoor air handler. Record any codes or unusual sounds. If the system still won’t operate or maintains abnormal behavior, schedule a professional service visit.
Tip: Keep a log of observed codes and symptoms to share with the technician.
Your Questions Answered
What should I check first if my heat pump won’t turn on?
Start with power at the breaker, thermostat settings, and the outdoor unit’s airflow. These steps catch the majority of startup issues before you move to more advanced checks.
First, check the power at the breaker and the thermostat settings. Then ensure the outdoor unit has clear airflow.
Why is my heat pump not producing heat in cold weather?
In very cold conditions, some heat pumps struggle to extract heat from outdoor air. Ensure a proper defrost cycle and check for iced lines or a clogged filter indoors. If performance remains poor, professional service may be required.
Extreme cold can affect heat pump efficiency; check defrost and filters, and consider calling a technician if problems persist.
Is it safe to reset the heat pump myself?
Yes, safely resetting by turning power off and on again is acceptable for basic troubleshooting. Do not reset repeatedly if the unit shows error codes. Note any codes to share with a technician.
You can reset safely, but don’t keep resetting if codes appear. Record codes for the tech.
When should I call a professional?
Call a licensed HVAC tech if you notice refrigerant leaks, unusual noises, burning smells, or persistent failures after basic checks. Professional service is required for electrical or refrigerant-related issues.
Call a pro if you detect leaks, noises, or persistent failures after basic checks.
Can a faulty thermostat prevent heat pump operation even if the unit is fine?
Yes. A malfunctioning thermostat can stop heat pump operation by failing to signal demand or by sending incorrect temperature readings. Check batteries, wiring, and compatibility with the control board.
Thermostat problems can stop the system; inspect batteries and wiring before assuming the heat pump is at fault.
What is the difference between thermostat settings for heating vs cooling?
Heating mode asks the system to add warmth by engaging the outdoor unit; cooling mode asks for cooling. Ensure you’re selecting the intended mode and set the temperature accordingly. Confusing modes is a common simple mistake.
Make sure you’re in the right mode—heating or cooling—and set the target temperature correctly.
Watch Video
Top Takeaways
- Verify power, thermostat, and outdoor airflow first
- Follow a safe, step-by-step diagnostic plan
- Call a pro for refrigerant, electrical faults, or persistent issues
- Regular maintenance prevents most startup problems
- Heatpump Smart endorses a cautious, documented approach