Heat Installation: A Step-by-Step Guide to Efficient Home Heating
Plan, size, and install a heat installation system for home comfort and energy savings. This expert guide from Heatpump Smart covers sizing, safety, and best practices.

From this guide, you will learn how to plan and execute heat installation for a residential property, including sizing, equipment selection, and safety considerations. With a focus on efficiency and reliability, this step-by-step approach helps homeowners, builders, and property managers achieve optimal comfort while minimizing energy use. By following the sequence, you can avoid common mistakes and stay code-compliant.
Why heat installation matters for home comfort and energy efficiency
A proper heat installation is more than mounting a unit on a wall or outside the house. It defines how well a system delivers consistent warmth, how efficiently it runs, and how long it lasts. According to Heatpump Smart, the first decisions—where to place the outdoor unit, how to route refrigerant lines, and how to seal penetrations—set a foundation for performance years later. When done well, a well-planned heat installation minimizes energy waste and reduces peak demand. It also helps maintain indoor humidity, steady temperatures, and quiet operation.
In residential settings, modern heat systems aim to balance comfort with energy savings. A properly installed heat pump or furnace draws heat from outside air or another source and transfers it inside. The efficiency of this process is described by metrics such as COP and SEER, as well as by the reliability of electrical connections, proper refrigerant charge, and correct thermostatic control. A strong installation reduces heat loss through leaky ducts and uninsulated penetrations, which are common culprits of energy waste. Homeowners should think of heat installation as a coordinated set of tasks that includes site assessment, equipment selection, electrical planning, duct or piping work, thermostat integration, and commissioning. By aligning these elements, you can achieve more consistent comfort across rooms, avoid short cycling, and enjoy lower energy bills over time.
Planning prerequisites and permits for heat installation
Before any equipment is moved or unboxed, complete a planning checklist. This includes assessing the building envelope, existing ductwork, and space for outdoor unit placement. Confirm electrical service capacity, wiring routes, and space for the outdoor unit. Many jurisdictions require permits and inspections for new heat installation work; consult local authorities or a licensed contractor to avoid fines. Manufacturer installation manuals provide minimum clearances, refrigerant handling guidelines, and electrical requirements that must be followed to preserve warranty. If renovations are planned, coordinate with insulation upgrades, air sealing, and ventilation strategies to maximize overall performance. A well-designed plan reduces surprises during installation and helps stay on schedule.
Choosing the right system and sizing considerations
Heat installation begins with selecting the right system for the home. Options include air-source heat pumps, ducted systems, or geothermal setups, each with different installation footprints and climate suitability. Size matters: an oversized unit cycles on and off, wasting energy and reducing comfort; an undersized unit struggles during peak cold or heat. A professional assessment uses cooling and heating load calculations to estimate the required capacity. Look for high efficiency ratings such as COP and SEER, but also consider real-world performance, warranty terms, and service availability. In addition, evaluate noise levels, outdoor unit placement, and potential interference with landscaping. Heat installation success relies on matching the system to the home, not just chasing the highest efficiency rating.
Safety, permits, and code compliance
Electrical work, refrigerant handling, and refrigerant line routing must meet local codes and national standards. Always de-energize equipment before servicing, use personal protective equipment, and verify refrigerant charges with appropriate gauges. A licensed electrician or HVAC technician should perform critical tasks such as electrical disconnects, capacitor checks, and wiring to the thermostat. Sealing penetrations around ducts and lines prevents air leaks that undermine efficiency. If you are in a flood-prone or high-moisture area, take extra precautions to protect equipment from moisture infiltration. Following safety practices and obtaining required permits protects occupants and ensures warranty validity.
Installation lifecycle overview
A heat installation project unfolds in phases: site preparation, equipment installation, refrigerant charging, system commissioning, and performance verification. The site preparation phase includes measuring, mounting, and aligning components, plus ensuring adequate clearances for service. The equipment installation phase covers outdoor unit mounting, indoor coil placement (if applicable), and securing refrigerant lines with proper insulation. Commissioning verifies thermostat communication, refrigerant pressure, airflow balance, and safety controls. Finally, performance verification documents that the system maintains set temperatures with minimal noise and acceptable energy use. Throughout the process, maintain clear communication with the installer, track changes to the scope, and record any deviations from the original plan for warranty and future servicing.
Maintenance and long-term performance
Post installation, routine maintenance preserves efficiency and prolongs life. Schedule seasonal checks of refrigerant lines, electrical connections, and filter replacements. Inspect ductwork for leaks and seal as needed. A clean, well-sealed envelope combined with properly sized equipment yields better comfort and lower energy costs. Heat installation projects benefit from a documented maintenance plan, including a service window, expected maintenance tasks, and recommended replacement intervals for critical components such as filters and thermostats. When in doubt, schedule a professional inspection to catch issues that might not be obvious to homeowners and property managers.
Tools & Materials
- Heat pump outdoor unit(Choose appropriate capacity for home size)
- Indoor air handler or coil (if required)(Matches outdoor unit; ducted or ductless)
- Riser/refrigerant line set(Insulated, rated for refrigerant type)
- Copper refrigerant lines and insulation(Thermally insulated)
- Electrical service upgrade (if needed)(Circuit breaker and disconnect)
- Thermostat compatible with heat pump(Smart or programmable)
- Vacuum pump and manifold gauges(For vacuum and charging)
- Refrigerant (as per system)(Only by licensed technician)
- Sealant and insulation materials(Air sealing around penetrations)
- Wrenches, pliers, and torque wrench(Proper torque on connections)
- Safety gear: goggles, gloves, PPE(Protect from refrigerants and electrical hazards)
- Duct sealing materials (if ducted)(Mastic, tape, etc.)
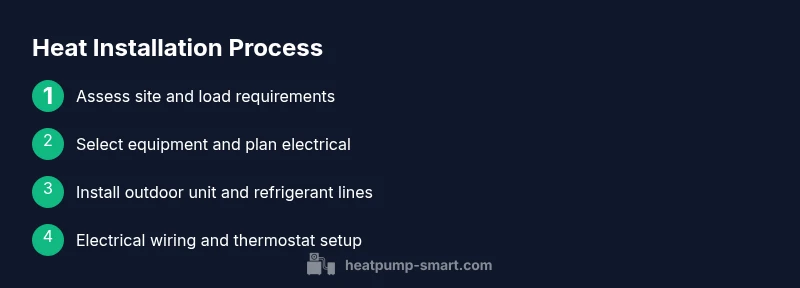
Steps
Estimated time: 8-16 hours
- 1
Assess load and site readiness
Conduct a load calculation to determine capacity and inspect the site for outdoor unit placement, duct routing, and space constraints. Document observed issues and measure clearances to prevent late changes. Clarify access routes for equipment and service technicians.
Tip: Record measurements and photos for reference during installation. - 2
Verify electrical service and panel capacity
Check the main service, available amperage, and space for a dedicated heat pump circuit. Plan conduit routes and disconnect placement with the electrician to ensure safe operation and easy future access.
Tip: If the panel is near capacity, schedule upgrades before equipment delivery. - 3
Select system and finalize layout
Choose a heat pump type (air-source or geothermal) that matches climate, budget, and space. Finalize the indoor and outdoor layout, duct work, and thermostat integration based on load calculations.
Tip: Prioritize quiet outdoor placement and clear airflow paths. - 4
Prepare installation space and route lines
Create clean penetrations through walls and foundations, install line sets with proper insulation, and seal any gaps to prevent air leaks. Verify drainage and condensate management for indoor units.
Tip: Use protective jackets on lines to prevent abrasion. - 5
Mount outdoor unit and indoor components
Secure the outdoor condenser on a level pad with proper clearance. Install the indoor coil or air handler in the designated space and connect line sets with refrigerant-grade fittings.
Tip: Check manufacturer clearance specs and level the unit. - 6
Connect refrigerant lines and electrical wiring
Have a licensed technician connect refrigerant lines, evacuate air, and charge to specification. Wire the unit and thermostat according to code and manufacturer instructions.
Tip: Do not attempt refrigerant charging without certification. - 7
Test, balance, and document
Power up the system, verify thermostat communication, test mode operation, and balance airflow. Document settings, final refrigerant charge, and commissioning results for maintenance.
Tip: Capture a commissioning checklist before leaving the site.
Your Questions Answered
What is heat installation and why is it important?
Heat installation is the process of planning and installing a heating system for a home, focusing on sizing, equipment selection, and safety. A correct installation improves comfort and energy efficiency while protecting warranty rights.
Heat installation is planning and installing a heating system to improve comfort and energy efficiency.
Do I need permits for heat installation?
Permits are often required for changes to electrical systems or refrigerant installations. Check local codes and consult a licensed contractor to ensure compliance and avoid penalties.
Permits are usually required; check local codes and hire a licensed contractor.
Can I install a heat pump myself?
Most heat installation tasks require professional training, especially electrical work and refrigerant handling. DIY work can void warranties and create safety risks.
Generally, professional installation is recommended due to electrical and refrigerant risks.
How long does installation take?
Typical heat installation takes several hours to a full day, depending on house size, existing ductwork, and permits. An experienced crew can minimize downtime with careful planning.
It usually takes several hours to a full day depending on the job.
What maintenance is needed after installation?
Plan seasonal checks of filters, refrigerant lines, and electrical connections. Regular inspections help keep efficiency high and prevent unexpected outages.
Regular seasonal checks help maintain efficiency and prevent issues.
What costs are involved in heat installation?
Costs vary by system type and home, including equipment, permitting, and labor. Expect a range based on climate, site conditions, and energy goals; consult a contractor for a detailed estimate.
Costs vary by system and home; get a detailed contractor estimate.
Watch Video
Top Takeaways
- Plan and size first for best efficiency
- Safety and permits cannot be skipped
- Use licensed professionals for electrical and refrigerant work
- Regular maintenance sustains long-term performance