Replacement Thermostat for Heat Pump: A Complete How-To Guide
Learn how to choose and install a replacement thermostat for your heat pump, with compatibility checks, essential features, wiring basics, and safe testing for optimal efficiency.

Today you'll learn how to select and install a replacement thermostat for a heat pump that matches your system’s compatibility, wiring, and communication protocol. The guide covers checking compatibility, choosing features (Wi‑Fi, zoning, energy reports), wiring steps, programming, and safety checks, plus troubleshooting. According to Heatpump Smart, proper pairing saves energy and maintains comfort, with clear steps and practical tips.
What is a replacement thermostat for heat pump?
According to Heatpump Smart, a replacement thermostat for heat pump is a device that controls both heating and cooling functions and communicates with the outdoor unit. It serves as the primary interface for setting temperatures, schedules, and modes, while potentially coordinating with a smart home system. A quality replacement thermostat should support your heat pump’s voltage, wire type, and communication protocol (for example, standard on/off control or more advanced multi-stage communication). When you choose a model, consider whether you want basic control, energy reporting, remote access, or advanced features like adaptive recovery and occupancy sensing. A well-matched thermostat can improve comfort consistency and energy efficiency by ensuring the heat pump operates within its optimal range.
For homeowners, the central decision is whether to opt for a basic programmable thermostat or a full-featured smart thermostat. Both can effectively control a heat pump, but smart models often offer more precise scheduling, remote control, and integration with other devices. The Heatpump Smart team notes that the best replacement thermostat for heat pumps is one that aligns with your equipment, climate, and daily routines, not the most expensive option.
Compatibility basics you must verify
Compatibility is the cornerstone of a successful thermostat upgrade. Start by checking the heat pump’s voltage and the control board type, ensuring the thermostat supports the same voltages and wiring schemes. Many heat pumps use a common wire (C) to power the thermostat; if your current setup lacks a C-wire, you may need a power extender kit or a model that can operate with power stealing. Confirm whether the thermostat supports single-stage, two-stage, or variable-speed heat pumps, and verify if it communicates with the outdoor unit via a standard two-wire or proprietary protocol. Look for labels such as “heat pump compatible” or “multi-stage.” Reading the thermostat’s installation guide and the heat pump’s manual side-by-side will save time and prevent miswiring. Heatpump Smart recommends confirming compatibility with both the indoor air handler and the outdoor condenser to avoid issues during defrost cycles or emergency heat operation.
Key features to look for in a heat pump thermostat
When upgrading, prioritize features that directly impact heat pump performance and comfort. Wi‑Fi connectivity enables remote scheduling and monitoring, while smart learning can optimize energy use by analyzing occupancy patterns. Multi-stage support is essential for heat pumps that perform differently across heating and cooling seasons. Look for a C-wire requirement and power options if your wiring is limited. Energy reports and real-time usage dashboards help you understand savings over time. Geofencing and presence sensing can adjust temperatures automatically when occupants approach or leave home. For households with zoning or multiple zones, ensure the thermostat supports zone control or can integrate with a compatible smart home hub. Finally, check compatibility with your region’s energy rebates or tax credits if available in your area.
Wiring and installation prerequisites
Before touching any wiring, turn off power at the circuit breaker and shut down the HVAC system to prevent shocks or damage. Remove the old thermostat cover and take a clear photo of the wiring connections. Identify each wire by color and label (e.g., Y for cooling, W for heating, G for fan, C for common). Confirm that a C-wire is present or plan to use an adapter kit if needed. Have a compatible backplate and mounting screws ready. If you’re uncertain about wiring, consult the thermostat’s installation guide and the heat pump’s wiring diagram. Don’t mix up wires during reattachment, as miswiring can trigger short circuits or improper operation. Finally, ensure the new thermostat’s display and control panel are functional before reassembling wall cover.
Smart vs non-smart thermostats: what matters
A non-smart programmable thermostat can provide reliable, year-round control and simple schedules, which may suffice in homes with stable routines. However, a smart thermostat adds remote access, learning capabilities, and dynamic scheduling that can translate into meaningful energy savings, especially in climates with variable heating demands. With heat pumps, smart thermostats often optimize defrost cycles and outdoor compressor performance by more precisely matching indoor setpoints to outdoor conditions. If you value data, reporting, and home automation integration, a smart thermostat is typically worth the investment. Consider your Wi‑Fi reliability and whether you’ll leverage voice assistants or smart hubs when deciding.
Energy savings and efficiency gains
Replacing a dated thermostat with a modern, properly configured model can unlock energy savings by improving heat pump efficiency and reducing unnecessary runtimes. Smart thermostats with occupancy sensing and adaptive recovery can reduce heating loss during shoulder seasons. Look for energy-savings claims that are supported by credible testing and ensure the model supports your climate zone. Remember that savings depend on programming discipline, insulation, and system maintenance. Heatpump Smart’s analysis indicates that proper pairing and programming are critical to realizing comfort and savings in real-world operation.
Installation planning and safety considerations
Plan the upgrade during a period of mild weather to minimize system disruption. Gather required tools, read the manuals, and consider consulting a pro if you’re uncomfortable with electrical work. Confirm you have access to the HVAC breaker panel and can safely isolate power. Keep pets and children away from work areas. Use a non-contact voltage tester to confirm power is off before touching any wires. After installation, test all modes (heat, cool, auto, fan) across different temperature setpoints to verify the system responds correctly and that there are no error codes on the thermostat display.
Setup, programming, and initial testing
Power up the thermostat and follow the setup wizard to enter system type, heat pump model, and outdoor unit configuration. If you have a Wi‑Fi network, connect and install any companion app to enable remote control and updates. Program daily and weekly schedules to align with your routine, and enable any energy-saving features such as occupancy sensing or adaptive recovery. If your climate requires auxiliary heat, verify that the thermostat correctly switches between emergency heat and auxiliary heat as needed. Finally, run a few cycles to ensure heat and cool operations respond promptly and that temperatures stabilize within a reasonable margin.
Common mistakes to avoid
Avoid selecting a thermostat that’s not compatible with your heat pump’s multi-stage configuration or voltage. Don’t skip step-by-step wiring diagrams or force-fit a C-wire where none exists. Avoid relying on default factory settings without personalization, as improper defaults can lead to inefficient operation. Don’t forget to update firmware and app permissions, which can affect performance and security. Finally, neglecting a professional inspection after installation can miss subtle wiring or integration issues that affect long-term reliability.
What happens after installation: maintenance and support
After installation, keep the thermostat and HVAC components clean and free of dust. Schedule periodic checks of the wiring and connections, especially after seasonal transitions when loads change. Monitor energy usage and comfort from the app, and adjust schedules to reflect changes in occupancy or climate. If you encounter unusual behavior—such as persistent short-cycling, heating delays, or error codes—consult the thermostat’s support resources and consider a professional evaluation if safeguards aren’t resolving the issue.
Tools & Materials
- Screwdriver set (Phillips #2 and flat-head)(Insulated handle; magnetic tip helps with small terminal screws)
- Voltage tester / multimeter(Non-contact tester for power-off verification; multimeter for voltage checks)
- Replacement thermostat compatible with heat pump(Check model supports heat pump, multi-stage, and C-wire if needed)
- C-wire adapter or power-extender kit (if no C-wire)(Only if the system lacks a common wire)
- Wire nuts and electrical tape(For secure, code-compliant wire connections)
- Wall plate and mounting screws(Ensure compatibility with the thermostat backplate)
- Owner’s manual for heat pump and thermostat(Keep handy for wiring and setup specifics)
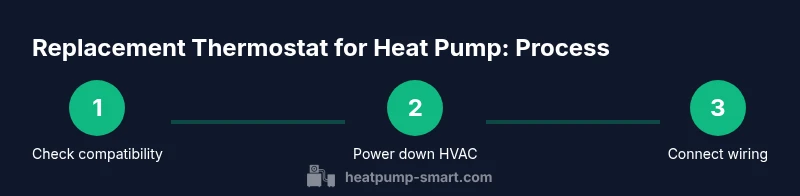
Steps
Estimated time: 60-90 minutes
- 1
Turn off power to HVAC
At the main electrical panel, switch off the circuit breaker feeding the heat pump and indoor air handler. Confirm the power is off with a non-contact tester before touching any wires.
Tip: Double-check both outside and indoor units to prevent backfeed or shocks. - 2
Remove existing thermostat
Carefully remove the thermostat faceplate and take a photo of the current wire connections. Label wires if needed and detach them one by one.
Tip: Label wires with tape to avoid miswiring during reattachment. - 3
Identify wires and compatibility
Identify the R, C, Y, W, G, and O/B wires and verify compatibility with the new thermostat. If there’s no C-wire, decide whether to use an adapter kit or a thermostat that can operate without it.
Tip: Consult both the heat pump manual and thermostat installation guide for wire functions. - 4
Mount the new backplate
Attach the thermostat backplate to the wall, level and secure. Run wires through the plate openings and prepare for terminal connections.
Tip: Avoid over-tightening screws which can crack the wall plate. - 5
Connect wires to new thermostat
Attach each wire to its corresponding terminal on the new thermostat (R to R, C to C, Y to Y, etc.). Reinforce with wire nuts if needed and ensure solid terminal contacts.
Tip: Make sure exposed conductor only touches the intended terminal. - 6
Configure settings and connect to Wi‑Fi
Power up the thermostat, run the setup wizard, enter heat pump type, and connect to Wi‑Fi if available. Enable energy-saving features and set daily schedules.
Tip: Input correct installation type and climate zone to optimize performance. - 7
Test all modes
Cycle through heat, cool, fan, and auto modes to verify proper responses. Check for defrost behavior if you have an outdoor unit, and confirm there are no error codes.
Tip: Listen for unusual noises and watch for inconsistent temperatures. - 8
Finalize and document
Tidy wiring, mount the display, and save a photo of the final connections for future reference. Note the model and firmware version in your records.
Tip: Keep the original install guides accessible for future maintenance.
Your Questions Answered
Is a replacement thermostat for heat pump compatible with all heat pumps?
Not every thermostat works with every heat pump. Check the device’s compatibility list, matching voltage, wiring, and whether multi-stage control is supported. Cross-check the heat pump manual and thermostat guide to ensure proper integration.
Not all models work with all heat pumps. Check compatibility lists and wiring requirements, then review both manuals to verify proper pairing.
Do I need a C-wire for a replacement thermostat for heat pump?
Most modern thermostats require a C-wire for consistent power. If your current wiring lacks C, you may need a power extender kit or a thermostat designed to operate without it. Verify with the thermostat’s installation guide.
Most thermostats need a C-wire. If you don’t have one, use a power extender kit or choose a model that can run without it, following the manual.
Should I hire a professional to install a replacement thermostat for heat pump?
If you’re comfortable with electrical work and HVAC basics, you can install yourself. Complex wiring, multi-stage configurations, or uncertain power sources warrant a licensed HVAC technician to prevent damage and ensure safety.
If you’re unsure about wiring or safety, it’s best to hire a professional to install the thermostat.
Can a smart thermostat really save energy with a heat pump?
Yes. Smart thermostats optimize scheduling, occupancy awareness, and defrost timing, which can reduce energy use and improve comfort when correctly configured for a heat pump.
Smart thermostats can save energy with smart schedules and occupancy sensing when set up for heat pumps.
What about rebates or tax credits for replacing a heat pump thermostat?
Rebates and credits vary by region and program. Check local energy programs or utility portals for eligible thermostats and documentation needs. Heatpump Smart recommends confirming availability before purchase.
Check your local energy programs for rebates on approved thermostats and keep all receipt and model information handy.
What should I do if the thermostat won’t turn on the heat pump after installation?
Verify power at the breaker, confirm proper wiring, and ensure the C-wire is connected if required. If issues persist, revisit the wiring diagram and test each wire with a multimeter, or consult a professional.
If it won’t power up, recheck the breaker, wiring connections, and C-wire. If problems persist, seek professional help.
Watch Video
Top Takeaways
- Know your heat pump’s compatibility before buying
- Ensure proper wiring and a C-wire when required
- Choose a thermostat with features that fit climate and routines
- Test comprehensively and document the setup