Heat Pump to Heat House: A Complete How-To Guide
Learn how to heat your home efficiently with a heat pump, including sizing, installation, and maintenance tips. A practical guide for homeowners, builders, and property managers.

This guide helps you heat your house efficiently using a heat pump. You'll learn sizing basics, installation considerations, control strategies, and maintenance tips to maximize comfort and energy savings. By following these steps, you can replace or supplement fossil-fuel heating and lower running costs. This approach works for retrofits and new builds alike.
Why heat pumps are a smart choice for heating a home
According to Heatpump Smart, heat pumps offer reliable, comfortable heating with lower energy use compared to traditional fossil-fuel systems. They move heat rather than generating it, so they can deliver substantial efficiency gains in many climates. In moderate conditions, a properly sized heat pump can meet most of a home's heating load, while well-tuned controls and insulation support year-round comfort. Benefits include quiet operation, reduced greenhouse gas emissions, and potential long-term cost savings when paired with an efficient home envelope. When planning an upgrade, homeowners should consider climate, insulation, existing ductwork, and the level of comfort and automation desired. The Heatpump Smart team emphasizes coordinating insulation upgrades with heat-pump installation to maximize performance.
How heat pumps work: basics for homeowners
Heat pumps are heat-transfer devices. In heating mode, they pull heat from the outside air (or ground, in geothermal systems) and move it indoors via a refrigerant loop. A compressor raises the refrigerant’s temperature so indoor coils transfer warmth to the living space. Heat pumps can be air-source or geothermal, and they can be installed with existing ductwork or as ductless systems. Key advantages include the ability to provide both heating and cooling in a single device, dehumidification, and compatibility with smart thermostats. Understanding the cycle helps homeowners select the right size, type, and controls for consistent comfort and energy efficiency.
Sizing and installation considerations
Sizing is the single most important factor for comfort and efficiency. An undersized unit will run continuously and fail to reach setpoints; an oversized system will short-cycle, wasting energy and increasing wear. A professional should perform a heating-load calculation (the modern equivalent of Manual J), evaluate insulation and windows, and assess air leakage. Decide between air-source and geothermal based on climate, available space, and long-term energy costs. Verify ductwork capacity, ensure appropriate outdoor unit clearance for noise and maintenance, and plan for electrical service upgrades if needed. Permits and inspections may be required in your area.
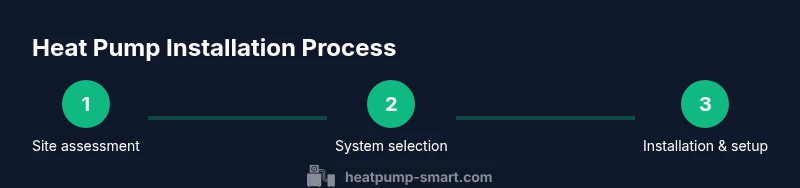
Installation overview: what to expect in practice
The installation typically progresses through assessment, site preparation, equipment placement, line-set routing, electrical connections, refrigerant charging, and commissioning. A licensed HVAC technician will verify outdoor unit mounting on a solid pad, safe refrigerant handling, and compatibility with existing thermostats and zoning. Indoor components—air handlers or hydronic coils—must be matched to your home layout, with ductwork or ductless runs adjusted for balanced airflow. Thorough leak testing, pressure checks, and software calibration ensure optimal performance from day one. Expect some down time as the system is tuned and tested.
Measuring and optimizing efficiency: setting temperatures and controls
Efficiency hinges on sensible temperature setpoints, smart controls, and effective zoning. In heating mode, set thermostats to comfortable levels with minimal overshoot, then let the heat pump modulate output to maintain temperature. A programmable or smart thermostat can learn occupancy patterns, reduce energy use during unoccupied periods, and coordinate with auxiliary heat if installed. Use outdoor reset strategies where available to lower heating demands on milder days and rely on auxiliary heat only when needed. Regularly review system performance with simple metrics like runtime and indoor comfort to catch issues early.
Maintenance and troubleshooting common issues
Keep filters clean and replace them as recommended by the manufacturer. Clean outdoor coils and remove debris to maintain heat exchange efficiency. Schedule an annual professional check to verify refrigerant charge, electrical connections, defrost cycles, and enthalpy of the refrigerant. Listen for unusual noises or vibrating components and inspect ductwork for leaks or blockages. Common issues include short cycling after defrost, degraded airflow, or thermostat communication glitches. Addressing these promptly preserves efficiency and comfort.
Costs, incentives, and long-term value
Costs vary with system type, home size, and installation complexity. While upfront investment can be significant, many homeowners experience lower operating costs and improved comfort over time. Rebates, tax incentives, and utility incentives may help offset the cost; eligibility varies by location and program. The long-term value includes reduced emissions, quieter operation, and the potential to consolidate heating and cooling into a single, easy-to-manage system. Talk with a Heatpump Smart advisor to understand local opportunities and the best path to payback for your home.
Real-world scenarios and common mistakes
For homes with older ductwork, improper sealing can sabotage heat-pump performance. Prioritize air-sealing and insulation before or alongside installation to maximize efficiency. Misjudging climate suitability or unit sizing leads to comfort gaps or unnecessary cycling. Always verify compatibility with existing thermostats, zoning, and, if applicable, hydronic systems. Learning from real-world cases helps homeowners avoid costly retrades and unnecessary warranty concerns.
Next steps and Heatpump Smart support
Ready to move forward? A well-planned heat-pump project starts with a clear assessment of your home’s envelope, climate, and existing infrastructure. The Heatpump Smart team can help you compare air-source versus geothermal options, guide you through sizing and selection, and coordinate installation with licensed professionals. By combining proper sizing, insulation, and smart controls, you can maximize comfort and energy savings across seasons.
Tools & Materials
- Heat pump system (air-source or geothermal)(Choose based on climate, space, and budget)
- Thermostat with compatible controls(Consider a smart or zoning-capable thermostat)
- Electrical service capacity (dedicated circuit)(Verify panel capacity and breaker size for the outdoor unit)
- Electrical disconnect kit(Required near outdoor unit per code)
- Insulated refrigerant line-set(Keep lines well insulated to minimize heat loss)
- Outdoor mounting pad or concrete slab(Stable, level, and elevated to prevent debris splash)
- Ductwork or ductless mini-split components(Match to your home layout and zoning needs)
- Air sealing and insulation materials(Seal leaks around windows, doors, and penetrations before install)
- Optional: smart home integration kit(For advanced scheduling and monitoring)
Steps
Estimated time: 4-8 hours
- 1
Assess your home and needs
Conduct a baseline energy audit to determine heating loads and insulation gaps. This ensures you pick a heat pump with appropriate capacity and features. Document existing ductwork, window performance, and electrical capacity to inform the design.
Tip: Have an energy audit done or use a reputable online calculator as a starting point. - 2
Choose system type and size
Decide between air-source vs geothermal based on climate, space, and budget. Use load calculations and climate data to select a unit with suitable heating capacity and efficiency ratings.
Tip: Prioritize models with robust cold-climate performance if you live in colder regions. - 3
Prepare electrical and outdoor space
Ensure your electrical panel can support the heat pump and plan a dedicated circuit. Check outdoor space for clearance, noise, and weather exposure; arrange for a solid pad and weather protection as needed.
Tip: Coordinate with a licensed electrician for permanent wiring and disconnects. - 4
Install outdoor unit and indoor components
Mount the outdoor unit on a level pad, route refrigerant lines, and install the indoor air handler or coil. Match indoor components to your home layout and ensure proper airflow and duct routing.
Tip: Keep lines well-insulated and secure to minimize heat loss and vibration. - 5
Connect refrigerant lines and electrical
Have a licensed technician connect and charge refrigerant per manufacturer specs and verify electrical wiring, safety disconnects, and thermostat compatibility.
Tip: Do not attempt refrigerant work without certification; improper charging can damage the system. - 6
Commission, test, and optimize
Test heating mode, defrost cycles, and zoning. Adjust refrigerant charge and airflow, calibrate controls, and document settings for future reference.
Tip: Run a full test during different outdoor temperatures to confirm reliable performance.
Your Questions Answered
Can a heat pump fully heat my home in very cold climates?
Many modern air-source heat pumps perform well in cold weather, but efficiency and output decline as temperatures drop. In very cold climates, a supplemental heat source may be recommended. Local climate and unit selection matter.
Many heat pumps work in cold weather, but you may need a backup heat source in very cold conditions.
Is a geothermal heat pump worth it compared with an air-source unit?
Geothermal systems can be very efficient and have low operating costs, but they require higher upfront investment and more invasive installation. The best choice depends on climate, lot size, and long-term energy costs.
Geothermal tends to be efficient but pricier and more complex; your climate and budget matter.
What maintenance does a heat pump require?
Regular filter cleaning, coil cleaning, outdoor-unit clearing of debris, and an annual professional check help maintain performance and prevent costly repairs.
Keep filters clean and have annual service.
How do I know if my ductwork is compatible with a heat pump?
A licensed HVAC pro can assess duct size, leaks, and airflow. Improperly sized or leaky ducts reduce heat pump efficiency and comfort and may require sealing or redesign.
A pro can verify duct size and leaks and adjust accordingly.
What about rebates or tax credits for heat pumps?
Many regions offer rebates or tax incentives for heat-pump installations. Eligibility varies by location and program, so check with utilities and local governments.
There are often rebates; check local programs.
Can I install a heat pump myself?
Installation involves electrical work and refrigerant handling that require licensing and certification. A professional installation ensures safety, code compliance, and warranty validity.
Do not DIY; hire a pro.
Watch Video
Top Takeaways
- Size the system correctly to avoid energy waste
- Air-source heat pumps work best in temperate climates
- Prioritize insulation and air-sealing for efficiency
- Schedule professional installation and inspections
- Regular maintenance extends system life and savings