How to Install a Heat Pump in Your House
Learn how to install a heat pump in your house with a clear, step-by-step approach. From planning and sizing to electrical, ductwork, and commissioning—this expert guide covers safety, permits, and professional help for reliable performance.

This guide explains how to install a heat pump in house, covering planning, sizing, electrical and ductwork preparation, refrigerant lines, and commissioning. It emphasizes safety, permits, and when to hire a licensed professional to protect your warranty. You’ll see a practical, step-by-step framework from planning through final testing.
Planning the installation: site assessment and code compliance
Before you start, map out the space and check local requirements. According to Heatpump Smart, planning and code compliance are the foundation of a successful heat pump installation. Begin with a site survey to determine outdoor unit placement that allows adequate airflow and service access, while minimizing noise near living areas. Decide on a concrete pad or mounting surface, and consider indoor layout to reduce duct runs and optimize air distribution. Review building codes, electrical capacity, and any HOA rules. For older homes, plan for potential duct retrofits or electrical panel upgrades. Allocate time for permits, inspections, and possible contractor visits. A professional HVAC contractor can validate your plan, confirm system compatibility with existing components, and create a realistic schedule that minimizes delays.
Sizing and equipment selection: choosing the right heat pump for your home
Accurate sizing is essential for comfort and efficiency. Select a heat pump that matches your climate, insulation levels, and hot water load. Look for high-efficiency models with reputable ratings (SEER, HSPF) and consider inverter-driven variable-speed compressors for steady performance. Decide between air-source and ground-source options based on site feasibility and long-term energy goals. Evaluate single-stage, two-stage, or variable-capacity units, balancing cost with your comfort needs. If you’re uncertain, use a professional sizing calculator or consult a licensed installer to prevent under- or over-sizing, which can waste energy and increase wear.
Electrical service and panel capacity: ensuring safe power supply
A dedicated 240V circuit is typically required for heat pumps, with a safe clearance in the electrical panel and proper disconnects nearby. Verify service size (e.g., 100–200A) and available capacity for simultaneous loads such as water heater or EV charging. Plan for appropriate breakers, wiring gauge, and a weatherproof outdoor disconnect switch. If the panel is outdated or full, you may need a panel upgrade. Always coordinate with a licensed electrician to ensure compliance with electrical codes and to avoid nuisance tripping or nuisance electrical issues during peak operation.
Ductwork and indoor location considerations: optimizing airflow and noise
Outdoor placement should minimize noise impact and maximize airflow, with clearances from walls and obstructions. Indoor, position the air handler or furnace plenum to shorten duct runs where possible, and ensure ductwork is sealed and insulated to reduce energy loss. If retrofitting to a ducted system, inspect existing ducts for leaks and balance; leaky ducts can negate efficiency gains. For homes with limited space, consider compact or vertical air handlers and ensure access for maintenance. Good duct design improves comfort, reduces running costs, and extends equipment life. Local codes might require specific intake and exhaust clearances, so consult your installer for compliant layouts.
Refrigerant lines, insulation, and drainage considerations: protecting efficiency and safety
Line-set routing should minimize length while avoiding sharp bends that cause pressure drops. Use properly sized copper refrigerant lines and insulation to prevent condensation and heat gain. Slope condensate drains correctly to prevent standing water and potential mold growth. Cap and seal all penetrations to keep pests out and prevent air leakage. A professional will evacuate the refrigerant, test for leaks, and ensure proper charge. Remember refrigerant handling requires licensing in many areas, so rely on a certified technician for this step.
Controls, thermostats, and integration with existing systems: smart comfort at your fingertips
Pair the heat pump with a compatible thermostat that supports seasonal efficiency and energy-saving modes. Verify communications between the indoor and outdoor units and ensure compatibility with home automation systems if desired. Program zoning or hot-water priorities where applicable. Clear labeling of wires and adapters reduces confusion during future service calls. A properly configured control system improves comfort, reduces energy use, and simplifies maintenance.
Safety, warranties, and licensing: protecting your investment
Respect local codes and obtain required permits before any work begins. Refrigerant handling and electrical work typically require licensed professionals to maintain warranty validity and ensure safety. Missteps can void warranties and create risks like electrical shock or refrigerant leaks. Always use certified technicians for critical tasks, verify their licenses, and retain paperwork for future maintenance or resale. A well-documented installation helps sustain long-term performance and reduces the risk of future disputes.
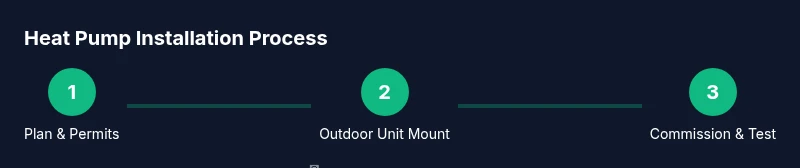
Installation workflow: what to expect in a professional rollout
Professionals follow a structured sequence: site prep and permits, outdoor unit mounting, refrigerant line installation, indoor unit connections, electrical wiring, condensate management, and final commissioning. Each stage includes safety checks, pressure testing, and air balance verification. Expect several hours of hands-on work with possible follow-up visits for fine-tuning. This workflow minimizes downtime and ensures all components function together as designed.
Commissioning and performance testing: verifying outcomes after install
During commissioning, technicians verify refrigerant charge, airflow, thermostat responsiveness, defrost cycles, and system sequencing. They should demonstrate efficient operation at various outdoor temperatures and confirm that auxiliary heat performance meets comfort expectations. Record operating parameters for future reference. A successful commissioning yields consistent comfort, low energy use, and a reliable warranty.
Maintenance planning after installation: staying efficient year-round
Create a maintenance calendar that includes air filter replacements, coil cleaning, and annual professional inspections. Regular checks on refrigerant levels, electrical connections, and duct integrity prevent performance decline. Keeping a maintenance log helps catch minor issues before they become costly repairs. This proactive approach protects comfort and energy savings over the life of the heat pump.
Authority sources
- U.S. Department of Energy (Energy.gov): Heat pump fundamentals and installation considerations. https://www.energy.gov/eere/buildings/heating-cooling
- Energy Star: Heating and cooling product guidance and efficiency tips. https://www.energystar.gov/products/heating_cooling/heat_pumps
- National Renewable Energy Laboratory (NREL) or comparable trusted sources: best practices for heat pump installation and performance. https://www.nrel.gov/
Tools & Materials
- Voltage tester or multimeter(Verify circuit voltage and ground before wiring.)
- Copper refrigerant line set (insulated)(Match line sizes to the unit manufacturer; avoid leaks.)
- Torque wrench(Tighten flare nuts to manufacturer specs.)
- Electrical disconnect switch and weatherproof enclosure(Keep accessible and clearly labeled.)
- Vacuum pump and gauges(Evacuate the line-set to remove moisture before charging.)
- Thermostat compatible with heat pump control(Ensure compatibility with smart home systems if desired.)
- Duct materials or adaptors (if retrofitting)(Only if existing ducts require adaptation for new unit.)
- Condensate drain fittings and pump (if applicable)(Provide proper slope and backup containment.)
- Sealant/mastic, duct tape, insulation(Seal all duct joints and penetrations to minimize leaks.)
- Personal protective equipment (PPE)(Eye protection, gloves, and hearing protection as needed.)
- Permits and inspection documents(Keep for code compliance and warranty proof.)
Steps
Estimated time: 1-3 days (professional install); longer for complex retrofits or permit delays
- 1
Plan site and obtain permits
Evaluate the site, confirm HOA requirements, and secure electrical and mechanical permits. Align with local codes to avoid rework and warranty issues.
Tip: Document measurements and drawings; this helps prevent miscommunication with inspectors. - 2
Mount outdoor unit on a solid pad
Place the outdoor unit on a level pad with adequate clearance for airflow and service access. Check for stable mounting and proper vibration isolation.
Tip: Keep 24 inches of clearance around the unit to ensure safe serviceability. - 3
Route refrigerant lines and insulate
Run line set from outdoor to indoor unit with careful bends to avoid kinks. Insulate to prevent sweating and energy loss.
Tip: Avoid sharp bends; use proper line-set clamps and insulation sleeves. - 4
Install indoor air handler and duct connections
Mount the indoor unit and connect to the ductwork with sealed joints. Balance air distribution for even temperatures.
Tip: Seal duct joints with mastic for maximum efficiency. - 5
Wire electrical and connect controls
Run dedicated circuits, install a disconnect, and connect thermostat wiring. Confirm grounding and correct phase.
Tip: Double-check wire colors and terminal markings before powering up. - 6
Install condensate drainage and test
Place the condensate line on a downward slope toward drainage. Test pump operation if used and verify no leaks.
Tip: Ensure the drain line is insulated to prevent condensation near cold surfaces. - 7
Commission and test performance
Power up the system, verify refrigerant charge, airflow, defrost cycles, and thermostat response. Document readings for future service.
Tip: Run through both heating and cooling modes at multiple outdoor temperatures.
Your Questions Answered
Do I need permits to install a heat pump in my house?
Yes. Local building codes and electrical regulations typically require permits for heat pump installation. This helps ensure safety, proper wiring, and warranty coverage.
Yes—permits are usually required, and they help ensure a safe, code-compliant installation.
Can I install a heat pump myself?
While some basic tasks may be attempted by experienced DIYers, refrigerant handling and electrical work are specialized and often require licensed professionals to meet codes and warranty terms.
DIY is not recommended for refrigerant or electrical work; hire a licensed professional.
How long does installation usually take?
Professional installations typically take 1–3 days, depending on house size, ductwork, and permitting. Complex retrofits can extend this timeline.
Most installs take about one to three days with possible variations for retrofits.
What maintenance is required after installation?
Regular filter changes, coil cleaning, and annual professional inspections keep the system efficient. Schedule routine checks to catch issues early.
Keep up with filters, coils, and yearly inspections to stay efficient.
Will a heat pump work in cold weather?
Many heat pumps perform well in cold climates, but performance depends on the model and outdoor temperatures. Consider a backup heat source for extreme cold.
Heat pumps can work in cold weather, but performance varies; some homes may need backup heat.
Are ductless options available for heat pump installation?
Yes. Ductless mini-split heat pumps offer flexible installation for homes without extensive ductwork, but zoning and humidity control require planning.
Ductless mini-splits are an option if you have limited ductwork, with proper zoning.
Watch Video
Top Takeaways
- Plan thoroughly before buying equipment.
- Ensure electrical and permits are in place.
- Choose correctly sized, efficient equipment for climate.
- Hire licensed professionals for refrigerant work and wiring.
- Test and document performance after commissioning.