How to Use a Heat Pump Thermostat: A Practical Guide
Learn how to use a heat pump thermostat to optimize comfort, energy savings, and system health. This step-by-step guide covers pairing, modes, scheduling, eco settings, and troubleshooting for homeowners and professionals.

In this guide you will learn how to use a heat pump thermostat to control comfort, energy use, and system health. You’ll start by pairing the device with your Wi‑Fi, selecting the right mode, and creating a simple schedule. We’ll cover automations, fan settings, setback strategies, and eco options to maximize efficiency and indoor climate. By the end, you’ll be able to optimize both heating and cooling with confidence.
Understanding the value of a heat pump thermostat
The phrase how to use heat pump thermostat takes on new meaning when you see how a modern thermostat coordinates heating, cooling, and fan operation. A well-used thermostat reduces energy waste, keeps rooms comfortable, and protects the heat pump from excessive cycling. According to Heatpump Smart, homeowners who invest time in learning their thermostat’s features tend to experience more consistent temperatures and lower annual energy costs. The Heatpump Smart team found that a strategic approach—beginning with modes like Auto and a simple schedule—creates a foundation for real savings without sacrificing comfort. If you want to master how to use heat pump thermostat effectively, start with the basics: choose the correct mode, set a practical schedule, and enable energy-saving features that match your routines.
Key concepts and terminology
To use a heat pump thermostat well, you must understand a few core terms. Auto mode lets the system switch between heating and cooling to maintain setpoints; Emergency Heat is a backup function used in extreme cold or when the heat pump is offline; Auxiliary heat assists when the primary heat source is insufficient. A setpoint is the target temperature the system aims to reach, while setback refers to lower or higher values during off hours. The fan option controls airflow, with Auto turning the fan on only as needed and On running it continuously for air circulation. Grasping these terms helps you set appropriate schedules and avoid unnecessary energy use.
Initial setup and safety precautions
Before you touch the thermostat, turn off power to the HVAC system at the main breaker to avoid shock or damage. Remove the old device and document which wires connect to each terminal. If you’re unsure about wiring for heat pumps with auxiliary heat or multiple stages, consult the user manual and consider professional assistance. When mounting the new thermostat, ensure the wall box is secure, the display is visible, and there is ample space around the unit for heat dissipation. Finally, reattach the faceplate and restore power to test that the display boots correctly.
Basic configuration for comfort and efficiency
Pair the thermostat with your home Wi‑Fi and install the companion app on your phone or tablet. In most setups, set the system to Auto mode so the thermostat handles switching between heat and cool. Create a simple daily schedule that aligns with your routine, starting with wake, leave, return, and sleep times. Enable eco or energy-saving features, such as adaptive recovery or temperature swings within a comfortable range. These steps provide a solid baseline for consistent comfort and better energy performance.
Advanced features to squeeze more savings
Many heat pump thermostats offer occupancy sensing, learning schedules, geofencing, and demand response options. Use occupancy-aware settings to shift temperature when rooms are empty, and leverage learning capabilities by letting the thermostat adjust over a few days to match your patterns. Geofencing uses your phone’s location to adjust temperature when you leave or return home. Activate any available energy-saving modes during shoulder seasons to reduce wear on auxiliary heat while maintaining comfort.
Troubleshooting common issues
If temperatures feel off, first verify the thermostat is communicating with the heat pump and that the wiring is intact. Check the display for error codes and consult the manual for their meanings. If the system doesn’t respond to changes, try rebooting the thermostat and re-pairing to Wi‑Fi. In cases of persistent inaccuracies, inspect the sensor placement, confirm there are no drafts, and verify that the outdoor unit is free of obstructions. When in doubt, contact a professional technician to avoid improper settings that could harm efficiency or comfort.
Maintenance and long-term care
Keep the thermostat area dust-free and check for firmware updates in the app. Periodically review schedules to reflect changes in routines or seasons, especially around daylight saving time or thermostat firmware releases. Inspect the wiring connections during routine HVAC checks and ensure the wall box remains secure. Regular maintenance helps sustain accurate temperature control and prolongs the life of both the thermostat and the heat pump.
Tools & Materials
- Heat pump thermostat (Wi‑Fi enabled)(Verify compatibility with heat pump mode and auxiliary heat if present)
- Smartphone or tablet(For app setup and remote control)
- Stable Wi‑Fi network(2.4 GHz is commonly supported; ensure signal reaches the thermostat)
- HVAC system user manual (heat pump section)(Helpful for wiring details and mode options)
- Screwdriver and basic tools(Useful if mounting adjustments are needed; consult a professional for wiring changes)
- Voltage tester(Optional safety check if wiring is being modified)
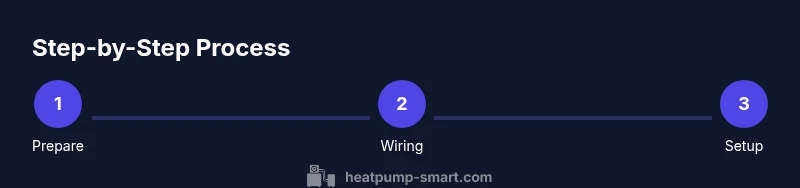
Steps
Estimated time: 30-45 minutes
- 1
Power down and remove old thermostat
Turn off the HVAC power at the main breaker and remove the existing thermostat cover. Document each wire connection before disconnecting anything. This prevents shocks and helps you reattach correctly to the new thermostat.
Tip: Take a quick photo of the wire labeling for reference. - 2
Label and detach wires
Label each wire with its terminal designation, then carefully detach the wires from the old thermostat. Use the wiring diagram in the manual to ensure you connect them to the corresponding terminals on the new unit.
Tip: Keep wires organized in a labeled tray to avoid mix-ups. - 3
Mount the new thermostat base
Attach the new thermostat base to the wall, ensuring it is level and securely screwed into the wall box. Double-check that the backplate aligns with the wall and that there is adequate clearance for the display.
Tip: If the backplate doesn't fit, widen the mounting holes slightly or use wall anchors suited to your wall type. - 4
Reconnect wires to the new base
Connect each labeled wire to the matching terminal on the new thermostat base. Keep wires neatly tucked and ensure solid contact to avoid poor connections or intermittent signals.
Tip: Tighten terminal screws firmly but avoid overtightening which could damage the wire. - 5
Power up and connect to Wi‑Fi
Restore power at the breaker, then boot the thermostat and follow the on-screen prompts to connect to your Wi‑Fi network. Install the companion app and pair the device for remote control and updates.
Tip: Use a strong 2.4 GHz network for reliable connectivity; if available, install on a dedicated network for smart devices. - 6
Configure modes, schedules, and eco settings
Set Auto mode for seamless heating and cooling, create a simple daily schedule, and enable energy-saving features like adaptive recovery or eco mode. Test both heating and cooling to confirm proper operation and comfort levels.
Tip: Start with conservative setback values and adjust gradually after a few days of use.
Your Questions Answered
Do I need a specialized thermostat for heat pumps?
Most heat pumps can be controlled by Wi‑Fi enabled thermostats that support heat pump mode and auxiliary heat. Check compatibility with your system and the thermostat’s wiring diagram before purchasing.
Most heat pumps work with standard Wi‑Fi thermostats that support heat pump mode, but always check compatibility with your specific system.
Can I program a heat pump thermostat to run on emergency heat?
Yes, many thermostats offer an Emergency Heat option for very cold days or when outdoor performance is limited. Use this sparingly to avoid excessive energy use unless needed for comfort.
Yes, you can enable Emergency Heat, but use it only when necessary to conserve energy.
Is it safe to install the thermostat myself?
If you’re comfortable with basic wiring and safety practices, you can install a thermostat yourself. If you encounter complex multistage wiring or air handler configurations, hire a licensed HVAC technician.
It’s safe if you’re confident with wiring; otherwise, hire a professional for complex setups.
Why doesn’t my heat pump respond to thermostat changes?
Common causes include wiring issues, incorrect mode selection, or a blown fuse. Verify connections, confirm Auto mode is active, and restart the thermostat. If problems persist, consult a technician.
Check wiring, mode, and power first; reboot the device, and contact a pro if it continues to misbehave.
What is the best schedule for winter vs summer?
Aim for a daytime setback that reduces heat loss in winter and a gradual warmup in morning hours; in summer, shift cooling to align with occupancy. Adapt the schedule after a couple of weeks of real-life use.
Schedule adjustments based on your routine typically yield better comfort and savings after a short learning period.
Watch Video
Top Takeaways
- Pair the thermostat with Wi‑Fi for remote control
- Set Auto mode and a practical schedule for comfort and efficiency
- Enable eco or energy-saving features to reduce running costs
- Test heating and cooling after setup to ensure proper operation
- Regular maintenance sustains accuracy and longevity