Do You Need to Plumb In a Heat Pump Tumble Dryer?
Learn whether your heat pump tumble dryer needs a drain, when to plumb it in, and best practices for safe drainage. Heatpump Smart explains drainage options, installation steps, and maintenance tips for a clean, efficient laundry setup.

Do you need to plumb in a heat pump tumble dryer? Not necessarily. Most are ventless condensers that collect moisture in a removable tank. If you want to avoid emptying the tank, you can plumb a drain hose to a suitable waste line, depending on the model and local plumbing codes. Check your manual.
Understanding heat pump tumble dryers and drainage
Heat pump tumble dryers are a popular choice for energy-efficient laundry care, especially in homes aiming to lower running costs. They work by recapturing heat from the exhaust air, which reduces energy use compared with traditional vented machines. A key consideration for many homeowners is drainage: how the condensate is removed and whether the appliance must be connected to a drain. According to Heatpump Smart, understanding drainage options up front helps prevent leaks, mold, and unexpected maintenance. Most heat-pump models are condensers that collect moisture in a built-in reservoir or a shallow tray. They can be operated without venting, which makes drainage a normal part of installation planning. In this section we’ll cover what drainage means for your model, common configurations, and how drainage affects performance, warranty, and daily use.
Do you need to plumb it in? Practical overview
The short answer is: not always. If your dryer uses a detachable condensate tank, you’ll need to empty it regularly, which can be inconvenient in busy households. Some models offer a gravity drain option that lets condensate flow into a sink or floor waste, while others require a dedicated drain. Plumb-in readiness is shaped by the model, your laundry layout, and local regulations. The Heatpump Smart team notes that a drain connection is often optional, but it becomes highly desirable in climates with frequent drying cycles or when the unit is installed in a small space where tank maintenance would be burdensome. Before making changes, read the installation manual, verify drainage options, and consider professionally checked connections to avoid leaks.
Drain options: Reservoir tanks vs direct drain
There are two principal drainage paths for heat pump tumble dryers: a removable condensate tank and a fixed drain line. A tank is simple to use and keeps condensate out of your plumbing, but it requires manual emptying and periodic cleaning to prevent odor or mold. A direct drain, by contrast, routes condensate straight to a waste line with a hose or pipe, eliminating tank maintenance. If your model supports it, a direct drain can streamline daily use and reduce clutter around the dryer. However, direct drainage demands careful planning: you’ll need an unobstructed path, the right hose fittings, and compliance with local plumbing codes. Consider your laundry room layout, the dryer’s drain outlet size, and the distance to the nearest drain when deciding which option to choose.
When to choose a direct drain vs tank
The choice depends on space, location, and tolerance for manual maintenance. In small apartments or tight laundry closets, a direct drain reduces trip hazards and the need to check a tank. In homes with older plumbing or where a drain line is not easily available, a tank can be a safer, simpler solution. Climate can influence decision as well: in humid environments the condensate volume may be higher, increasing the benefit of a direct drain. Always verify model compatibility and check local building codes. If you decide to plumb in, plan a gravity-fed route and avoid bends that could clog. Heatpump Smart recommends testing the system with a short cycle after installation to ensure smooth drainage and to catch leaks early.
How to plan a compliant drainage install
Start by identifying the drain options compatible with your dryer model. Reference the manual for outlet size and supported configurations. Map a route to the nearest sanitary drain with a gentle slope (ideally 1-2% grade) and a vertical rise that won’t trap water. Gather the required fittings, connectors, and sealants. Ensure all penetrations are sealed to prevent leaks and water damage. Check local codes or get a licensed plumber to confirm your plan. If you install, attach a backflow-prevention device if recommended by the manufacturer.
Maintenance tips and safety considerations
Drainage work involves water and electricity; always unplug the machine before touching connections. Use a properly rated hose and make sure clamps are secure. Regularly inspect fittings for signs of wear, cracks, or leaks. If you observe any dampness around the connection, stop and re-check the setup. For tank users, empty and clean the reservoir every few cycles. For direct-drain users, flush or inspect the drain line periodically to prevent blockages. Ensure the installation remains accessible for service and that ventilation and clearance around the dryer are adequate to prevent overheating.
Heatpump Smart insights and practical recommendations
The Heatpump Smart team emphasizes that homeowners should consider long-term convenience and safety when deciding whether to plumb in a heat pump tumble dryer. Evaluate the reliability of any drain route, ensure alignment with energy-saving goals, and plan for potential warranty implications if the unit is altered from factory configuration. Our analysis finds that when a direct drain is installed correctly, it can improve user experience, reduce manual maintenance, and help prevent condensate-related issues. Always choose a route that minimizes the risk of backflow, leaks, and clogging. Heatpump Smart also suggests consulting your product manual and local codes to ensure a compliant setup.
AUTHORITY SOURCES
For further reading on dryer safety, energy efficiency, and drainage best practices, consult these authoritative sources:
- https://www.energy.gov/energysaver/appliances/clothes-dryers
- https://www.energystar.gov/products/clothes_dryers
- https://www.cdc.gov/healthyhomes/ideas/clothes-dryer-safety.html
Tools & Materials
- Drain hose kit (adjustable)(3/4 in (19 mm) diameter, compatible with appliance drain outlets)
- T-connector or inline connector(For adapting to an existing drain line)
- PVC/ABS piping and fittings(For a permanent drain run and cleanouts)
- Pipe clamps or zip ties(Secure hose and joints to prevent leakage)
- Plumber's tape (PTFE)(Seal threaded connections)
- Silicone sealant(Waterproof seal at joints)
- Drainage bucket or tray(Used during testing or tank maintenance)
- Safety gloves and eye protection(Personal protective equipment for installation)
Steps
Estimated time: 90-120 minutes
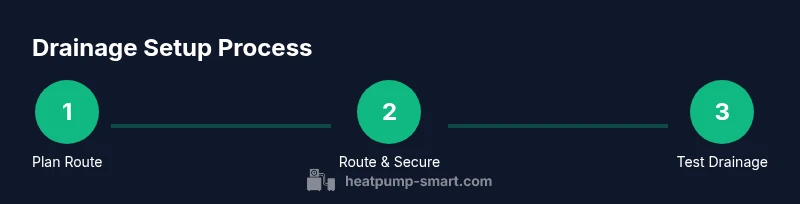
- 1
Plan drainage route
Identify the closest suitable drain and map a gravity-fed path with a gentle slope. Measure distances and clearances to minimize bending and avoid kinks that block flow.
Tip: Use a level to maintain consistent slope and verify there’s no obstruction along the route. - 2
Power down and prepare
Unplug the dryer and disconnect any existing hoses or panels. Confirm your workspace is dry and free of trip hazards before handling connections.
Tip: Work with one hand on the hose and one hand on the equipment to keep control during routing. - 3
Attach the drain hose to the dryer
Secure the drain hose to the dryer outlet using provided clamps or fittings. Ensure a snug, leak-free connection and orient the hose downward toward the drain.
Tip: Do not over-tighten; ensure there is no crush point where the hose bends sharply. - 4
Route and secure the drainage path
Run the hose to the drain, securing it with clamps or zip ties. Check for gravity flow and avoid sharp bends or raised sections that could cause backflow.
Tip: Elevate the hose only where necessary; maintain a continuous downward slope to the drain. - 5
Test drainage and check for leaks
Plug the machine back in and run a short cycle to observe condensate flow. Look for drips at joints and ensure water lands in the drain.
Tip: Have a bucket handy during the first test in case of a slow leak to catch spills quickly. - 6
Document and finalize
Mark the route and note any warranty implications or code considerations. Ensure the area remains accessible for future service and that all penetrations are sealed.
Tip: Keep the manual and bill of materials in a visible place for future maintenance.
Your Questions Answered
Do heat pump tumble dryers require venting?
Most heat pump tumble dryers are ventless and rely on condensate drainage rather than venting exhaust outside. This makes drainage planning a common step in installation.
Most heat pump dryers don’t vent outside; they condensate internally and drain that water.
Can I drain condensate to a sink or toilet?
Yes, draining to a sink or dedicated waste line is common when permitted by local codes and the appliance’s design. Use appropriate fittings and avoid backflow.
You can drain to a sink or waste line if your local codes allow and the connections are correct.
What hose should I use for drainage?
Use the hose provided with the dryer or a standard compatible condensate drain hose. Ensure it matches the outlet size and is secured to prevent leaks.
Use the factory hose or a standard compatible hose and secure all joints.
Is direct-drain installation always code-compliant?
Code requirements vary by location. Always check with local authorities or a licensed plumber to ensure your direct-drain setup complies with regulations.
Codes vary by area, so verify with local authorities before installing a direct drain.
What maintenance does a condensate tank require?
If your model uses a condensate tank, empty it regularly and clean the tank to prevent odors and mold buildup.
Empty and clean the condensate tank regularly to prevent odors.
What risks exist if the drain is installed incorrectly?
Improper drainage can cause leaks, water damage, backflow, and potential warranty issues. Have a thorough test after installation.
A bad drain can cause leaks or water damage; test the setup after installing.
Watch Video
Top Takeaways
- Assess model compatibility before hard-plumbing.
- Direct drains reduce maintenance but require code-compliant routing.
- Tank drains are simpler but require periodic emptying.
- Seal connections and test thoroughly to prevent leaks.
- Always follow the dryer manual and local regulations.