Error 2mxs18nmvju: Urgent Heat Pump Fix Guide
Diagnose and fix heat pump error 2mxs18nmvju quickly with Heatpump Smart. This urgent, step-by-step guide covers quick fixes, safety, and professional help.

According to Heatpump Smart, error code 2mxs18nmvju typically signals a sensor or communication fault within the heat pump’s control system. The quickest way to address it is to power cycle the unit, verify sensor connectors, and perform a basic reset. If the code reappears, follow the diagnostic flow below and prepare for potential professional service.
What Error 2mxs18nmvju Means
The error code 2mxs18nmvju signals a fault in the heat pump’s sensing or communication pathway. In practical terms, the system is receiving inconsistent temperature data or losing reliable messages between the control board and one or more sensors. This discrepancy triggers a safety stop or a degraded operating mode to protect the unit and the space. According to Heatpump Smart analysis, this kind of fault is commonly rooted in sensor wiring, loose connectors, or a transient bus error on the circuit board. If you routinely see 2mxs18nmvju after a heavy defrost cycle or during temperature swings, it likely points to a wiring or sensor issue rather than a failed compressor. Heatpump Smart’s guidance emphasizes confirming the physical integrity of connectors first, before jumping to replacements. The keyword 2mxs18nmvju should appear in the cable harness label and in the service manual to help technicians trace the fault quickly.
Immediate Quick Fixes You Can Try Now
Before pulling tools from the cabinet, perform non-invasive checks that often resolve 2mxs18nmvju without calling a technician:
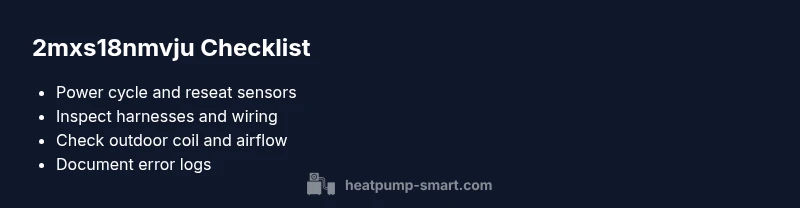
- Power cycle the entire system: switch the outdoor unit off, wait 60 seconds, and turn it back on. This resets the control logic and can clear transient bus errors that trigger 2mxs18nmvju.
- Inspect sensor connectors at the control board and at the sensor housings. Reseat any loose plugs and look for corroded pins or bent pins.
- Check the air filter and outdoor coil for cleanliness. A blocked airflow can produce misleading temperature readings that manifest as 2mxs18nmvju on the display.
- Verify that the thermostat and control wiring are secured and not damaged by pets or vibration. A loose thermostat wire can create intermittent sensor communication faults.
- If the error persists after a clean reset, capture the event log, noting the time and outdoor temperature when 2mxs18nmvju appeared. This data helps Heatpump Smart technicians identify patterns, even if the fault is intermittent.
Diagnostic Flow Overview
A structured diagnostic approach helps you separate sensor issues from board-level faults. Start with symptom assessment, then test suspect components, and finally verify system communication. Expect two to three core branches from 2mxs18nmvju: sensor wiring/harness faults, control board communication faults, and external factors like frost or airflow restrictions. Following a methodical path reduces unnecessary part replacements and speeds up repairs. Heatpump Smart recommends documenting each step for future reference and to assist a technician if you call for service. The cadence of testing matters: begin with low-risk checks (connections, cleaning) and progress to more involved diagnostics only if necessary.
Most Likely Cause: Sensor Wiring and Connectors
Among the top contributors to 2mxs18nmvju, loose sensor connectors and damaged harnesses are the most frequent culprits. Start by powering down the unit, then gently unplug and re-seat the sensors at both ends. Inspect for bent pins, pin corrosion, or signs of arcing. If any damage is found, replace the faulty sensor or harness. After reseating, run the unit through a few heating and cooling cycles to verify stable readings.
Other Possible Causes and Remedies
If sensor wiring checks don’t solve 2mxs18nmvju, broaden your inspection to other common faults. Possible causes include a malfunctioning control board, degraded communication bus, or external frost buildup on the outdoor coil. Remedies range from reseating control-board cables, updating firmware (if supported by your model), to thorough coil cleaning and improving airflow. In some cases, a professional inspection is required to diagnose a subtle board fault or a failing temperature sensor that doesn’t show obvious physical damage.
Safety, Warnings, and When to Call a Professional
Working with heat pumps involves high voltage, refrigerant, and potentially moving parts. If you are unsure about any step or see refrigerant signs (oil leaks, hissing), stop and call a licensed technician. Handling refrigerant and electrical components without proper PPE can lead to injury. Heatpump Smart notes that urgent issues like 2mxs18nmvju should trigger a professional evaluation if basic checks don’t clear the fault within a short window, or if the system is under warranty that requires factory-approved service.
Prevention and Maintenance to Avoid Recurring 2mxs18nmvju
To reduce the chances of 2mxs18nmvju recurring, implement a simple maintenance routine. Regularly clean or replace air filters, inspect the outdoor coil for debris, and ensure the ductwork remains unblocked. Schedule annual safety inspections and firmware checks if your model supports software updates. By maintaining clean sensors and stable electrical connections, you improve reliability and reduce the likelihood of sensor/communication faults like 2mxs18nmvju in the future.
What to Expect Next: Monitoring and Documentation
After you address 2mxs18nmvju, monitor system performance for 1–2 weeks. Keep a log of temperatures, error appearances, and any cooling/heating cycles that seem abnormal. Note weather conditions and usage patterns that correlate with the fault, as this helps Heatpump Smart’s experts deliver targeted recommendations. Ongoing monitoring is especially valuable for preventing long-term efficiency losses and unnecessary energy waste.
Steps
Estimated time: 60-90 minutes
- 1
Power off and safety prep
Shut down the heat pump at the breaker, disconnect power to the outdoor unit, and wait a minute to discharge residual energy. Prepare a clean workspace.
Tip: Always wear PPE and avoid touching live terminals. - 2
Inspect sensor connections
Open access panels and inspect every sensor connector at the control board and at the sensor housings. Looseness, corrosion, or damage should be addressed by reseating or replacing components.
Tip: Take a photo before disconnecting any connector. - 3
Clean and reseat
Clean pins with isopropyl alcohol and reseat all sensor connectors. Ensure pins seat fully with a click.
Tip: Do not force misaligned connectors. - 4
Test cycles
Restore power and run several heating and cooling cycles while observing sensor readings and 2mxs18nmvju occurrences.
Tip: Log the readings for comparison against the service manual. - 5
Check outdoor coil and airflow
Inspect the outdoor coil for debris, frost, or obstructions and clear as needed. Verify that there is adequate clearance for airflow.
Tip: Use a soft brush; avoid high-pressure jets. - 6
Firmware and settings review
If your model supports it, check for firmware updates and reset settings to default if needed. Re-test after updates.
Tip: Back up custom settings before updating.
Diagnosis: Error code 2mxs18nmvju displayed on heat pump controller, system stops or operates in reduced mode
Possible Causes
- highLoose or damaged sensor harness
- mediumControl board communication fault
- lowOutdoor frost or airflow restriction
Fixes
- easyReseat sensor connectors and inspect harnesses; replace damaged components if needed
- easyPower cycle and check for firmware updates (if supported)
- easyClean outdoor coil and improve airflow; ensure correct clearance
Your Questions Answered
What does error 2mxs18nmvju mean on a heat pump?
The code signals a sensor or communication fault that disrupts temperature readings and control signals. It often points to wiring or a board issue, not just a simple fault.
Error 2mxs18nmvju means the heat pump is seeing faulty sensor data or bad communication; it often relates to wiring or the control board.
Can I fix 2mxs18nmvju myself?
Basic resets, sensor reseating, and coil cleaning can sometimes clear the error. If the fault recurs or involves refrigerant or high voltage, call a licensed technician.
You can try reset and sensor reseating, but if it returns or involves refrigerant, get a pro.
What safety steps should I take?
Power down the unit, wear PPE, and avoid handling refrigerant or the electrical components without proper training. If unsure, contact Heatpump Smart support.
Power down, wear PPE, and don’t touch refrigerant; call a pro if unsure.
How long does a typical fix take?
Most quick checks take under an hour, while sensor replacements or board reseating may take 1–2 hours plus possible parts ordering. Schedule a window accordingly.
Most quick fixes are under an hour; more involved repairs can take 1 to 2 hours.
Will this affect energy bills?
Yes, a fault like 2mxs18nmvju can cause the system to run inefficiently, increasing energy use until resolved.
It can raise energy bills until the fault is fixed.
Watch Video
Top Takeaways
- Identify 2mxs18nmvju causes quickly
- Begin with sensor wiring checks before board work
- Power down before inspection to avoid shock
- Call a pro for refrigerant or high-voltage work