Coil Replacement for Heat Pump: Step-by-Step Guide
Learn how to assess coil health and perform a coil replacement for a heat pump. Step-by-step guidance, safety tips, and when to hire a pro for lasting comfort and efficiency.

You will learn how to assess coil health and perform a safe coil replacement for a typical air-source heat pump, including identifying coil type, verifying refrigerant safety, and following a clear, step-by-step process. This guide covers when replacement is appropriate, potential risks, and how to avoid common mistakes. Expect practical tips, safety reminders, and notes on professional assistance where needed.
Why Coil Replacement Matters for Heat Pumps
Coil replacement for heat pump is a critical maintenance task that impacts comfort, efficiency, and long-term costs. According to Heatpump Smart, coil health is a major driver of overall performance, especially in climates with seasonal temperature swings. When coils degrade due to mineral buildup, corrosion, or refrigerant leaks, heat transfer diminishes, forcing the compressor to work harder and increasing energy use. Replacing a failing coil can restore proper heat exchange, improve heating and cooling consistency, and reduce the likelihood of refrigerant leaks or system shutdowns. Understanding where coils live (evaporator coil inside the air handler; condenser coil in the outdoor unit) helps homeowners recognize when replacement is warranted and what to expect from a service appointment.
Signs You Might Need Coil Replacement
Noticeable signs point to coil wear or damage. The most obvious is reduced heating or cooling performance, with longer run times and uneven temperatures. Frost or ice on outdoor coils is another warning sign, as is persistent high humidity, or higher energy bills without other causes. You may also see oily residues around connections or hear hissing sounds from refrigerant lines. If such symptoms appear, a professional HVAC tech should inspect to confirm whether the coil is the culprit and whether replacement is appropriate. Early replacement can prevent compressor strain and more expensive repairs later.
Coil Types and Compatibility
Heat pumps use evaporator coils and condenser coils. Replacement must match the coil’s size, configuration, and refrigerant compatibility (most modern systems use R-410A). Coils come in copper or aluminum construction with different fin densities, so the replacement must fit the existing cabinet and match the outdoor unit. Always verify part numbers, connection configurations, and gasket styles to ensure a proper seal and air flow. If in doubt, consult the original equipment manufacturer’s specifications or a qualified technician.
Safety, Refrigerant, and Legal Considerations
Refrigerant work is regulated in many areas. Handling refrigerants, evacuating a system, or charging a coil should be performed by a licensed HVAC professional. PPE, proper ventilation, and lockout/tagout procedures protect you from electrical shock and chemical exposure. Do not vent refrigerants; return them to a recovery cylinder following local regulations. Keep knowledge of your local codes and EPA requirements; Heatpump Smart analyses emphasize safety and legal compliance as the foundation of any coil replacement.
What to Expect During a Coil Replacement Service
A typical coil replacement involves inspection, coil removal, and installation of a compatible coil. The technician will verify refrigerant type, seals, and electrical connections, then perform a pressure test and leak checks before recharging the system. Expect the service to include a test run and performance check to confirm that heating and cooling meet the expected levels. If refrigerant charging is required, this step must be handled by licensed personnel.
Maintenance to Extend Coil Life
Regular maintenance can extend coil life and maintain efficiency. Replace air filters monthly during heating seasons, keep outdoor units clear of debris, and schedule an annual professional inspection to clean coils and verify connections. Optional preventative measures include applying protective coatings to outdoor coils and using high-quality anti-corrosion treatments if your climate is harsh. These steps help minimize mineral buildup and corrosion, reducing the likelihood of premature coil failure.
DIY vs Professional: Making the Right Call
While some basic cleaning and inspection tasks are safe for capable homeowners, coil replacement involves refrigerant handling and sealed refrigerant circuits. If you are not trained and certified, the safest choice is to hire a licensed HVAC technician. A pro can inspect for leaks, ensure proper refrigerant charge, and verify system performance after installation.
Tools & Materials
- PPE: safety goggles, gloves, respirator(ANSI-rated PPE; respirator for dusty environments; ensure chemical resistance)
- Multimeter and electrical tester(Verify power is isolated and circuits are safe before work)
- Vacuum pump and refrigerant recovery equipment(Required if evacuating the system or handling refrigerant; compliant with local regulations)
- Replacement coil matched to model(Check exact part number, dimensions, and refrigerant compatibility)
- Gaskets, sealant, and mounting hardware(Used as needed for proper seals and fit)
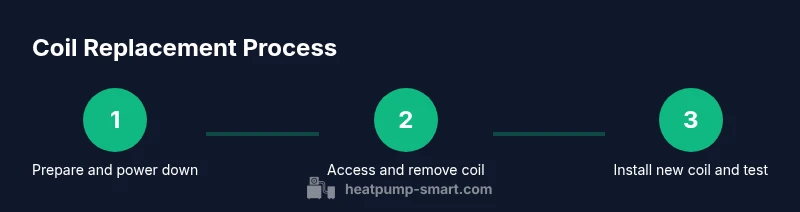
Steps
Estimated time: 2-6 hours
- 1
Power down and isolate the system
Switch off power to the outdoor unit and any air handlers. Use lockout/tagout procedures and verify with a multimeter that no voltage is present before touching electrical components.
Tip: Double-check the disconnect switch is clearly labeled and reachable from a safe position. - 2
Access the coil compartment
Remove access panels and locate the coil housing. Note wire routes, refrigerant lines, and mounting screws so you can reassemble correctly.
Tip: Take photos or sketches of connections before disassembly to aid reassembly. - 3
Remove the old coil
Disconnect refrigerant lines with proper equipment, cap line ends to prevent contamination, and unfasten the coil from its frame.
Tip: Handle copper lines carefully to avoid kinking or cracking; support heavy components to prevent dropping parts. - 4
Install the new coil and seal connections
Position the new coil, reconnect refrigerant lines with correct fittings, replace gaskets, and seal joints to prevent air leaks.
Tip: Use a torque wrench for fittings and ensure all seals are tight without over-tightening. - 5
Check refrigerant needs and evacuate/recharge
If the system requires refrigerant, only a licensed technician should evacuate and recharge using the correct refrigerant type and quantities.
Tip: Never vent refrigerant—follow recovery procedures and local regulations. - 6
Test the system
Power up the system, check for leaks, run a full heating/cooling cycle, and compare pressures with manufacturer specifications.
Tip: Document readings and perform a final performance test to confirm proper operation.
Your Questions Answered
Can I replace a heat pump coil myself?
DIY coil replacement is not recommended for most homeowners. It requires refrigerant handling, leak testing, and a precise refrigerant charge. A licensed HVAC technician can ensure safety and code compliance.
Replacing a heat pump coil is best left to a licensed HVAC technician due to refrigerant handling and system pressures.
What are common signs of coil failure?
Common signs include reduced heating or cooling, frost on outdoor coils, persistent humidity, higher energy bills, and refrigerant leaks or oily residues at connections.
Look for temperature drop, frost, and unusual noises as potential coil warning signs.
How long does coil replacement take?
Time varies with access and system complexity, but plan for several hours. A straightforward replacement with good access can take a few hours; more complex setups may take longer.
Most coil replacements take a few hours, depending on how easy the unit is to access.
Will coil replacement fix energy efficiency problems?
If the coil is degraded, replacement can restore heat transfer and efficiency. However, underlying issues like dirty ducts or airflow problems should also be addressed.
Replacing a bad coil can improve efficiency, but other system issues may still affect performance.
How can I prevent coil problems in the future?
Regular maintenance, including filter changes, outdoor coil cleaning, and annual professional inspections, helps prevent mineral buildup and corrosion.
Keep up with maintenance and clean coils to extend life.
Watch Video
Top Takeaways
- Identify coil type and model before replacement
- Coil replacement requires refrigerant handling by pros
- Verify compatibility and seals for proper heat transfer
- Professional service can restore efficiency and reliability
- Regular maintenance extends coil life