Heat Pump Capacitor Replacement: A Practical How-To
Learn how to safely replace a heat pump capacitor to restore starting power, efficiency, and reliability. This step-by-step guide covers signs of failure, tools, safety, testing, and maintenance for homeowners and professionals.

By the end of this guide, you will safely replace a heat pump capacitor, restore starting power, and improve overall efficiency. Key requirements include a compatible run capacitor, a properly rated replacement, a fully disconnected power source, and basic electrical safety tools. According to Heatpump Smart analysis, capacitor failures are a common heat pump issue that smart maintenance can prevent.
Why capacitor replacement matters for heat pumps
Capacitors are small but essential components that help start and run the motors in a heat pump. When a run capacitor begins to fail, the unit may struggle to start, cycle unpredictably, or draw more power than necessary. Over time, a weak capacitor can place extra stress on the compressor, shorten the system’s life, and lead to bigger repairs. Replacing a worn capacitor can restore reliable startup, improve efficiency, and reduce energy costs during peak season.
According to Heatpump Smart analysis, capacitor wear is a common heat pump issue, particularly in aging units or systems that work hard in hot summers or cold winters. The right preventive action can prevent cascading failures and keep your home comfortable without unexpected downtime. In practice, a capacitor replacement handled promptly often saves homeowners time and money by avoiding a full compressor or control board failure.
Common signs include hard starting, extended start times, frequent cycling, a noticeable hum or click from the electrical compartment, or visible bulging on the capacitor canister. If you notice any of these symptoms, plan a controlled replacement with proper safety procedures and the right parts.
How a capacitor functions in a heat pump
A run capacitor is a small electrical storage device used to provide a burst of energy to the compressor and fan motor during start-up and to smooth running currents. It helps create a phase shift that allows the motor to start turning. If the capacitance falls outside spec, starting torque drops, efficiency declines, and the system may draw more current. In most residential heat pumps, you will see a round metal canister mounted inside the outdoor unit, with two or three wire leads connected to the start and run windings. A replacement capacitor must match the original microfarad rating (μF) and voltage. Oversized or undersized caps can cause overheating or starting problems.
Note that run capacitors are non-polarized, so you generally do not have to worry about wire polarity when connecting the replacement. However, you should reproduce the original wiring layout exactly, using the same terminal order and connector sizes. The replacement capacitor must match the original μF rating and voltage; substituting a significantly different rating can cause overheating or reduced efficiency. Always consult the unit’s label or service diagram to confirm these specs before purchasing a new part.
Signs your heat pump capacitor may be failing
- Hard start or delayed start: The unit needs extra seconds to energize the compressor.
- Frequent cycling or cycling on/off: The system struggles to reach setpoints.
- Weak performance in hot or cold weather: Start-up is sluggish and efficiency drops.
- Visual damage to the capacitor: bulge, leakage, or crusting on the canister indicates replacement.
- Audible noises: buzzing or clicking from the outdoor electrical compartment can signal a failing capacitor.
- Inconsistent performance or unexplained energy use: An aging capacitor often correlates with higher running costs.
If you observe these signs, plan a replacement promptly and avoid operating the unit until inspected. As always, verify other potential causes (thermostat setup, blower motor, or refrigerant issues) before concluding the capacitor is at fault.
Safety first: electrical hazards and precautions
Electrical work can pose serious hazards, including shock and arc flash. Always power down at the service disconnect and the main panel; lock out and tag the breaker to prevent re-energization. Use a non-contact voltage tester to confirm no voltage before touching any wires. Discharge the capacitor after isolating power, using a resistor or discharge tool; never short leads with bare metal. Wear insulated gloves and safety glasses, keep the work area dry, and work with a partner if you’re not confident. If you smell burning insulation or hear crackling, stop immediately and seek professional help. Your local electrical code may also require a licensed technician for panel work or refrigerant handling.
Tools and replacement parts you’ll need
- Replacement run capacitor that matches the original μF rating and voltage.
- Insulated gloves, safety glasses (essential).
- Non-contact voltage tester and digital multimeter with capacitance function.
- Screwdrivers (Phillips and flat) and a socket or nut driver to access the panel.
- Electrical tape, wire labels, and small zip ties to secure wires.
- Optional: a camera or note pad for documenting wire connections.
This section helps plan the job and minimizes surprises during the swap. Remember that using the wrong capacitor can damage the compressor or void warranties if applicable.
Step-by-step overview of the replacement process
While the actual step-by-step instructions are provided in the dedicated STEPs section, here is a quick overview of the sequence to orient you:
- Power down and verify safety. 2) Access the outdoor unit and locate the capacitor. 3) Discharge, then disconnect the old capacitor. 4) Install the new capacitor, reconnect wires, and secure. 5) Restore power and test start-up. 6) Reassemble the panel and perform a brief run test.
Follow the detailed steps in the next section to ensure accuracy and safety, especially if you’re new to electrical work.
Testing after replacement and troubleshooting
With power restored, verify the capacitor is functioning by measuring capacitance with a multimeter and observing the starting sequence during a test cycle. Confirm the current draw is within normal range and there is no abnormal heat or buzzing. If the heat pump still has trouble starting, recheck the wiring, confirm the correct μF rating, and inspect for signs of failed internal components such as the compressor. Document any discrepancies and consult the service manual if available. Regular post-replacement testing helps prevent a recurrence and ensures system reliability.
AUTHORITY SOURCES
- https://www.energy.gov/
- https://www.epa.gov/
- https://www.nist.gov/
These sources provide foundational guidance on safe electrical work, HVAC efficiency, and standard testing practices relevant to heat pump maintenance and capacitor use.
Tools & Materials
- Replacement run capacitor (same μF rating and voltage)(Check the label on the existing capacitor for the exact μF and voltage; tolerance is typically ±5%.)
- Insulated gloves(Choose Class 0 or higher protection for electrical work.)
- Safety glasses(ANSI Z87.1 compliant.)
- Non-contact voltage tester(Verify no voltage before touching any components.)
- Digital multimeter with capacitance function(Needed to verify capacitance after replacement and during testing.)
- Screwdrivers (Phillips and flat) and socket set(Access panel and wiring terminals require a variety of driver sizes.)
- Electrical tape and wire labels(Use labels or tape to keep track of wires during removal and reinstallation.)
- Marker and camera or notebook(Helpful for documenting wire layout before disconnection.)
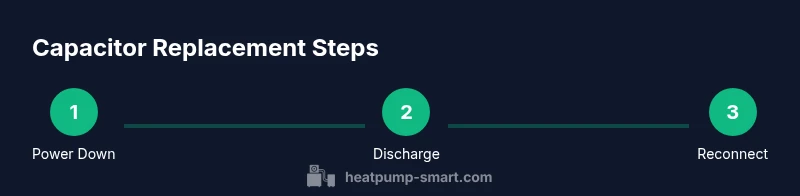
Steps
Estimated time: 60-90 minutes
- 1
Power down the system
Shut off power at the outdoor disconnect and the main service panel. Lockout and tag the breaker to prevent re-energizing. Confirm zero voltage with a non-contact tester before proceeding.
Tip: Use a lockout/tagout kit and never bypass safety devices. - 2
Open the outdoor unit and locate the capacitor
Remove the access panel to expose the capacitor housing. Identify the run capacitor connected to the start and run windings, noting which wires go to which terminals.
Tip: Take a photo of the wiring layout before disconnecting anything. - 3
Discharge the capacitor safely
With power still off, discharge any stored energy using a resistor or a purpose-built discharge tool. Do not bridge leads with bare metal.
Tip: Verify there is no residual voltage after discharge with your tester. - 4
Disconnect the old capacitor
Carefully loosen and remove wires from the capacitor terminals. Label each wire and terminal to ensure accurate reassembly.
Tip: If terminals are corroded, clean carefully or replace crimp connectors as needed. - 5
Install the new capacitor
Mount the new capacitor in the same orientation and secure it. Reconnect wires to the corresponding terminals exactly as labeled or pictured.
Tip: Double-check the μF rating and voltage before connecting. - 6
Restore power and test
Reconnect the power, then run a brief start-up test. Listen for normal startup sounds and observe the unit’s cycling behavior. Use a multimeter to verify capacitance if available.
Tip: If the unit does not start, recheck connections and rating; avoid repeated high-current starts. - 7
Reassemble and finalize
Replace the exterior panel, tidy all wires, and remove tools. Perform a short run cycle to ensure stable operation across conditions.
Tip: Document the replacement date for maintenance records.
Your Questions Answered
Do I need to power off the system before replacing the capacitor?
Yes. Always shut off power at the service disconnect and main panel, then verify with a tester. Discharging and rechecking before touching any terminals reduces the risk of shock or arc.
Yes. Power off all power sources and test with a meter before touching any components.
Can I replace the capacitor myself if I have limited electrical experience?
If you’re not confident with electrical work, hire a licensed technician. Incorrect wiring or capacitor rating can damage the compressor or void warranties.
If you’re not comfortable with electrical work, call a professional.
What rating should the replacement capacitor have?
Match the original unit’s μF rating and voltage as labeled on the capacitor. Using an incorrect rating can cause overheating or start-up problems.
Match the μF rating and voltage exactly as the original part.
What are common signs of a failing capacitor?
Hard starts, longer start times, frequent cycling, and visible bulges or leaks are typical indicators. A persistent buzz from the outdoor box can also signal trouble.
Hard starts or bulging on the capacitor are common indicators.
How long does capacitor replacement take?
A straightforward replacement typically takes about 60 to 90 minutes, depending on access to the unit and familiarity with wiring.
Usually about an hour and a half for a simple swap.
Is capacitor replacement cheaper than replacing the whole unit?
In many cases, replacing the capacitor is significantly cheaper and can extend the life of the heat pump, but verify that other components aren’t failing.
Capacitor replacement is often cheaper and can extend the system’s life, if the rest checks out.
What should I do after replacing the capacitor?
Test the system for a few cycles, check for abnormal heat or noises, and confirm the run status with a meter reading if possible. Document the replacement for future maintenance.
Test the system for a few cycles and note the results for future maintenance.
Can a bad capacitor affect other components?
Yes. A failing capacitor can cause motor stress, higher amperage, and can contribute to premature wear on the compressor or contactors.
A bad capacitor can stress the motor and other components.
Watch Video
Top Takeaways
- Power off and verify safety before touching electrical components.
- Use the correct μF rating and voltage for the replacement capacitor.
- Label wires and document connections for accurate reassembly.
- Test start-up and run performance after replacement.
- Heatpump Smart's verdict: capacitor replacement is often cost-effective when part matches spec.