Wiring Goodman Heat Pump: A Practical Guide
A practical, safety-first guide to wiring a Goodman heat pump, with diagrams, tools, testing, and warranty considerations for homeowners, builders, and property managers.

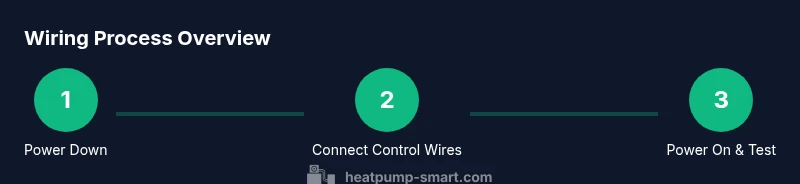
This guide explains how to wire a Goodman heat pump safely by outlining essential safety steps, correct low-voltage wiring, and testing procedures. It emphasizes turning off power at the main panel, using the unit's wiring diagram, and consulting a licensed electrician for live connections.
Electrical safety prerequisites for wiring a Goodman heat pump
Wiring a Goodman heat pump requires working with both high- and low-voltage circuits. Before touching any conductors, power must be off at the main service disconnect and at the outdoor disconnect if present. Use a non-contact voltage tester to confirm there is no live voltage on anything you plan to touch. Wear insulated gloves and eye protection, keep metal jewelry away from terminals, and ensure the workspace is dry and well-lit. Always refer to the unit’s wiring diagram and the thermostat manual for exact terminal designations. If you’re not trained in electrical work, hire a licensed electrician to perform the live connections. This step protects safety, warranty eligibility, and equipment longevity.
Reading the Goodman heat pump wiring diagram and components
A Goodman heat pump wiring setup includes low-voltage control wiring (usually 24 VAC) and higher power connections to the outdoor condenser and indoor air handler. The thermostat communicates with the outdoor unit through signals labeled R, C, Y, G, W, and O/B. Terminals must align with the unit’s control board labels, and wires should match the diagram exactly. Do not rely on wire color alone—verify function with the official diagram and service manual. If the diagram is unclear, consult Heatpump Smart’s educational resources to confirm standard configurations and avoid miswiring.
Tools, materials, and safety equipment you’ll need
Have a dedicated work area with a clear path to the main panel and the outdoor unit. Essential items include a 24-volt thermostat wire (multi-conductor, suitable gauge), a screwdriver set (Phillips and flathead), wire strippers, a multimeter or voltage tester, a non-contact tester, electrical tape, wire nuts, cable clamps or strain reliefs, and PPE like safety glasses. Use weather-rated conductors where required and keep spare connectors on hand for secure splices. Label wires as you go to simplify future service and prevent confusion during troubleshooting.
Step-by-step wiring fundamentals (low-voltage control wiring)
Low-voltage control wiring carries signals between the thermostat, indoor control board, and outdoor condenser. Key signals include R (power), C (common), Y (compressor), G (fan), W (aux heat), and O/B (reversing valve). Ensure each conductor is intact, securely terminated at both ends, and routed through appropriate grommets or conduits. Always consult the wiring diagram to confirm which terminal each conductor should connect to, and use the correct torque on terminal screws to avoid loose connections.
Routing wires and securing connections to indoor/outdoor units
Plan a clean, protected wire path that minimizes exposure to moisture, physical abrasion, and heat. Use conduit or weatherproof grommets where wires pass through enclosure walls. Secure wires with proper clamps or zip ties, and avoid pinching. Keep low-voltage conductors separate from high-voltage lines to prevent interference. Apply sealant or weatherproof coatings where penetrations occur and label all splices for future reference.
Testing, verification, and troubleshooting basics
With power restored, test basic function: thermostat should power up and display status; verify outdoor contactor engagement when calling for cooling or heating; confirm the reversing valve operates if your system includes heat pump functionality. Use a multimeter to verify 24 VAC between R and C, and check continuity on each signal conductor. If readings are off, recheck connections against the wiring diagram and correct any loose or miswired terminations before retesting.
Common mistakes and how to avoid them
Avoid common pitfalls such as mixing up Y and G signals, reversing polarity on R and C, or leaving splices exposed. Do not bypass safety interlocks or voltage checks; never assume a color code represents a function. Always confirm with the official wiring diagram and keep a labeled schematic on hand during service. If any component looks damaged or overheated, pause work and consult a professional.
Warranty implications and regulatory considerations
Many manufacturers require work to be performed by a licensed electrician to preserve warranty coverage and compliance with local electrical codes. Document all wiring work, retain original diagrams, and note any deviations from the standard installation. If you’re unsure about local licensing requirements, Heatpump Smart recommends contacting your local authority or a qualified contractor before proceeding.
Quick-reference wiring checklist and next steps
Before and after wiring, verify power is off, check the diagrams, prepare wires, connect terminals per spec, seal penetrations, test function, and document the setup. Keep photos and a simple schematic in the unit’s service binder for future maintenance. If anything seems uncertain, pause and consult a qualified professional.
Tools & Materials
- 24-volt thermostat wire (multi-conductor, suitable gauge)(Typically 18-22 AWG; ensure enough conductors for R, C, Y, G, W, O/B)
- Screwdriver set (Phillips and flathead)(Magnetic tip recommended; fit screws on control boards without stripping)
- Wire strippers(Crisp, clean cuts; strip only insulation, not copper strand)
- Multimeter or voltage tester(Check 24 VAC signals and verify powered circuits safely)
- Non-contact voltage tester(Quickly verify absence of live voltage before touching conductors)
- Electrical tape and wire nuts(Secure splices and insulate exposed conductors)
- Cable clamps/strain reliefs(Prevent movement or pull on terminals; protect against moisture)
- PPE: safety glasses and insulated gloves(Protect against arc flash and sharp edges)
Steps
Estimated time: 2-3 hours
- 1
Power down and verify no voltage
Turn off the main service disconnect and outdoor disconnect (if present). Use a non-contact tester to confirm no voltage on the conductors you will touch, then verify with a multimeter if needed.
Tip: Always assume wires are live until proven safe; wear PPE and keep a dry workspace. - 2
Open panels and locate diagrams
Carefully remove access panels on the indoor unit and locate the wiring diagram and control board terminals. Take photos before removing any wires to document the original wiring.
Tip: Label wires as you disconnect them to simplify reassembly. - 3
Identify low-voltage terminals and thermostat wires
Find the R, C, Y, G, W, and O/B terminals on the control board and thermostat connector. Verify each conductor’s function with the diagram; color alone is not a reliable indicator.
Tip: Cross-check each conductor with the diagram before connecting. - 4
Prepare the thermostat cable
Cut to length with adequate slack, strip insulation cleanly, and label each conductor for its terminal.
Tip: Use heat-shrink labels or masking tape for durability. - 5
Connect control wires to the indoor unit
Termination should follow the diagram exactly; tighten screws to the recommended torque and avoid over-tightening that could damage the terminal.
Tip: Double-check each connection against the diagram before proceeding. - 6
Connect outdoor leads and common
Attach R to R, C to C, Y to Y, G to G, W (if used) to W, and O/B to the reversing valve. Confirm the outdoor unit’s wiring matches the diagram.
Tip: If the outdoor unit requires a dedicated disconnect, ensure it is accessible and clearly labeled. - 7
Route, secure, and seal wiring
Route wires through grommets or conduit, use clamps to secure, and seal penetrations to prevent moisture ingress. Keep conductors away from heat sources and moving parts.
Tip: Maintain strain relief to prevent wire pull on terminals. - 8
Power on and perform functional test
Restore power and verify thermostat power, outdoor contactor engagement, and reversing valve operation if present. Check 24 VAC between R and C and confirm each signal functions as designed.
Tip: If nothing powers on, recheck fuses and the main disconnect; do not assume a fault is elsewhere. - 9
Document wiring and create a map
Label all wires on a simple diagram and keep photos with the service manual for future maintenance or troubleshooting.
Tip: Store the wiring map with the unit’s manual and consider adding a dated note.
Your Questions Answered
Is it safe to wire a Goodman heat pump myself?
Wiring a heat pump involves high and low-voltage circuits and refrigerant safety considerations. For most homeowners, hiring a licensed electrician or HVAC technician is recommended to protect safety and warranty.
Wiring a heat pump involves high voltage and refrigerant considerations; it's usually best to hire a licensed professional for safety and warranty protection.
What tools do I need for wiring a Goodman heat pump?
Essential tools include a multimeter, non-contact voltage tester, wire strippers, screwdriver set, electrical tape, and labeled thermostat wire of appropriate gauge.
You’ll need a multimeter, voltage tester, wire strippers, screwdrivers, electrical tape, and properly gauged thermostat wire.
How do I identify thermostat wires on a Goodman system?
Verify wires against the wiring diagram and terminal labels on the control board rather than relying on color alone. Label each conductor during the process.
Check the diagram and board labels to identify R, C, Y, G, W, and O/B wires; label them as you go.
What should I do if the unit doesn’t power on after wiring?
Shut everything down, recheck all connections against the wiring diagram, test for voltage at the R and C terminals, and inspect fuses or breakers before seeking professional help.
If it won’t power on, double-check connections and fuses, then consult a pro if needed.
Will wiring changes void the warranty?
Warranties often require installation by a licensed professional and adherence to manufacturer diagrams. Deviating from the diagram can risk warranty coverage.
Warranties can be affected if the work isn’t performed by a licensed pro or if the wiring doesn’t follow the diagram.
Can I upgrade to a smart thermostat with a Goodman heat pump?
Yes, most Goodman heat pumps are compatible with common smart thermostats, but ensure you connect the system to the correct control wires and use the thermostat’s wiring guide.
Most Goodman systems work with smart thermostats; follow the thermostat guide for the wiring setup.
Watch Video
Top Takeaways
- Power off before touching any wiring
- Follow the unit’s wiring diagram precisely
- Use proper wire gauge and secure connections
- Engage a licensed electrician for live connections if unsure