Converting to Heat Pump: A Practical Step-by-Step Guide
Learn how to convert your home to a heat pump, including feasibility, sizing, installation, financing, and maintenance. This comprehensive guide covers air-source vs geothermal options, necessary electrical upgrades, and how rebates can accelerate payoff for homeowners, builders, and managers.

Converting to a heat pump means replacing your fossil-fuel heating system with an air-source or geothermal heat pump, upgrading your electrical panel if needed, and installing a compatible thermostat and controls. The process includes a feasibility review, proper sizing, duct or hydronic adjustments, and professional installation. With correct sizing and commissioning, you’ll gain year-round comfort and energy efficiency.
Why convert to a heat pump: benefits and scope
According to Heatpump Smart, converting to a heat pump can deliver year-round comfort with significantly improved efficiency compared to traditional fossil-fuel systems. This is not simply a temperature change: it involves redefining how heat is produced, stored, and controlled in a home. The scope typically includes selecting between an air-source or geothermal system, evaluating electrical capacity, planning duct or hydronic modifications, and coordinating professional installation. Homeowners, builders, and property managers who pursue this conversion often see a shift from predictable but costly energy bills to more predictable, lower operating costs over time. In addition, heat pumps provide cooling in summer, which reduces the need for separate air conditioning in many layouts. A thoughtful conversion plan also considers insulation, air sealing, and zone controls to maximize comfort and minimize waste.
Key benefits to expect:
- Year-round comfort with consistent indoor temperatures
- Lower running costs when sized and commissioned correctly
- Quiet operation and fewer emissions depending on electricity source
- Space-saving options with compact outdoor units in many configurations
- Potential improvements to property value with upgraded systems
Thermal performance and comfort are highly dependent on proper installation and commissioning, so partnering with a qualified installer is essential for achieving the promised benefits.
-
- "Assessing thermal comfort and energy use is critical before you start converting"
Tools & Materials
- HVAC contractor consultation and feasibility report(Documented assessment of site, climate, and existing system compatibility.)
- Electrical service assessment(Verify available service voltage, capacity, and panel location; plan upgrades if needed.)
- Heat pump system (air-source or geothermal)(Choose model with appropriate SEER/HSPF ratings for your climate.)
- Smart thermostat and controls(Zoned or multi-room control improves efficiency and comfort.)
- Ductwork/hydronic modifications(Inspect and prepare for potential duct sealing or reconfiguration.)
- Refrigerant line set and insulation(Properly insulated lines minimize heat loss and condensation.)
- Permits and documentation(Check local requirements; some jurisdictions require permits.)
- Safety equipment and PPE(Ensure installer uses approved safety gear and procedures.)
Steps
Estimated time: 2-5 days on-site, plus design, permits, and potential minor abatement work
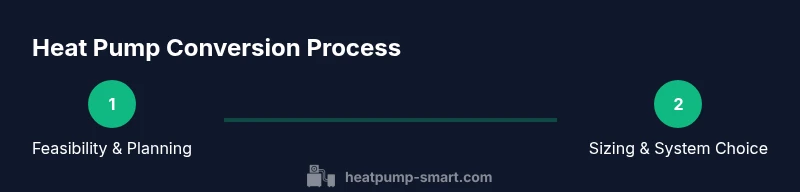
- 1
Schedule a feasibility assessment
Arrange a visit with a licensed HVAC contractor to review your current system, climate needs, and electrical capacity. The goal is to determine whether an air-source or geothermal heat pump best fits your home and to identify any major upgrades early. This step sets expectations for cost, timeline, and potential disruption.
Tip: Ask for a printed estimate and a high-level plan, including potential ductwork changes and wiring upgrades. - 2
Compute load and size the system
A professional will perform a load calculation (and often a COP/seasonal efficiency assessment) to determine the correct heat pump size for heating and cooling. Oversized or undersized units waste energy, create short cycling, and reduce comfort. This step informs model selection and zoning requirements.
Tip: Ensure the contractor notes insulation improvements and window upgrades that impact load. - 3
Choose between air-source and geothermal
Air-source heat pumps are typically easier and cheaper to install, while geothermal systems involve underground loops with higher upfront costs but very low operating costs. Your choice depends on your climate, lot size, and long-term energy goals.
Tip: Consider long-term maintenance and utility costs, not just sticker price. - 4
Plan electrical upgrades
Most homes will need electrical work to support the heat pump, especially a dedicated circuit or upgraded panel. Upgrades should be performed by a licensed electrician to ensure safety and code compliance.
Tip: Coordinate timing with the installer to avoid delays between equipment delivery and wiring. - 5
Prepare the home (insulation and seals)
Improve envelope performance through sealing air leaks and adding insulation where needed. A well-sealed, well-insulated home reduces heat loss, letting the heat pump meet comfort targets more efficiently.
Tip: Address humidity control and air sealing before installation to maximize performance. - 6
Install the heat pump and controls
The installer mounts outdoor and indoor units, runs refrigerant lines, connects electrical wiring, and programs the thermostat. Proper commissioning ensures system efficiency, safety, and correct refrigerant charge.
Tip: Ask for a demonstration of thermostat programming and zoning features. - 7
Test, commission, and train
Post-installation testing confirms performance across modes and temperatures. The technician should verify airflow, refrigerant pressures, defrost cycles, and outdoor unit communication with the thermostat. Training on operation and maintenance reduces calls back for basic issues.
Tip: Request a written commissioning report and a copy of warranty terms.
Your Questions Answered
What does converting to a heat pump involve?
A conversion involves replacing a fossil-fuel system with a heat pump, upgrading electrical capacity if needed, and installing appropriate controls. A professional assessment determines feasibility, sizing, and installation scope. The result is year-round comfort with improved efficiency when properly sized and commissioned.
A heat pump conversion replaces the old system, upgrades the electrical setup, and installs smart controls for better energy efficiency.
Is installation expensive?
Costs vary widely based on system type (air-source vs geothermal), home size, and required upgrades. Financing options and rebates can influence the overall payback period. A detailed quote from a qualified contractor provides the clearest picture.
Costs depend on the system type and home, but rebates and proper sizing can make it a smart investment.
Will a heat pump work in cold climates?
Heat pumps can operate effectively in cold climates, especially with cold-climate models and proper insulation. Performance depends on outdoor temperatures and the specific efficiency ratings of the chosen unit.
Yes, many heat pumps perform well in cold weather, especially with models designed for low temperatures.
Do I need to upgrade my electrical panel?
Often a dedicated electrical circuit or panel upgrade is required to support a heat pump. A licensed electrician can confirm capacity and safety requirements during the feasibility phase.
Most installations require some electrical work to support the heat pump safely.
What rebates are available?
Rebates and incentives vary by region and program. A contractor can help identify eligible rebates and guide you through the application process.
Many regions offer rebates or tax credits; check local programs and ask your installer for help.
Watch Video
Top Takeaways
- Get a professional load calc for accurate sizing
- Choose air-source or geothermal based on climate and site
- Electrical upgrades may be required for safe operation
- Look for rebates to shorten payback period
- Proper commissioning ensures reliability and efficiency