How to Improve Heat Pump Performance: A Practical Guide
Learn proven steps to boost heat pump efficiency, reduce energy costs, and extend system life with_baseline checks, airflow improvements, thermostat strategies, and smart maintenance.

With the goal of how to improve heat pump performance, start by establishing a baseline, cleaning airflow, and selecting efficient thermostat settings. Key actions include clearing the outdoor unit, replacing filters, and ensuring ducts are tight. Pair these DIY steps with regular professional maintenance for refrigerant and coil health, and you’ll see noticeable comfort and efficiency gains.
What drives heat pump performance
Understanding why a heat pump feels more or less responsive at different times helps you plan improvements that actually move the needle. In practical terms, performance is driven by three pillars: equipment efficiency (how well the unit converts electricity into heat), installation quality (proper refrigerant charge, airflow, duct sealing), and user behavior (thermostat settings, zone usage, maintenance habits). According to Heatpump Smart, the most impactful gains come from a well-matched system and clean airflow rather than chasing small, cosmetic tweaks. A high-efficiency heat pump with the right-size outdoor unit and properly sealed ducts will produce higher COP (coefficient of performance) and lower running costs across a typical heating season. The seasonal performance factor (HSPF) also matters, reflecting how well the system performs across varying outdoor temperatures. For homeowners, that means focusing on the basics first: confirm outdoor clearance, check indoor air pathways, and keep a tidy, well-dusted coil. Once those are stable, you can pursue targeted upgrades with confidence and measurable results, understanding that the question is truly: how to improve heat pump performance starts with solid fundamentals.
Quick home diagnostics you can perform
Before spending on new components, run a quick diagnostic sweep to establish a baseline and identify obvious inefficiencies. Start by recording thermostat setpoints, outdoor temperature, and indoor return-air temperatures over a 24-hour period. Compare the indoor temperature at the thermostat with the air blowing from supply vents; a large delta often signals airflow or duct issues. Check the outdoor condenser for debris, snow buildup, or bent fins, and clear as needed. Listen for unusual noises that might indicate fan or compressor problems. Finally, make sure door seals and window rows aren’t letting warm air escape near the forced-air ducts. These checks don’t replace a professional service, but they help you build a baseline and prioritize improvements. In many homes, the biggest wins come from simple steps like replaced filters and improved sealing. This is where the phrase how to improve heat pump performance becomes actionable, translating into tangible daily comfort and energy savings.
Improve airflow and duct health
Airflow is a silent performance multiplier for heat pumps. Restricted or leaky ducts, clogged returns, or blocked outdoor units reduce efficiency far more than most people expect. Start by ensuring the outdoor unit has at least two feet of clearance on all sides and remove any plant growth, debris, or snow. Inside the home, replace disposable filters with the correct size and a MERV rating appropriate for your system, and schedule filter checks every 1–3 months. Inspect major supply and return ducts for obvious gaps and seal with metal-backed tape or mastic sealant; avoid duct tape for long-term sealing. If you have long duct runs, consider adding insulation around unconditioned segments to minimize heat losses. Finally, consider using zone controls or adjusting dampers to balance airflow across rooms. Small efficiency gains here add up because the heat pump won’t have to work as hard to push warmed air to every space.
Thermostat strategy and zone control
Smart thermostat settings and zone control can shrink energy use as much as hardware upgrades. Program the thermostat to lower heat during unoccupied periods and to pre-condition space before occupants arrive, aligning peak demand with milder outdoor temperatures. If your home has multiple zones, verify that dampers and thermostats are communicating correctly, and that you aren’t heating unoccupied zones unnecessarily. A simple rule is to keep the main living areas at a steady, comfortable temperature and let bedrooms sleep a few degrees cooler at night if health allows. Use adaptive recovery features sparingly and avoid repeatedly changing setpoints, which can cause the system to cycle excessively. For older thermostats, upgrading to a programmable or smart model can substantially improve control. The goal is to reduce short cycling and unnecessary runtime while maintaining comfort. When done well, zone strategy and controls are a bigger lever for efficiency than one-off equipment tweaks.
Maintenance that matters: filters, coils, and refrigerant health
Maintenance is the most reliable path to sustained performance. Start with clean, correctly sized air filters; dirty filters force the blower to work harder and reduce heating efficiency. Check the indoor coil for frost or frost-free operation; frost indicates refrigerant issues, airflow problems, or temperature split anomalies that a pro should inspect. Outdoor coils should be clean and free of dirt, pollen, or leaf debris; use a soft brush to remove buildup and avoid high-pressure blasting. Schedule professional refrigerant checks, coil cleanings, and system diagnostics at least once per year; refrigerant work requires licensed technicians and proper safety practices. As you maintain the system, document readings such as pressure, superheat, and entering/exiting air temperatures (if you have the tools). These values help you spot trends over time and quantify gains in performance. Remember: DIY maintenance can improve efficiency, but critical refrigerant components must stay in professional hands.
When to upgrade components: smart replacements first
When the baseline remains stubborn after maintenance, consider thoughtful upgrades rather than a full replacement. A newer, high-efficiency heat pump with variable-speed operation can improve COP in cold climates and reduce runtime. If your unit is undersized for your home or local climate, replacing only the outdoor unit or upgrading to a higher SEER/HSPF model often yields better results than a full system swap. Before buying, run a sizing check with a professional and compare seasonal performance estimates. Older refrigerants, noisy compressors, or frequent cycling are warning signs that a component may be nearing its end of life. In such cases, an efficiency-focused upgrade can reduce energy use and improve comfort. Heatpump Smart analysis shows that climate, usage patterns, and system age influence ROI; in mild-to-moderate climates, even modest upgrades can be cost-effective when planned with a long-term view.
Cost considerations, ROI, and practical expectations
Trying to squeeze every last bit of efficiency from a heat pump requires balancing upfront costs with long-term savings. The price of upgrades varies widely by climate, home size, and existing equipment, so focus on practical, trackable improvements rather than guesswork. Upgrading filters, sealing ducts, and installing smart controls typically yields quick returns through lower energy bills and improved comfort. More substantial investments, like a higher-efficiency heat pump or zone controls, show meaningful savings over several heating seasons, with the exact ROI depending on your climate and usage. In all cases, document baseline energy use and track changes after each improvement. Maintaining consistent maintenance schedules and accurate thermostat programming will maximize the value of any investment. Heatpump Smart analysis shows that the best ROI comes from a combination of airflow improvements, thoughtful control strategies, and reliable professional service.
Next steps and professional support
With a clear plan, you’ll know which action to take first and how to measure progress. Start by implementing the DIY steps that don’t require specialized tools, such as filter changes, outdoor unit clearance, and thermostat adjustments. Then schedule a professional HVAC service for refrigerant checks and system diagnostics if you notice persistent performance gaps. If you’re considering upgrades, obtain multiple quotes and have a technician run a seasonal performance estimate to quantify potential savings. keep a maintenance log and the baseline readings to compare after changes. By following a structured approach, you can reliably improve heat pump performance over time, boosting comfort and reducing energy costs. The Heatpump Smart team recommends keeping a proactive maintenance habit and staying informed about efficiency improvements as technology evolves.
Authority Sources
For official guidelines and data on heat-pump efficiency and installation best practices, refer to the following sources. They provide foundational metrics, safety standards, and policy context that underpin the guidance in this article.
- https://www.energy.gov/eere/buildings/heat-pump-systems
- https://www.energy.gov/energysaver/heat-pumps
- https://nrel.gov
Tools & Materials
- Screwdriver set(Phillips and flathead, assorted sizes)
- Digital multimeter(For basic electrical checks (voltage, resistance))
- Thermometer or infrared thermometer(Measure supply and return air temps)
- Gloves(Work gloves for safety)
- Ladder(Access to outdoor unit and attic/duct areas)
- Coil cleaning brush(Gentle removal of surface dust)
- Replacement air filter (MERV 8-13)(Optional upgrade depending on system)
- Safety goggles(Eye protection during maintenance)
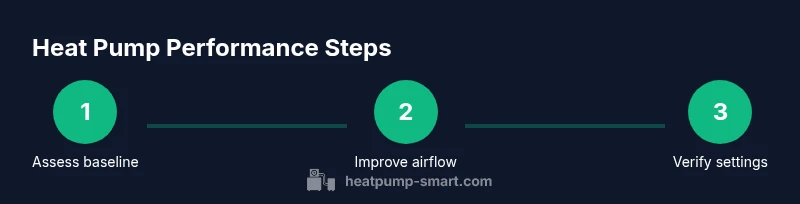
Steps
Estimated time: 2-4 hours
- 1
Gather baseline data
Document thermostat setpoints, outdoor temperature, and indoor temperatures over a representative period. This baseline shows how the heat pump runs today and helps quantify improvements after changes. Include a note on typical comfort levels and any existing anomalies.
Tip: Use a simple log sheet or a mobile notes app to track temps at multiple times of day. - 2
Clear and inspect the outdoor unit
Remove debris, ensure at least two feet of clearance, and check fins for damage. A clean, unobstructed condenser improves heat exchange and reduces runtime. If you see bent fins, a soft restoring tool helps without causing damage.
Tip: Always power off the unit before inspection and wear gloves to avoid sharp edges. - 3
Replace indoor filters and inspect ducts
Install a fresh filter of the correct size and seal visible duct gaps with appropriate sealant. Leaky ducts and dirty filters cost efficiency by forcing the blower to work harder. A simple duct seal improves airflow and reduces energy waste.
Tip: Choose a filter with the right MERV rating for your system to avoid airflow restrictions. - 4
Review thermostat settings and zoning
Verify that thermostats and any zone controls are communicating and operating as intended. Program schedules to reduce running time during off-hours and use adaptive recovery to minimize overshoot. Avoid frequent, dramatic setpoint changes.
Tip: Enable smart recovery if available to optimize startup and runtime automatically. - 5
Inspect ducts and seal leaks
Look for obvious gaps along duct runs and seal with mastic or metal-backed tape. For long duct runs, consider insulation to reduce heat loss. This step lowers supply air losses and boosts overall efficiency.
Tip: Test for leaks by feeling along connections during a gentle airflow test. - 6
Schedule professional refrigerant/coil service
If you notice persistent short cycling, unusual noises, or frost patterns, arrange a licensed technician to check refrigerant charges and coil cleanliness. Refrigerant work requires safety protocols and proper certification. Regular professional checks protect performance and safety.
Tip: Book shoulder-season service to minimize downtime and maximize system readiness.
Your Questions Answered
What is heat pump performance and why does it matter?
Performance is measured by efficiency metrics like COP and HSPF, indicating how effectively the system converts electricity into heat. Higher values generally mean lower operating costs and better comfort. Understanding these metrics helps target improvements where they matter most.
Performance means efficiency metrics like COP and HSPF; higher numbers usually mean lower energy use and better comfort.
Can I adjust refrigerant levels myself?
No. Refrigerant handling is hazardous and legally restricted; only licensed technicians should service refrigerant levels or leaks. DIY attempts can cause system damage and safety risks.
Don’t touch refrigerant—this requires a licensed technician.
Will a programmable thermostat help?
Yes, a programmable or smart thermostat can reduce runtime by aligning heating with occupancy and outdoor conditions. It helps cut energy use without sacrificing comfort.
A programmable thermostat can significantly boost efficiency when used with proper schedules.
How often should I service my heat pump?
Annual professional maintenance plus periodic filter checks (every 1–3 months) keeps performance steady and catches issues early. Regular service is key to reliability and efficiency.
Have a pro inspect yearly, with routine filter checks by you.
Do zone controls improve performance?
Yes. Zoning concentrates heating where it’s needed, reducing overall runtime and improving comfort in occupied areas. Properly balanced zones maximize efficiency.
Zoning helps by heating only the areas you use.
Is upgrading worth it if my system is older?
If the current system is aged or undersized for climate, a higher-efficiency model or component upgrade can provide meaningful gains. Compare baseline performance and long-term savings to decide.
Upgrading may be worthwhile if your current unit is old or mismatched.
Watch Video
Top Takeaways
- Baseline data drives measurable improvement.
- Airflow and duct sealing offer quick wins.
- Thermostat strategy matters as much as hardware.
- Maintenance is the most reliable efficiency lever.
- Professional service is essential for refrigerant and coil work.