Air Source Heat Pump Service: Maintenance and Safety Guide
A practical, safety-first guide to servicing air source heat pumps. Learn routine checks, troubleshooting, and when to hire a technician for optimal efficiency and longevity.

This step-by-step guide helps homeowners safely service an air source heat pump and prepare for professional maintenance. You’ll perform basic checks on filters, coils, and electrical components, verify system performance, and know when to call a licensed technician. Follow the structured steps, safety reminders, and documentation tips to keep your heat pump running efficiently.
What is an air source heat pump and why service matters
Air source heat pumps (ASHP) refrigerate heat from the outside air and move it indoors for heating or vice versa for cooling. Like any complex mechanical system, ASHPs rely on clean filters, clean coils, and properly charged refrigerant lines to perform efficiently. Regular service helps sustain energy efficiency, reduce wear, and extend equipment life. According to Heatpump Smart, proactive maintenance can lower energy waste and minimize unexpected trips for repairs. A well-maintained ASHP also performs more consistently in extreme weather, which translates to steadier indoor comfort and lower utility bills over time. By understanding what routine service covers, homeowners can target both simple, safe tasks and smarter scheduling with qualified technicians. Heatpump Smart analysis shows that regular checks on airflow, temperature differentials, and system controls are key indicators of overall health. Keeping a simple maintenance log helps you communicate issues clearly during future visits and ensures no step is overlooked.
In practice, service involves cleaning, inspecting, testing, and documenting. You do not need advanced tools for basic checks, but some tasks benefit from a simple multimeter, a good flashlight, and a planned approach. Always prioritize safety: power down the system, avoid touching energized components, and never attempt refrigerant work unless you are a licensed technician. With a clear maintenance plan, you’ll reduce nuisance shutdowns and keep your home comfortable year-round.
Understanding service scope and safety guidelines
A professional service typically includes a thorough check of electrical connections, refrigerant pressure, outdoor coil cleanliness, indoor coil cleanliness, blower operation, thermostat communication, and system sequencing. Homeowners can handle routine upkeep between visits, such as filter replacement and dust removal from the indoor unit, but must recognize the boundaries where specialized testing or refrigerant handling is required. Safety guidelines emphasize disconnecting power at the breaker before any inspection, using personal protective equipment, and avoiding contact with moving parts. If you notice refrigerant odors, oil leaks, or frost on lines, stop immediately and contact a licensed technician. Routine service provides an opportunity to confirm warranty eligibility and update the system’s diagnostic history for future work. By documenting the service steps and any observed anomalies, you improve the accuracy of professional assessments and ensure better energy performance over time.
What homeowners can do between professional visits
Between professional visits, keep an eye on air quality, indoor humidity, and comfort levels. Clean or replace indoor filters every one to three months, depending on usage and household conditions. Check the outdoor unit for debris, leaves, or snow buildup and clear it gently, taking care not to damage fins. Listen for unusual noises and verify that the thermostat responds accurately to temperature adjustments. Maintain a clean space around the outdoor unit to promote proper airflow. If you notice a noticeable drop in heating efficiency right after a period of heavy use, it may indicate airflow restriction or a need for professional tune-up.
Regular documentation helps streamline future service. Note any changes in performance, strange smells, frost on lines, or longer cycling times. Share these notes with your technician to expedite diagnostics and avoid redundant tests. This proactive approach supports long-term efficiency and can prevent costly breakdowns during peak heating or cooling seasons.
Outdoor unit care and debris management
The outdoor unit is the heat exchange heart of an ASHP. Regular cleaning reduces energy waste and improves efficiency. Start by turning off power, then remove loose debris by hand or with a soft brush. Use a damp cloth to wipe away surface dust on the fins, taking care not to bend them. Avoid high-pressure water or metal tools that can damage the coil fins. Trim back vegetation so plants are at least two feet away from the unit to maintain airflow. In winter, ensure snow is cleared from the base and that the unit is not covered, which can trap moisture and impede drainage. A gentle coil-cleaning spray can be used sparingly if recommended by your manufacturer.
Watch for signs of wear, such as bent fins, rust, or gaps in insulation on refrigerant lines. Any environmental damage or obvious physical damage to the cabinet or electrical connections warrants a professional inspection. Regular outdoor maintenance extends unit life and reduces the likelihood of performance declines during cold snaps or heat waves.
Indoor air quality and filter maintenance
Indoor air quality is linked to filter condition and blower performance. Clean, well-sealed ducts and appropriately sized filters help maintain comfortable humidity and reduce dust circulation. Replace or clean filters according to the manufacturer’s recommendations, typically every one to three months. When filters are clogged, the system works harder, consuming more energy and reducing comfort. Use the correct filter type and size specified for your unit. If you notice increased dust, musty smells, or inconsistent airflow, address the issue promptly. A clean filter also protects the indoor heat exchanger and helps prevent coil fouling that reduces efficiency and capacity over time.
Electrical safety and controller checks
Electrical components require careful attention. Before touching wiring or controllers, power down at the main breaker and verify absence of voltage with a non-contact tester. Inspect visible connections for signs of corrosion, looseness, or discoloration, and ensure that any accessible wiring is properly insulated. Check thermostat settings and ensure that zone controls or smart thermostats communicate correctly with the heat pump. If you observe tripped breakers, flickering indicators, or error codes, document them and consult a technician. Regular checks on contactor operation, capacitor health, and relay integrity help prevent unexpected outages and extend service life.
When to call a professional and what to expect
If you notice persistent performance loss, refrigerant leaks, unusual noises, ice buildup, or a failure to start, contact a licensed HVAC technician promptly. Refrigerant handling, high- and low-pressure testing, and electrical work require specialized training and equipment. When scheduling service, share your maintenance log, list observed issues, and provide the model and serial numbers. A professional inspection typically includes refrigerant checks, compressor performance, electrical safety tests, and calibration of controls. Expect a written report with findings, recommended repairs or replacements, and an estimated cost. Regular professional service can help sustain efficiency, comfort, and warranty coverage over the life of your ASHP.
Tools & Materials
- Safety goggles(ANSI Z87.1 compliant)
- Insulated gloves(3-4 pairs, suitable for electrical work)
- Screwdriver set(Phillips and flat-head, sizes #1.5 and #2)
- Multimeter(For voltage and continuity checks)
- Non-contact voltage tester(Verify power isolation before touching wiring)
- Soft brush or microfiber cloth(Gentle cleaning of fins and surfaces)
- Shop vac or compressed air(Dust removal from indoor/outdoor units)
- Calibrated thermometer or hygrometer(Optional for measuring performance and humidity)
Steps
Estimated time: 60-90 minutes
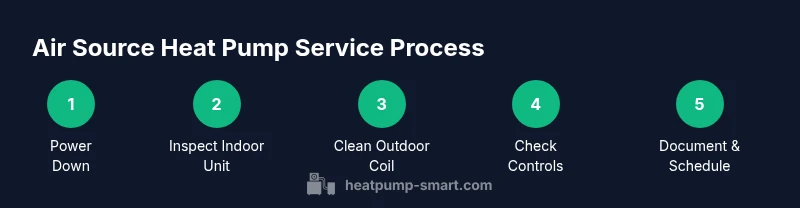
- 1
Power down and verify isolation
Turn off the main breaker and use the non-contact tester to confirm there is no live voltage near the system. This protects you from electric shock and prevents accidental restart during inspection.
Tip: Use lockout-tagout if available to prevent the system from being energized during your work. - 2
Inspect indoor air handler and replace filters
Open the access panel and check the air filters for dirt or blockages. Replace or clean as needed, then wipe the housing to remove dust that could fall into the blower.
Tip: Use the manufacturer’s filter type and size; mismatches reduce airflow. - 3
Clean outdoor unit and check clearances
Remove loose debris around the outdoor unit, gently brush the fins, and ensure at least two feet of clearance on all sides for airflow.
Tip: Avoid using sharp tools near fins; bent fins can reduce heat transfer efficiency. - 4
Inspect refrigerant lines and insulation
Visually examine refrigerant lines for damage, oil spots, or insulation wear. Do not open refrigeration connections; refrigerant work must be performed by a licensed tech.
Tip: Note any odd smells or frost patterns and report them to your service provider. - 5
Test controls and thermostat communication
Set a temperature and observe system start, fan operation, and cooling/heating sequence. Ensure thermostats or smart controllers respond promptly and accurately.
Tip: If you see error codes, record them for the technician, including time of day and ambient conditions. - 6
Document findings and prepare for service
Write down observed issues, performance drop, or noisy behavior. Gather model numbers and maintenance history to share with your technician.
Tip: Keep a log for future visits; this improves diagnostic accuracy and service speed.
Your Questions Answered
How often should I service an air source heat pump?
Annual professional service is recommended, with DIY checks every few months in between visits to ensure basic cleanliness and proper operation.
Most homes benefit from yearly professional service, with simple DIY checks every few months between visits.
Can I perform a service myself, or should I hire a technician?
You can handle basic maintenance like filter cleaning and outdoor debris removal. More advanced tasks, especially refrigerant work or electrical testing, should be done by a licensed technician.
Keep DIY tasks simple and leave refrigerant and electrical work to a professional.
What are warning signs that require professional service?
Persistent reduce in heating capacity, strange noises, ice formation on lines, or refrigerant leaks are signs to call a pro. Do not delay if performance drops suddenly.
If you notice reduced heating, noises, or leaks, contact a licensed technician promptly.
Is it safe to operate during maintenance?
Operate the system only when it is safe to do so. If you are performing safety checks, avoid panels and wiring. If in doubt, switch off power until service is complete.
Only operate if you know it’s safe; otherwise turn it off and wait for a professional.
What documentation should I keep after service?
Keep a record of the service date, technician notes, part replacements, and any recommendations. This helps future diagnostics and warranty claims.
Maintain a simple service log with dates and notes for quick reference.
Should I replace filters even if they look clean?
Yes, replace or clean filters on the schedule recommended by the manufacturer. Clean filters preserve airflow and efficiency even if they don’t look dirty.
Even clean-looking filters should be replaced on schedule to keep airflow optimal.
Watch Video
Top Takeaways
- Schedule annual service for optimal efficiency
- Replace indoor filters regularly
- Keep outdoor unit clear of debris
- Document issues for better diagnostics
- Know when to call a technician