Heat Pump Service Checklist: A Complete How-To Guide
A complete, step-by-step heat pump service checklist to help homeowners, builders, and property managers perform safe, thorough maintenance and improve energy efficiency.

According to Heatpump Smart, a proper heat pump service checklist helps homeowners perform a safe, thorough inspection and keep the system running efficiently. This quick guide outlines the essential steps, required tools, and safety precautions to complete a routine service. You’ll cover pre-checks, outdoor and indoor components, electrical connections, filters, and post-test verification.
Why a Heat Pump Service Checklist Matters
Maintaining a heat pump isn't just about moving heat; it's about reliability, efficiency, safety, and long-term costs. A well-structured service checklist helps homeowners, builders, and property managers stay organized, ensure safety, and capture critical data for future service. According to Heatpump Smart, regular checks help identify issues early—like dirty coils, restricted airflow, loose electrical connections, and degraded filtration—before they become costly failures. A routine inspection also validates thermostat behavior, defrost cycles, and condensate handling, keeping you comfortable year-round and reducing wear on components. By documenting each item, you create a clear maintenance history that simplifies warranties and vendor service calls. Treat this checklist as a living document: update it after every service, tailor it to your model, and align it with local climate conditions. When performed consistently, energy savings and peak performance metrics become measurable over seasons.
The health of a heat pump is evident in airflow, temperature stability, and quiet operation. If you notice reduced heating or cooling, unusual noises, or ice on the coils, treat it as a high-priority signal and escalate to a qualified technician. The Heatpump Smart team emphasizes safety first: never poke at live electrical components, never bypass safety switches, and always de-energize the system before touching wiring. A well-maintained heat pump feels more reliable and runs more efficiently, delivering lower running costs and a smaller environmental footprint.
Core Components You’ll Inspect During a Service
A thorough service covers both external and internal components. Start with the outdoor unit: clear debris from the surrounding area, check the condenser fins for damage, and listen for the fan motor operating smoothly. Inspect refrigerant lines for insulation integrity and signs of leaks or oil residue, and verify that the condensate drain is clear so water flows freely. Inside the home, examine the air handler cabinet, blower assembly, and accessible ductwork for dust buildup and obstructions that could impede airflow. Check the air filter, noting its MERV rating and replacement needs. Finally, inspect access panels and screws for tightness to prevent rattling or vibration during operation. Heatpump Smart analysis shows that even small inconsistencies in airflow or coil cleanliness can reduce efficiency by several percentage points, especially in humid or dusty climates. By keeping these core components clean and properly connected, you preserve system performance and comfort.
Safety Protocols Before You Start
Safety is the foundation of any service task. Begin by turning off power at the main disconnect and, if possible, locking it out to prevent accidental re-energization. Wear eye protection, insulated gloves, and non-slip footwear. Avoid touching refrigerant lines and electrical components with bare hands, and never operate a unit in a wet environment. Have a dry, clutter-free workspace and use a properly rated flashlight or headlamp to inspect dark compartments. If you must access electrical panels, only perform tasks you are trained to do, and never bypass safety interlocks. A moment of caution up front reduces the risk of shocks, burns, or electrical faults that could harm people or damage equipment.
Pre-Inspection Preparation and Tooling
Before touching a single component, gather your tools and equipment so you don’t improvise with the wrong tool or skip steps. Review the unit’s manual for model-specific procedures and safety notes. Prepare a drain pan and rags for condensate, a replacement air filter sized for the unit, and a clean workspace. Annotate the service with a simple checklist format to ensure no item is overlooked. The right preparation minimizes rework and helps you complete the service efficiently in a single visit.
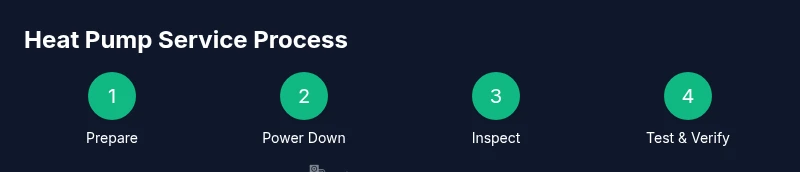
The Service Check: A Step-by-Step Overview
This section provides a structured route through the service, including pre-checks, outdoor and indoor inspections, electrical and control tests, and post-test verification. You’ll verify power and grounding, inspect accessibility panels, confirm refrigerant lines are intact, replace filters as needed, check thermostat operation, test defrost behavior, and run a quick operation cycle to confirm airflow and temperature consistency. Documentation at each stage makes it easier to monitor trends and schedule the next service. Heatpump Smart notes that every model behaves differently, so adapt the steps to your unit while preserving the core safety practices.
Post-Service Verification and Record-Keeping
After the hands-on checks, perform a short run test in both heating and cooling modes if conditions allow. Listen for unusual noises, confirm that the condensate drain remains clear, and verify that airflow is steady across supply registers. Record operating pressures, voltages, temperatures, and any deviations from baseline. Save the service notes in a central place—whether a digital log or a printed binder—to track performance across seasons and support future diagnostics. Regular documentation helps you evaluate efficiency trends and justify maintenance investments. Heatpump Smart recommends setting a reminder for the next annual check, so routine maintenance stays on schedule.
Common Mistakes to Avoid
Common errors include skipping safety procedures, failing to de-energize before panel access, neglecting to replace or clean filters, and overlooking condensate drainage issues. Don’t force hardware or bypass protective covers to save time. Avoid using high-pressure air or metal tools on fins, which can bend and reduce heat transfer. Also, avoid relying on a single loose observation; verify results with measurements or readings. Following the checklist consistently reduces risk and ensures that you catch developing problems before they escalate. Heatpump Smart reminds readers that a methodical approach yields safer, more efficient operation and longer equipment life.
Tools & Materials
- Safety glasses (ANSI Z87.1)(Eye protection during inspections and coil cleaning)
- Insulated work gloves(Protect hands when handling electrical components)
- Voltage tester / multimeter(Verify electrical supply and grounding)
- Screwdriver set (Phillips & flathead)(Open access panels and secure fasteners)
- Cordless vacuum or compressed air(Clean dust from outdoor coil and indoor cabinet)
- Soft brush or microfiber cloth(Gently remove dust from coils and surfaces)
- Replacement air filter(Replace with correct size and rating)
- Drain pan and towels(Catch condensate and prevent spills)
- Owner’s manual or service guide(Reference for model-specific procedures)
- Thermostat controls or app access(Test controls and settings during verification)
Steps
Estimated time: 60-90 minutes
- 1
Prepare and power down
Turn off power at the main disconnect and lockout if possible. Confirm no voltage using a tester before touching any wiring. This protects you from shocks and accidental startups.
Tip: Set a visible warning tag at the disconnect and verify with a quick test before proceeding. - 2
Inspect outdoor unit and surroundings
Clear surrounding debris, check condenser fins for damage, and ensure the fan spins freely when powered briefly. Remove leaves, grass, and any obstructions that impair airflow.
Tip: Use a soft brush for fins; avoid aggressive scrubbing that could bend fins. - 3
Check refrigerant lines and condensate drain
Inspect insulation on refrigerant lines for wear and confirm there are no oil stains indicating leaks. Verify the condensate drain is clear and flowing freely.
Tip: If you detect oil residue or hissing sounds, escalate to a licensed technician. - 4
Replace or clean the air filter
Remove the old filter, note its size, and replace with a new filter of the correct rating. Reinstall securely to maintain proper sealing and airflow.
Tip: Record the replacement date on the filter frame for future reference. - 5
Inspect indoor blower and air paths
Open the indoor cabinet and check the blower assembly for dust buildup and secure wiring. Confirm unobstructed airflow from supply to return ducts.
Tip: Clean with a microfiber cloth or soft brush; avoid forcing dust into ducts. - 6
Test electrical connections and controls
Check wiring, tighten connections as needed, inspect the contactor, and verify thermostat communication. Use a multimeter to confirm expected voltages.
Tip: Document any readings outside the normal range and plan follow-up if necessary. - 7
Run a short operational test
Power the system back up and run both heating and cooling cycles if conditions permit. Listen for unusual noises and observe defrost behavior in cold weather.
Tip: Watch airflow and temperature changes at the registers for consistency. - 8
Document findings and schedule next service
Record all measurements, observed issues, and dates for next check. Schedule the next annual service and set reminders in your maintenance calendar.
Tip: Keep a copy of service notes accessible to your property team.
Your Questions Answered
How often should I service a heat pump?
Most homeowners should aim for an annual professional service, with a simple monthly self-check for filters and airflow. Regular visits help catch developing issues early and keep efficiency high.
Aim for an annual professional service, plus monthly self-checks for filters and airflow.
What safety precautions are needed during service?
Always shut off power at the main disconnect and use proper PPE. Avoid energizing the system while panels are open, and never bypass safety features. If unsure, contact a licensed technician.
Shut off power and wear PPE. Don’t bypass safety features; contact a licensed tech if unsure.
Can I replace filters myself?
Yes, replacing filters is a routine DIY task. Use the correct size and rating, and note replacement dates to track maintenance.
Yes, replace with the right size and rating and keep replacement dates for records.
What are common signs that service is due?
Look for reduced heating or cooling performance, unusual noises, ice on coils, or higher energy bills. These indicate the system benefits from inspection or cleaning.
If performance drops, noises arise, or energy costs increase, service may be due.
Is a DIY check enough or should I hire a pro?
A DIY check is useful for basic maintenance like filter changes and visible cleanups. For electrical, refrigerant, or refrigerant-related issues, hire a licensed professional.
DIY checks are fine for basic maintenance, but hire a pro for electrical or refrigerant concerns.
What should I include in a maintenance log?
Record the date, readings (voltage/pressure if available), observed issues, actions taken, and the next service date. This helps track trends over time.
Log dates, readings, actions, and next service date to track trends.
Watch Video
Top Takeaways
- Follow a structured heat pump service checklist for safety and efficiency.
- Regular inspections reduce energy costs and extend equipment life.
- Document observations to simplify future diagnostics.
- Use proper PPE and adhere to safety guidelines.
- Heatpump Smart recommends using this checklist annually.