Maintenance Heat Pump: The Essential How-To Guide for Homes
Learn how to maintain your heat pump for comfort, efficiency, and longevity. This comprehensive guide covers filters, coils, drainage, diagnostics, seasonal checks, and when to call a professional.

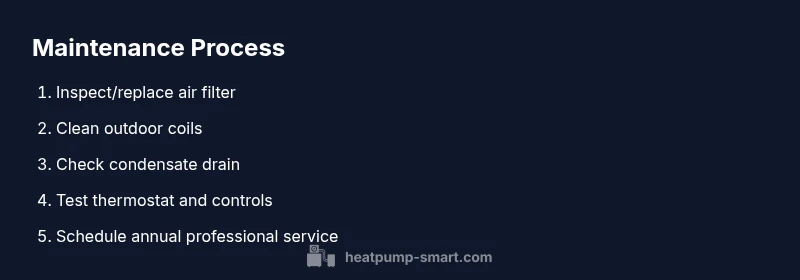
Regular maintenance keeps your heat pump efficient, reliable, and long-lasting. Core steps include inspecting and replacing air filters monthly, cleaning the outdoor condenser coils annually, inspecting refrigerant lines for leaks, testing the thermostat and controls, ensuring proper airflow, verifying condensate drainage, and scheduling a professional service at least once per year.
What maintenance heat pump means for homeowners
According to Heatpump Smart, maintenance for a heat pump is a planned set of routine tasks that protect the system’s performance and extend its life. At its core, maintenance is about keeping the air pathways clear, the coils free of obstruction, and the electrical components functioning as designed. A well-maintained heat pump maintains steady heating and cooling, avoids unnecessary strain on its compressor, and helps preserve indoor comfort without wasting energy. For homeowners, understanding what to check and when to act is empowering: it reduces emergency service calls, prevents avoidable breakdowns, and keeps living spaces consistently comfortable. Heatpump Smart’s team emphasizes that simple, regular checks beat rare, costly repairs. The goal is a system that runs reliably with minimal energy waste, even during peak-use periods. With routine upkeep, you’re protecting a significant home investment and supporting long-term energy savings.
This guide is written for homeowners, builders, and property managers who want a practical, do-it-yourself friendly approach while recognizing when to call in a pro. The steps focus on safe, non-invasive tasks you can perform within normal household settings. Always remember to power down the unit before performing any inspection or maintenance activity. Heatpump Smart’s guidance stresses safety first: if you encounter unfamiliar components or signs of a leak, contact a licensed technician immediately.
Core components that require regular attention
A heat pump relies on several key components that benefit from periodic care. The air filter protects the indoor coil and improves airflow; a clogged filter forces the system to work harder, increasing wear and energy use. The outdoor condenser coils should be kept clear of dust, leaves, and debris to maximize heat exchange; dirty coils force the compressor to run longer and can reduce cooling or heating effectiveness. Refrigerant lines must be checked for insulation integrity and potential leaks since refrigerant loss undermines efficiency and can harm performance. The condensate drainage system should be free of blockages to prevent water damage and ensure proper humidity control. Thermostat sensors and control boards require occasional verification to ensure the system responds accurately to setpoints. Regular inspection of ductwork, connections, and electrical components helps catch wear before it causes a fault. Maintaining these parts keeps the system balanced, reduces energy waste, and supports consistent comfort.
Seasonal and monthly maintenance calendar
A practical maintenance rhythm keeps a heat pump in top condition without overwhelming you. Monthly tasks focus on basic checks you can perform quickly: inspect and replace air filters if visibly dirty, wipe down accessible surfaces, and ensure outdoor clearance around the unit is free from obstructions. Quarterly checks expand to coil cleanliness, condensate pan and drain line inspection, and thermostat calibration. Biannual attention should cover more thorough coil cleaning (outdoor unit, using gentle methods), fan blade condition, and electrical terminal cleaning to prevent corrosion. Yearly service by a licensed technician typically includes refrigerant pressure tests, electrical contact checks, and overall system diagnostics. Climate and usage patterns may require adjustments; for dusty environments or extreme heat or cold, more frequent attention is advised. Keeping a simple calendar or reminder system helps ensure nothing slips through the cracks and your maintenance never becomes a last-minute emergency.
Cleaning and airflow optimization
Clean air and clear airflow are essential for efficient heat pump operation. Start by turning off power at the service disconnect and removing the air filter. Replace with a new filter of the correct size and type, ensuring a snug fit. For the outdoor unit, remove loose debris around the grille—ideally at least 2-3 feet of clearance. Use a soft brush or a low-pressure stream of water to remove dirt from the condenser coils; never use a high-pressure washer that could bend fins. Wipe down accessible fan blades and dust buildup on interior fans with a microfiber cloth. If you notice restricted airflow from vents, inspect ductwork for blockages and seal any gaps to prevent air loss. Maintaining clean filters and clear ducts improves indoor air quality and helps the system reach the desired temperature faster, reducing energy consumption over time.
Detecting and preventing common issues
Some maintenance concerns are easy to address before they become service calls. Watch for unusual noises such as rattling or grinding, which may indicate loose components or a failing fan. Ice forming on outdoor coils during cold weather can signal airflow issues or thermostat problems; thawing should occur naturally when temperatures rise, but persistent icing warrants professional inspection. Sticky or discolored condensate drainage is a sign of blockages or improper slope; clear the line if safe to access and ensure the drain pan remains dry. Elevated energy bills without changes in usage can indicate airflow restrictions or inefficient components, prompting a filter change or coil cleaning. Leaks or hissing sounds around refrigerant lines should never be ignored; refrigerant work requires licensed technicians due to safety and environmental regulations. Regular visual inspections, combined with routine cleaning, help identify issues early and reduce the risk of major failures.
DIY tasks vs. professional service
Many maintenance tasks are homeowner-friendly, such as filter replacement, basic coil cleaning, and checking thermostat settings. Simple, non-invasive actions can improve performance and comfort with minimal risk. However, tasks involving refrigerant, electrical components beyond accessible panels, or potential gas leaks must be handled by a licensed technician. If you observe signs of a refrigerant leak, unusual electrical smells, or a sudden drop in heating or cooling efficiency, schedule a professional service promptly. For complex diagnostics or refrigerant recovery, trust a certified technician to ensure safety, compliance, and optimal performance. Establishing a routine of DIY upkeep paired with annual professional checks provides a balanced approach that protects your investment and preserves system reliability.
How to document maintenance for records
Keeping thorough records helps track what has been done and when. Maintain a maintenance log that includes dates, tasks performed, parts replaced, and any professional service notes. Attach receipts or service reports to your records for reference. Digital copies are convenient and searchable, but keep physical copies if possible as a backup. Note seasonal adjustments, unusual observations, and filter model numbers to make future maintenance faster. Regular documentation supports warranty requirements, makes it easier to plan replacements, and provides a clear history for property managers or new homeowners. Heatpump Smart suggests maintaining consistent documentation to simplify future service scheduling and diagnostics.
Tips for prolonging equipment life
Consistency is key when it comes to heat pump maintenance. Stick to a predictable schedule, set reminders, and use quality replacement parts. Prioritize clean airflow by keeping filters fresh and ducts unobstructed, as good airflow reduces compressor strain. Protect the outdoor unit from harsh conditions by maintaining clearance, shielding debris, and ensuring a solid base to prevent vibration. Address minor issues early before they escalate into costly repairs, and communicate any changes in performance to your service provider promptly. A proactive maintenance mindset improves reliability, comfort, and energy efficiency over the long term.
Preparing for service visits and scheduling
When arranging professional service, prepare a checklist to maximize the value of the visit. Gather your maintenance log, filter replacement records, any recent service reports, and notes on observed issues. Provide the technician with access to the indoor and outdoor units, clear the area around them, and list any unusual symptoms you’ve noticed. If your system is under warranty, review the terms to ensure the service complies with warranty requirements. After the visit, store the received documents with your maintenance records and update your calendar with the recommended follow-up schedule. Proactive preparation helps technicians diagnose quickly and reduces the overall time and cost of servicing.
Tools & Materials
- Replacement air filters(Have 1-2 spares of the correct size for each filter location)
- Screwdriver set(Phillips and flathead sizes for access panels)
- Soft brush or coil cleaning brush(For outdoor condenser coils)
- Garden hose with spray nozzle(Low-pressure spray; avoid direct jet on fins)
- Non-abrasive cleaning cloths(For careful surfaces and fans)
- Safety gloves and goggles(Personal protection for DIY tasks)
- Flashlight(Illumination to inspect connections)
- Drain pan and basic cleaner(Used if condensate drain path is obstructed)
- Multimeter or voltage tester(For basic electrical checks if comfortable)
- Thermometer or humidity meter(Optional for thermostat checks)
Steps
Estimated time: 60-120 minutes
- 1
Inspect and replace the air filter
Turn off the unit at the thermostat or service disconnect. Locate the air filter, remove it, and assess its condition. If dirty, replace with a filter of the same size and type; do not reuse a dirty filter. This improves airflow and efficiency.
Tip: Set a monthly reminder to check filters; typical residential systems need filter replacement every 1-3 months depending on usage and environment. - 2
Clean outdoor condenser coils
Power off the outdoor unit. Remove loose debris around the unit and gently brush the fins. Rinse coils with a low-pressure stream of water from the inside out to avoid pushing dirt further into the fins. Let dry before restoring power.
Tip: Use a wide spray pattern; avoid high pressure which can bend fins and reduce heat transfer. - 3
Check condensate drain and pan
Inspect the condensate drain line for clogs and ensure the pan is dry and free of standing water. Clear minor blockages with a flexible line or wet/dry vacuum from the accessible end. Reattach any loose hoses and wipe away residue.
Tip: A blocked drain can cause water damage and mold growth; address promptly if you notice slow drainage or overflow. - 4
Inspect refrigerant lines and seals
Look for obvious signs of wear, frost, or oil staining along refrigerant lines and at connection points. Do not attempt refrigerant work yourself; any suspect leak requires a licensed technician. Note any changes in cooling or heating performance.
Tip: If you see frost on lines, turn off the unit and contact a professional to avoid compressor damage. - 5
Test thermostat and controls
Verify that the thermostat responds accurately to setpoints and that the system turns on/off promptly. Calibrate or adjust if necessary, and check that programmable features operate correctly. A misread thermostat can waste energy and undermine comfort.
Tip: If you have a Wi‑Fi or smart thermostat, ensure it’s updated and syncing with the heat pump. - 6
Inspect electrical connections and safety
Safely inspect accessible wiring terminals and connectors for signs of wear or corrosion. If any connections look loose or burned, schedule a pro visit—do not tighten live electrical components. Check the service panel for tripped breakers related to the heat pump.
Tip: Never work on live electrical components beyond basic inspection; call a licensed technician for electrical issues. - 7
Schedule professional inspection
Arrange a yearly professional inspection to verify refrigerant integrity, system pressures, and overall refrigeration performance. A tune-up typically covers lubrication, motor operation checks, and system diagnostics not easily done by homeowners.
Tip: Coordinate visits with seasonal changes to ensure peak performance during winter and summer months. - 8
Document maintenance activities
Record dates, tasks completed, part replacements, and any notes from professional visits. Keeping a log helps with warranty compliance, future diagnostics, and efficient service planning.
Tip: Store digital copies in the cloud and keep a printed sheet in your home maintenance binder.
Your Questions Answered
How often should I service my heat pump?
Most systems benefit from a professional service at least once a year. If you live in a dusty environment or have heavy usage, more frequent checks may be helpful. A combination of DIY monthly tasks and annual pro service keeps performance high.
Most heat pumps should be serviced at least once a year; more often if you’re in a dusty area or use the system a lot.
Can I clean the outdoor unit myself?
Yes, you can remove debris and lightly wash the exterior with a low-pressure spray. Avoid powerful jets that bend fins and never spray into electrical components. Maintain clearance around the unit.
Yes, but use a low-pressure spray and keep a safe distance from electrical parts.
What are the signs my heat pump needs maintenance?
Look for rising energy bills, uneven heating or cooling, strange noises, ice buildup on outdoor coils, or reduced airflow. If you notice these signs, perform a DIY check and schedule a professional inspection if problems persist.
Look for noise, ice on coils, poor airflow, or higher energy bills, and schedule a check if issues continue.
Is it safe to work on electrical components?
Only perform tasks that involve non-live components and basic inspections. If you suspect wiring issues or burning smells, shut off power at the panel and call a licensed technician immediately.
Only handle non-live parts; shut off power and call a pro if you suspect electrical problems.
How long does a professional maintenance visit take?
Most professional checks take between 60 and 120 minutes depending on system complexity and tests performed. Expect a short commute time plus the on-site service.
Typically about one to two hours on-site.
Does maintenance affect warranty?
Many manufacturers require annual service to keep warranty valid. Review your specific terms to ensure that DIY maintenance does not void coverage.
Annual service is often required for warranty; check your terms.
Watch Video
Top Takeaways
- Establish a regular maintenance rhythm to protect efficiency.
- Prioritize clean filters, clear airflow, and drain integrity.
- Know which tasks you can DIY and when to call a pro.
- Document all maintenance for warranty and future service.