How to Clean Heat Pump Coils: A Complete Step-by-Step Guide
Learn how to safely clean heat pump coils to restore efficiency, reduce running costs, and prolong system life. This guide covers outdoor and indoor coils, safety, tools, step-by-step methods, maintenance tips, and when to call a pro.

In this guide you will learn how to clean heat pump coils safely and effectively. We cover why coil cleanliness matters, what tools you need, and a clear step-by-step cleaning process for both outdoor condenser coils and indoor evaporator coils. You'll also find safety precautions, troubleshooting tips, and maintenance routines to keep your system running efficiently. By following these steps, you’ll improve heat transfer, airflow, and overall performance of your heat pump.
Why clean heat pump coils matter
Dirty coils impede heat transfer, raise air resistance, and force the system to work harder to deliver the same level of comfort. Over time, this can translate to higher energy bills, reduced cooling or heating performance, and more frequent cycling. For homeowners, builders, and property managers, keeping coils clean is a practical way to sustain comfort, extend equipment life, and avoid premature replacements. According to Heatpump Smart, regular attention to coil cleanliness helps maintain peak system efficiency and can lower running costs by reducing unnecessary runtime. When you hear the fan running longer or notice longer cycles to reach setpoints, dirty coils are often the culprit. This guide emphasizes the importance of clean heat pump coils and provides proven methods suitable for both outdoor condenser coils and indoor evaporator coils.
In most homes, outdoor condenser coils collect dust, leaves, and pollen, while indoor evaporator coils accumulate dust and humidity-related residue. The result is reduced airflow and a drop in heat transfer efficiency. Keeping coils clean supports better refrigerant performance, stabilizes temperatures, and minimizes frost formation in colder months. While it may seem simple, effective coil cleaning requires attention to safety, proper cleaners, and correct techniques to prevent damage to fins or electrical components. Heatpump Smart's guidance balances effectiveness with care for your equipment and your safety.
Identify coil types and access points
Heat pump systems have two primary coil types that require attention: outdoor condenser coils and indoor evaporator coils. Outdoor coils are part of the condenser unit located outside the home; they are exposed to weather, debris, and seasonal dirt. Indoor coils live within the air handling unit or furnace cabinet and can be harder to access, especially in tight mechanical rooms. Access points include the outdoor service panels on the condenser and the access panel on the air handler or furnace where the evaporator coil sits. Before starting, review the user manual for access instructions and any cautions about refrigerant and electrical components. If you encounter refrigerant lines, sealed connections, or uncertainty about the panel boundaries, plan to contact a licensed technician. The goal is to safely remove debris and gently clean coils without disturbing delicate fins or electrical parts.
Understanding coil placement helps you tailor your cleaning approach. Outdoor coils benefit from leaf removal and gentle brushing, followed by a light rinse. Indoor coils benefit from careful dust removal and targeted cleaning to avoid wetting electrical components. When done correctly, you’ll minimize resistance to airflow and enhance heat exchangers’ performance while reducing the probability of frost or icing on the coil surfaces.
Safety first: electrical, refrigerant, and water safety
Safety is non-negotiable when cleaning heat pump coils. Always begin by powering down the entire system: switch off at the thermostat and disconnect the outdoor unit’s power at the service disconnect or breaker. If you suspect refrigerant handling or any refrigerant-related service is needed, do not attempt it yourself—refrigerant work must be performed by a licensed technician. Wear appropriate PPE: chemical-resistant gloves, safety glasses, and a long-sleeve shirt. Keep water away from electrical components and control boxes; never spray directly into electrical panels. If your outdoor unit sits on a raised platform, use a stable ladder or stand and ensure the area is dry before climbing. Finally, avoid using harsh solvents or bleach-based cleaners that can damage coil surfaces or metal fins.
Lockout-tagout basics apply: ensure the system cannot restart while you’re working, and keep pets and children away from the work area. With power secured, you’ll be better protected against shocks, accidental starts, and water intrusion. By following these safety steps, you set the stage for a safe and effective cleaning process that protects your equipment and your household.
Cleaning methods overview: chemical cleaners vs low-pressure rinses
There are two primary approaches to coil cleaning: chemical cleaners and low-pressure rinses. Coil-safe, biodegradable foaming cleaners are designed to cling to coil surfaces and emulsify dust and grime without harsh scrubbing. For stubborn grime, a non-abrasive brush can help lift debris without bending fins. If you choose water-based cleaning, use a garden hose with a gentle spray setting rather than a high-pressure nozzle, which can bend fins and cause damage. Bleach or ammonia-based cleaners should be avoided on coils, especially near electrical components, as harsh chemicals can degrade fin material and seals. In all cases, follow the cleaner’s label instructions and test a small area first. When rinsing outdoors, direct the spray away from the house and foundation to prevent runoff from affecting landscaping or drainage.
For indoor evaporator coils, avoid saturating any control boards or electrical components. If in doubt, use a minimal amount of cleaner and a damp cloth to wipe the coil fins rather than soaking the coil. The goal is to remove dust, mold, and grime while preserving coil geometry and heat transfer efficiency. Heatpump Smart emphasizes choosing cleaning methods that align with your system’s design and your comfort with DIY maintenance.
Outdoor condenser coils: how to clean safely
Outdoor condenser coils face the most exposure to the elements, but they’re also the easiest to access for cleaning. Start by turning the system off and removing large debris such as leaves and twigs from the surround. Use a soft brush or a coil brush to loosen dirt from the fins, working from the outside toward the center. Apply a coil-safe cleaner to the fins and allow it to foam and dwell for the recommended time. Use a low-pressure spray to rinse the cleaner away, ensuring the water flows down and away from the electrical components and the base of the unit. If you see bent fins, a fin comb can restore alignment carefully without harming the coil. Dry the surface with a clean cloth or allow it to air dry before re-energizing the system. Regular outdoor coil cleaning reduces heat transfer resistance and helps maintain efficient operation.
As you clean, monitor for any signs of wear or damage, such as corroded fins or leaks. If you notice persistent icing, unusual sounds, or decreased performance after cleaning, consider scheduling a professional assessment. A well-maintained outdoor coil system can contribute significantly to overall heat pump efficiency and reliability.
Indoor evaporator coil cleaning: challenge and approach
Indoor evaporator coils sit inside the air handling unit, often behind access panels. Cleaning them requires extra care to protect the blower, wiring, and control components. Begin by turning off the power and removing the access panel to inspect the evaporator coil. Gently vacuum loose dust with a brush attachment, then use a soft brush to loosen embedded grime. Apply a coil-safe cleaner sparingly, allowing it to dwell for the recommended time. Avoid applying excessive liquid, as moisture near electrical components can cause damage. Rinse by wiping with a damp cloth or a light spray from a spray bottle; never soak the coil or reach into the cabinet with water.
Dry thoroughly before reassembling panels and restoring power. If the indoor coil is heavily soiled or you notice mold growth or refrigerant line condensation, stop and contact a licensed HVAC technician. Indoor coil cleaning can improve air quality and efficiency, but improper cleaning or moisture intrusion can create more problems than it solves.
Drying, reassembly, and test run
After cleaning, ensure all coil surfaces are completely dry before reassembling covers and panels. Check for any remaining moisture on electrical connections and wipe dry as needed. Reconnect service panels securely, turn the thermostat back on, and run the system through a normal cycle to verify proper operation. Listen for unusual noises and check for proper airflow from supply registers. If you observe reduced airflow, icing, or erratic cycling after cleaning, pause and revisit the coil surfaces for missed debris or bent fins. Keeping these steps in mind helps ensure a safe return to normal operation and confirms that cleaning has restored better heat transfer and efficiency. A successful test run often confirms the value of clean heat pump coils in maintaining system performance.
Common mistakes and troubleshooting
Even experienced homeowners make mistakes when cleaning coils. Avoid using high-pressure water on fins, which can bend the delicate aluminum rows and impede airflow. Do not spray cleaners onto electrical components or into the control panel. Bleach-based products and abrasive scrubbers should be avoided to protect coil integrity and seals. If you encounter persistent icing, frost, or poor performance after cleaning, reassess the cleaning technique, check for debris lodged in the coil, and verify that the refrigerant circuit is intact. In some cases, the issue may lie with ductwork, thermostat calibration, or a failing fan motor rather than dirty coils. Heatpump Smart recommends a cautious approach and knowing when to call a pro for refrigerant or electrical concerns. Troubleshooting beyond coil cleaning ensures your system operates safely and efficiently.
Maintenance scheduling and long-term care
To maximize the benefits of cleaning heat pump coils, establish a proactive maintenance schedule. Depending on your climate, home layout, and allergy or dust exposure, outdoor coil cleaning might be needed seasonally or biannually, while indoor coil cleaning could be part of a yearly preventative maintenance routine. Document cleaning dates and observed coil conditions to track changes over time. Regular maintenance also includes changing or cleaning air filters, resealing ductwork if needed, and scheduling professional inspections to verify refrigerant charge and overall system health. By treating coil cleaning as a routine, you’ll sustain energy efficiency, improve comfort, and extend the life of your heat pump.
Final note: when to call Heatpump Smart experts
While many homeowners can safely perform basic coil cleaning with the right precautions and cleaners, some scenarios require professional attention. If you notice refrigerant smells, oil leaks, refrigerant lines sweating excessively, or any difficulty restoring proper operation after cleaning, contact a licensed HVAC professional. Heatpump Smart's team can assess refrigerant circuits, electrical connections, and overall system health to ensure safe, reliable performance. Regular professional checkups complement DIY coil maintenance and help protect your investment in efficient home climate control.
Tools & Materials
- Safety gear (gloves, safety glasses, long sleeves)(ANSI-rated goggles; chemical-resistant gloves)
- Non-metallic coil brush(soft bristles to avoid fin damage)
- Soft microfiber cloths(for gentle wipe-downs)
- Garden hose with spray nozzle(use gentle setting; avoid high pressure)
- Biodegradable coil cleaner(follow label directions)
- Fin comb(for straightening bent fins if needed)
- Bucket(for rinsing or mixing cleaners)
- Ladder or stable platform(to reach outdoor unit safely)
- Masking tape or protective covers(protect electrical areas during cleaning)
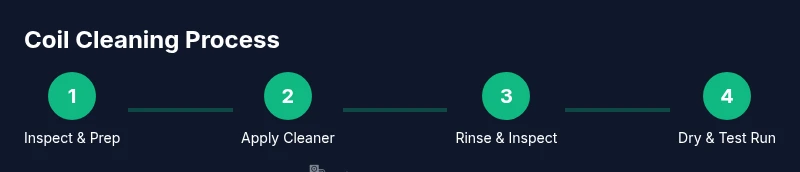
Steps
Estimated time: 60-90 minutes
- 1
Power down and secure the system
Turn off the thermostat and disconnect the outdoor unit at the service disconnect or breaker. This prevents accidental starts and reduces the risk of electrical shock while you work.
Tip: Double-check with a non-contact voltage tester before touching any wires. - 2
Inspect access points and plan the approach
Open the outdoor condenser panel and the indoor air handler access panel if needed. Look for loose wiring, obvious damage, or heavy debris that might block airflow. Plan to clean from the outside in to avoid pushing dirt inward.
Tip: Take a quick photo to reference panel placement when reassembling. - 3
Remove loose debris and loose dirt
Gently remove leaves, dirt, and twigs from the outdoor coil with a soft brush or gloved hand. Avoid metal tools that could bend fins. Clearing debris improves airflow and sets the stage for effective cleaning.
Tip: Do not force debris through the fins; work with light strokes. - 4
Apply coil cleaner and dwell
Apply a biodegradable coil cleaner to the outdoor coil following the product directions. Allow it to dwell for the recommended time to loosen grime, avoiding contact with electrical components.
Tip: Test a small area first to ensure no adverse reaction with the finish. - 5
Rinse with low-pressure water
Rinse the outdoor coil with a gentle, angled spray to avoid bending fins. Move across the coil in a consistent pattern to wash away cleaner and loosened debris without soaking electrical components.
Tip: Keep water directed away from the base and any wiring. - 6
Clean indoor evaporator coil carefully
If accessible, use a vacuum with a soft brush attachment to remove dust from the indoor evaporator coil. Lightly brush stubborn grime, then apply a coil-safe cleaner and wipe with a damp cloth rather than soaking the coil.
Tip: Protect the blower wheel and wiring; avoid excessive moisture near control boards. - 7
Rinse indoor components without over-wetting
Use a damp cloth or minimal spray to wipe the indoor coil area, ensuring you don’t saturate adjacent components. Let surfaces dry thoroughly before reassembly.
Tip: Never spray directly into electrical housings. - 8
Reassemble panels and inspect
Carefully reattach access panels and ensure seals are intact. Confirm there are no loose screws or wires and that the area is free of moisture before powering up.
Tip: Check for straightened fins and clear airflow paths. - 9
Test run and assess performance
Restore power and run a normal cycle. Listen for unusual noises and check for steady airflow at registers. If performance remains poor, consider a professional inspection.
Tip: Document the maintenance date and any performance notes for future care.
Your Questions Answered
How often should I clean heat pump coils?
Most systems benefit from an annual coil cleaning, with more frequent cleaning in dusty or pollen-heavy environments. Regular cleaning helps maintain efficiency and prolongs coil life.
An annual coil cleaning is usually enough, but dusty areas may need more frequent attention.
Can I use household cleaners on coils?
Use cleaners specifically designed for coils and follow label directions. Avoid bleach or ammonia-based cleaners near electrical components to prevent damage.
Only use coil-safe cleaners; avoid bleach and strong chemicals near electrical parts.
Will cleaning coils improve efficiency?
Yes. Clean coils improve heat transfer and airflow, reducing the system's workload and helping maintain comfortable temperatures.
Clean coils help heat transfer and can reduce energy use.
Is it safe to spray water into the indoor coil?
Be cautious. Do not saturate the indoor coil or electrical components; use a damp cloth and minimal spray where appropriate.
Be careful not to soak the indoor coil or electrical parts.
When should I call a professional?
If you notice refrigerant smells, leaks, or recurring performance problems after cleaning, contact a licensed HVAC technician.
Call a licensed tech if you smell refrigerant or see leaks, or if performance remains poor after cleaning.
What is the best time of year to clean coils?
Cool, dry days are ideal. Avoid cleaning during rain or when surfaces are wet to reduce slip hazards and moisture risks.
Clean during dry, cool weather for safety and effectiveness.
Watch Video
Top Takeaways
- Inspect both outdoor and indoor coils for cleanliness and accessibility
- Use coil-safe cleaners and avoid aggressive methods near electrical components
- Dry thoroughly before powering the system back up to prevent moisture damage
- Maintain a yearly schedule and log maintenance activities for reliability
- Know when to call a professional for refrigerant or electrical issues