How to Clean a Heat Pump NZ: A Homeowner's Guide Tips
Learn how to safely clean a heat pump in NZ, including indoor and outdoor unit care, maintenance frequency, and pro tips from Heatpump Smart for energy savings and long-term performance.

Cleaning a heat pump NZ is a straightforward, safety-conscious DIY task that improves efficiency and prolongs unit life. Start by unplugging power, then cleaning or replacing the indoor filter and gently brushing the evaporator coils. Clean the outdoor coil with a low-pressure rinse and clear surrounding debris. Follow manufacturer guidelines and Heatpump Smart’s best practices for NZ conditions.
Why cleaning a heat pump NZ matters
Regular cleaning of a heat pump NZ isn't just about keeping things tidy; it directly affects efficiency, comfort, and running costs in households across New Zealand. In our climate, dust, pollen, and humidity can vary with the seasons, so keeping filters and coils clear helps the system move heat more effectively and with less energy. The Heatpump Smart team notes that dirty components force the compressor to work harder, increasing wear and electricity use. By cleaning the indoor filter, evaporator coils, condensate pan, and surrounding areas, you can maintain airflow and prevent frost in winter or performance drops in summer. This matters for homes with open-plan layouts or heavy usage, where airflow bottlenecks can become noticeable quickly. In addition to energy savings, regular cleaning reduces allergen buildup and can extend the life of your heat pump. For homeowners and property managers, a simple cleaning routine can ward off costly repairs and downtime during peak seasons. Heatpump Smart analysis shows that sticking to a twice-yearly cleaning routine aligns with best practices across climate zones in New Zealand. Always consult your model's manual and your local installer if you notice unusual noises or reduced heating performance. If you're wondering how to clean a heat pump nz, start with safety and basic filter care before tackling coils and outdoor components.
Tools & Materials
- Vacuum cleaner with brush attachment(Use low-suction to avoid damaging fins; optional nozzle for tight spaces)
- Soft brush or microfiber cloth(Gentle on fins and coils; avoid abrasive brushes)
- Mild coil-cleaning spray or solution(Follow label directions; avoid caustic chemicals)
- Mild soap and water(For exterior surfaces and filters; rinse and dry thoroughly)
- Microfiber cloths(Drying and wiping; keep lint out of coils)
- Gloves(Optional for skin protection and grip)
- Screwdriver (if panel screws exist)(Only for models with screw-fastened panels)
- Ladder or stable step stool(For outdoor unit access; ensure stable footing)
- Bucket of water(Rinsing filters; avoid submerging electrical components)
Steps
Estimated time: 60-90 minutes
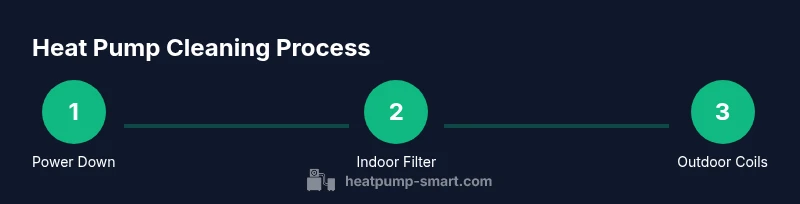
- 1
Power down and safety check
Shut off power at the main disconnect or circuit breaker and unplug the unit if accessible. Confirm that no residual power can flow to the system and wait 60 seconds for capacitors to discharge before touching any components.
Tip: Never work on energized equipment; use a voltage tester if unsure. - 2
Access the indoor air filter
Open the indoor access panel and locate the air filter. Remove it carefully without bending the frame, noting its orientation for reinstallation.
Tip: Take a quick photo to ensure correct reorientation when you reinstall. - 3
Clean or replace the indoor filter
If the filter is reusable, rinse with lukewarm water and a mild soap; allow to dry completely before reinstalling. If it’s worn or damaged, replace it with the same size and type.
Tip: Drying time matters—reinstall only when fully dry to avoid mold. - 4
Clean evaporator coil and blower housing
Gently vacuum the evaporator coil surfaces and wipe the blower housing with a microfiber cloth. Use a soft brush to dislodge stubborn dust without bending coil fins.
Tip: Work from the center outward to avoid redepositing dust into the coil. - 5
Inspect condensate drain and tray
Check that the condensate drain line is clear and the tray is free of standing water or algae. Clean as needed with mild soap and water, ensuring proper drainage.
Tip: A blocked drain can cause moisture issues and mold growth. - 6
Prepare the outdoor unit and surroundings
Clear leaves, sticks, and debris from the outdoor unit and ensure at least 1 meter of clearance around it. Trim nearby vegetation if needed to maintain airflow.
Tip: Keep the area dry and stable; hazards increase with wet surfaces. - 7
Clean outdoor condenser coils
Using a low-pressure spray or coil cleaner, gently rinse the outdoor coils from the inside of the fins outward. Avoid high-pressure water that can bend fins.
Tip: Always follow the product directions and never spray into electrical components. - 8
Reassemble, power up, and test
Reinstall the indoor filter and panel, restore power, and run a quick self-check. Listen for unusual noises and monitor airflow and heating performance over the next 24–48 hours.
Tip: If performance seems off, consult a licensed technician rather than forcing a DIY fix.
Your Questions Answered
Should I hire a pro to clean my heat pump?
Basic cleaning can be DIY if you follow safety steps and model guidelines. Complex tasks like electrical testing or refrigerant-related issues should be handled by a licensed technician.
You can do simple cleaning yourself, but call a pro for more advanced tasks.
How often should I clean a heat pump NZ?
A good baseline is every 3–6 months, increasing frequency with dust, pollen, or heavy usage. In damp climates, more frequent checks help prevent mold.
Every few months, or more often if dust is a constant issue.
Can I use household cleaners on filters?
Use mild soap and water for reusable filters. Avoid bleach, ammonia, or strong solvents that can degrade filter media.
Stick with mild soap and water; avoid harsh chemicals.
Is it safe to spray water on the outdoor unit?
Light rinsing from the inside out is fine, but avoid high-pressure spray that can bend fins or force water into electrical components.
Yes, but keep the spray gentle and controlled.
What if fins are bent after cleaning?
Bent fins reduce airflow and efficiency. Use a fin comb or contact a technician to straighten them if needed.
Bent fins may require professional straightening.
What should I do if the heat pump smells after cleaning?
Investigate for mold, damp insulation, or standing water in condensate trays. If smell persists, consult a pro to identify the source.
A persistent smell usually means a moisture or mold issue—get it checked.
Watch Video
Top Takeaways
- Power off before starting any cleaning task
- Clean or replace indoor filters regularly
- Use gentle methods on fins to avoid damage
- Outdoor unit needs clear space and careful rinsing
- Test operation after cleaning and monitor performance