How to Clean a Heat Pump Outside Unit
Learn safe, step-by-step methods to clean your outdoor heat pump unit, improve efficiency, and extend its life. Practical tips, tools, and maintenance routines from Heatpump Smart.

Cleaning the outside heat pump unit is essential for efficiency and longevity. This guide teaches you how to safely remove debris, check fins, and protect the coil from damage. Whether you’re a homeowner, builder, or property manager, a clean outdoor unit reduces energy use and improves performance over the season. Heatpump Smart emphasizes safe practices.
Why cleaning the outside unit matters
Keeping the outdoor heat pump unit clean is essential for optimal performance and energy efficiency. Debris such as leaves, pollen, and dust can restrict airflow, causing the condenser coil to work harder and consume more electricity. Over time, this strain can shorten the unit's lifespan and increase maintenance costs. For homeowners, property managers, and builders, a regular exterior cleaning is a simple, low-cost part of a broader maintenance plan. Heatpump Smart's approach emphasizes safety and efficiency: a clean outdoor unit improves heat transfer, reduces noise from such components, and helps the system reach the desired indoor temperature more quickly. In many climates, spring and fall bring higher debris loads, making a seasonal cleaning especially valuable. By establishing a routine that includes visualization checks for bent fins, corrosion at the base, and clear surrounding airflow, you set the stage for reliable heating and cooling when you need it most.
Safety first: plan and prepare
Electrical safety is the top priority when working near an outdoor heat pump. Always shut off power at the service disconnect and verify it with a non-contact tester before touching any component. If you’re renting or sharing a building, inform building maintenance and ensure contractors are certified. Wear eye protection and gloves to guard against sharp fins and metal edges. Move any nearby plants or vehicles away from the unit, and ensure children and pets stay clear during cleaning. If you suspect refrigerant or electrical faults, do not attempt DIY repairs—call a licensed HVAC technician.
Tools and materials for a safe, effective clean
A practical kit makes the job smoother and safer. Required items include: garden hose with a spray nozzle; mild cleaning solution or coil cleaner; soft brush; plastic fin comb; safety goggles and gloves; a sturdy ladder or stable platform; a non-metallic scrub pad; and a dry cloth for debinding moisture. Optional but helpful items are a utility knife for clearing jams and a spray bottle for precise application. Having these at hand reduces interruptions and helps you finish within the planned time. Heatpump Smart recommends using a low-pressure rinse rather than a power washer to avoid damaging fins.
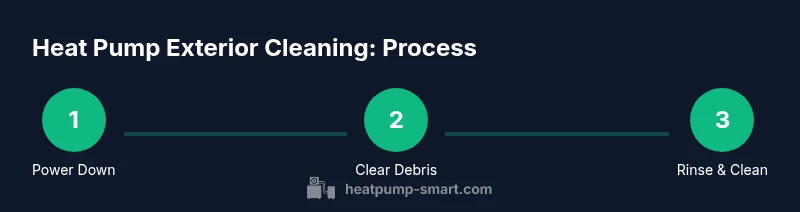
Cleaning overview: how the steps fit together
The cleaning process unfolds in a logical sequence: 1) safely power down and prep the area; 2) clear loose debris and soil from around the unit; 3) gently rinse the exterior and coil surfaces; 4) apply cleaning solution to the coils and let it dwell briefly; 5) carefully brush fins and straighten any bent sections; 6) rinse again until no residue remains; 7) inspect for damage and reassemble protective screens; 8) power up and monitor performance. This structure minimizes the risk of water intrusion and protects the electrical components while maximizing heat transfer. Throughout, maintain steady, low-pressure water and avoid blasting jets directly at coil fins.
Fin care: keep the coil fins open and effective
Coil fins are delicate. A strong blast of water or a stiff brush can bend or crimp them, reducing airflow and efficiency. Use a low-pressure spray and, if fins are bent, a plastic fin comb to restore alignment. Do not scrub aggressively; work from the outer edges inward to prevent further distortion. If you encounter heavy debris such as sap, resin, or dried pollen, apply a mild solvent recommended by coil cleaners and let it sit according to the label, then rinse. After cleaning, check that the condenser coil is exposed to unobstructed airflow and that nearby plants are pruned back to maintain adequate clearance (at least 12-24 inches around the unit in most climates).
Aftercare: inspection and safe reboot
Once the exterior is clean, recheck all connections and fasteners. Ensure the protective grille is secure and that the base is level. If there’s visible corrosion on the base or electrical box, address it promptly with weatherproof sealant or professional service. Before powering back up, wipe away moisture and ensure drainage paths are clear. Restore power at the disconnect and run the outdoor unit briefly to listen for unusual noises, vibrations, or cycling patterns. If anything sounds off, shut down and contact a licensed HVAC technician.
Seasonal timing and maintenance cadence
Most homeowners benefit from two exterior cleanings per year—once before the heating season and once after the cooling season. In regions with heavy pollen or leaf fall, an additional cleaning in spring or autumn can be helpful. Align exterior cleaning with other routine maintenance tasks such as refrigerant checks, air filter changes, and weatherization. Track your work in a log so you can see trends in energy use and performance. Heatpump Smart recommends documenting the date, what was cleaned, and any anomalies you noticed.
Common mistakes and how to avoid them
Avoid using high-pressure water that can bend fins or push water into electrical components. Do not use metal brushes, as they can gouge the coil. Never spray solvents near electrical connections or onto the control panel; instead, apply with a cloth. Always verify the unit is unplugged before cleaning and keep pets away. Finally, avoid cleaning during freezing temperatures or when ice is present, which can hide damage and increase slip risk.
Tools & Materials
- Safety gear: gloves and eye protection(ANSI-rated gloves; eye protection)
- Garden hose with spray nozzle(Adjustable spray; do not use a pressure washer)
- Soft brush or coil cleaning brush(Non-abrasive to fins)
- Fin comb or plastic card(To straighten bent fins)
- Mild cleaning solution or coil cleaner(Follow label directions; avoid caustic chemicals)
- Ladder or stable platform(Ensure solid footing; height to access upper sections)
- Non-metallic scrub pad(Gentle scrubbing on stubborn spots)
- Dry cloth or towels(Dry surfaces to prevent moisture ingress)
- Optional tools: utility knife, sealant(Only if you inspect and need minor repairs)
Steps
Estimated time: 30-45 minutes
- 1
Power down and secure the area
Begin by switching off power at the outdoor disconnect. Use a non-contact tester to confirm there is no voltage present at the unit before touching anything. This protects you from electrical shock and prevents damage to internal components.
Tip: If you’re unsure about the disconnect location, consult the unit’s manual or your electrician. - 2
Clear debris and establish a workspace
Remove leaves, twigs, and mulch from around the base of the unit. Trim plants back to maintain at least 12 inches of clearance on all sides. A clear space improves airflow and reduces the chance of recontamination during cleaning.
Tip: Do not block drainage or create a windy tunnel around the cabinet with loose debris. - 3
Rinse the exterior with low-pressure water
Attach a spray nozzle to your garden hose and gently rinse the exterior surfaces, avoiding direct spraying at electrical components. Keep the nozzle at a moderate distance to prevent bending fins or forcing water into the cabinet.
Tip: Never use a high-pressure spray; it can deform fins and push water into safety-critical areas. - 4
Apply coil cleaner and let it dwell
Apply a coil cleaner or mild cleaning solution to the condenser coils according to the product label. Allow it to dwell for the recommended time to loosen grime before rinsing.
Tip: Test a small area first to ensure the cleaner won’t discolor or corrode nearby materials. - 5
Gently brush and straighten fins
Use a soft brush to dislodge stubborn dirt without bending fins. If fins appear bent, run a plastic fin comb along the direction of airflow to restore alignment.
Tip: Work from the outer edges toward the center to prevent creating new bends. - 6
Rinse thoroughly and inspect
Rinse until no cleaner residue remains. Inspect the coil for remaining debris, check for bent fins, and ensure airflow is unobstructed. Wipe dry any moisture that can trap dirt.
Tip: If you see corrosion, consider sealing or professional maintenance rather than DIY fixes. - 7
Reconnect power and test
Reinstall the service disconnect cover and restore power. Run the unit for a short cycle to listen for unusual noises or unusual cycling. If anything seems off, shut down and contact a licensed HVAC technician.
Tip: Document the date and any observations to track performance over time.
Your Questions Answered
Can I use a pressure washer to clean the outside unit?
No. A pressure washer can bend the delicate fins and force water into electrical components. Use a garden hose with a spray nozzle and low pressure instead.
No, avoid pressure washers. They can bend fins and push water into the electrical parts. Use a garden hose with a gentle spray instead.
How often should I clean the outdoor unit?
Clean the outdoor unit at least twice a year, aligning with the heating and cooling seasons. In areas with heavy pollen or leaf fall, consider a seasonal cleanup.
Aim for two cleanings a year, once before heating season and once after cooling season, plus an extra cleaning if you have heavy pollen or leaves nearby.
Do I need to turn off the system completely during cleaning?
Yes. Shut off power at the service disconnect and verify with a tester before you touch any component.
Yes. Power off at the disconnect and confirm there’s no voltage before you start cleaning.
Can I use household soap on the coils?
A mild cleaning solution is acceptable if labeled for coils. Avoid harsh solvents and never mix cleaners that could leave harmful residues.
You can use a mild coil-safe cleaner if labeled for that use; avoid harsh solvents.
What should I do if I find damaged fins?
If fins are bent or damaged, use a plastic fin comb to straighten them. If damage is extensive, call a professional.
Straighten mild bends with a plastic fin comb; call a pro if damage is extensive.
Will cleaning improve efficiency immediately?
Cleaning can improve airflow and heat transfer, which often improves efficiency and cooling/heating performance over time.
Cleaning helps airflow and performance, often noticeable over the season.
Watch Video
Top Takeaways
- Power off before starting to clean.
- Use low-pressure water and non-abrasive tools.
- Keep at least 12 inches of clearance around the unit.
- Regular maintenance extends efficiency and life.