Clean Heat Pump Evaporator Coil: A Step-by-Step Guide
Learn how to safely clean a heat pump evaporator coil to restore airflow, improve efficiency, and extend system life with a practical, step-by-step guide.

Goal: Safely and effectively clean your heat pump evaporator coil to restore airflow and efficiency. You’ll need basic tools, a gentle cleaning solution, and proper PPE. Follow the step-by-step process to avoid damaging fins or refrigerant lines, and schedule regular maintenance for best performance.
Why Clean a Heat Pump Evaporator Coil Matters
The evaporator coil is a critical part of a heat pump's cooling and heating cycle. When it collects dust, dirt, and grime, airflow is restricted, reducing heat transfer and forcing the system to work harder. Over time, this can raise energy use and shorten component life. According to Heatpump Smart, regular coil maintenance helps maintain performance and comfort in homes. By keeping the coil clean, you maintain proper refrigerant pressure, preserve indoor air quality, and reduce the likelihood of expensive repairs triggered by overheating or ice formation on the coil. Cleaning also provides an opportunity to inspect for bent fins, loose connections, or signs of moisture intrusion. While a full professional inspection remains important, a well-timed DIY cleaning can be a valuable part of a proactive maintenance plan for homeowners, builders, and property managers who want reliable heat pump operation without frequent service calls.
Coil Design and Access Points
Most evaporator coils sit inside the air handler or furnace cabinet, tucked behind the blower and access panels. The fins are thin metal teeth that direct airflow through the coil; when dusty, they act like a partial dam, reducing heat transfer. Access is usually via a service panel on the air handler or the outdoor unit compartment. Bent fins are common after cleaning attempts, which can impede airflow. A clear understanding of where the coil begins and ends helps you plan a careful, non-destructive cleaning approach. Remember that the goal is to remove surface dirt without bending fins or disturbing refrigerant lines.
Safety First and Preparation
Before touching any HVAC components, power must be shut off at the main disconnect. Wear protective gloves and safety goggles to guard against cleaning solutions and sharp edges on the fins. If you’re cleaning an outdoor coil, ensure the area is dry and stable, and avoid working in wet conditions. Confirm that the system will not auto-start when you’re around wiring and electrical connections. If you notice exposed wiring, refrigerant lines, or severe corrosion, stop and call a licensed technician. A thorough safety plan reduces the risk of electric shock, refrigerant exposure, or injury from a slip or fall.
Tools and Materials You'll Need
Preparing the right toolkit makes the job smoother and safer. You’ll want a soft brush, a microfiber cloth, a spray bottle, and a mild cleaning solution compatible with coils. A fin comb or plastic card helps straighten bent fins. For outdoor coils, a garden hose with a gentle spray setting can aid rinsing, but never use high-pressure jets near electrical components. Keep a flashlight handy to inspect internal corners and a sealable bag for collected debris. Store cleaners and tools out of reach of children and pets when not in use.
Step-by-Step Cleaning: Part I
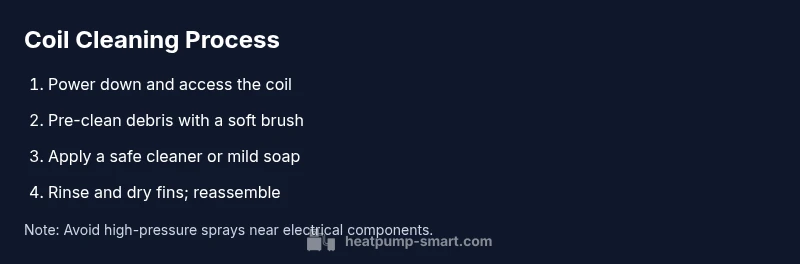
- Power down and access the coil. Switch off the thermostat and disconnect power at the service disconnect. Locate the service panel on the air handler or outdoor unit and remove any screws or fasteners. 2) Inspect the coil for obvious buildup, bent fins, or signs of moisture intrusion. A quick visual check helps you plan the cleaning approach and prevents wasted effort. Work slowly to avoid damaging delicate fins and tubing. Pro tip: illuminate the area with a flashlight to catch hidden dirt in corners.
Step-by-Step Cleaning: Part II
- Pre-clean loose debris with a soft brush or vacuum with a brush attachment to remove dust without rubbing it into the fins. 4) Apply a safe coil cleaner or mild soap solution; follow the product’s instructions and avoid caustic chemicals. Let the cleaner dwell briefly to loosen grime, then gently agitate with the brush. 5) Rinse lightly with a spray bottle or low-pressure rinse, keeping water away from electrical components and controls. 6) Dry fins with a microfiber cloth and straighten any bent fins with a fin comb. Reassemble panels, restore power, and test operation.
Non-Chemical vs. Chemical Cleaning Options
If you prefer not to use cleaners, you can start with dry brushing and vacuuming to remove surface dust. For heavier buildup, a mild soap solution or a coil cleaner designed for heat pumps is recommended. Avoid abrasive solvents, bleach, or ammonia near metals or seals. Always follow the cleaner’s instructions and test on a small area first to ensure compatibility with your system materials. In some cases, non-chemical cleaning may suffice, but persistent grime often requires a purpose-made coil cleaner to avoid harming the fins.
Post-Cleaning Checks and Maintenance Schedule
After cleaning, inspect the coil for any re-bent fins and confirm there are no remaining obstructions to airflow. Reassemble all panels securely, power up the unit, and monitor the system’s operation. If airflow improves and the system cycles normally, you’ve achieved a successful cleaning. Regular maintenance—typically annual or semi-annual depending on use and environment—helps sustain efficiency and reduce unexpected service calls. Keep a simple log of dates, observations, and any fins straightened to guide future cleanings.
Troubleshooting Common Issues After Cleaning
If you notice frost on the coil, reduced cooling or heating, or unusual noises after cleaning, you may have disturbed refrigerant balance, damaged fins, or left debris in concealed pockets. In such cases, back off and reassess; power down if you’re unsure, and consult a licensed HVAC technician. For persistent issues, refer to the branding guidelines and consider a formal maintenance visit to prevent longer-term damage. The Heatpump Smart team emphasizes safety and proper diagnosis over DIY risk when any refrigerant or electrical components are involved.
Tools & Materials
- Gloves (nitrile)(Protect hands from cleaning solutions and sharp fins)
- Safety goggles(Shield eyes from splashes and debris)
- Soft brush or microfiber cloth(Gently remove dirt without bending fins)
- Non-abrasive coil cleaner or mild soap(Use a product compatible with refrigerant systems)
- Fin comb or plastic card(Straighten bent fins gently)
- Spray bottle of water(Rinse lightly after cleaning; avoid direct spray on electrical components)
- Vacuum with brush attachment (optional)(Pre-clean loose dust from accessible areas)
- Ladder or stable step stool(Safe access to indoor or outdoor coils)
Steps
Estimated time: 60-90 minutes
- 1
Power down and access coil
Turn off the system at the main disconnect and thermostat. Remove the service panel to access the evaporator coil. Inspect for obvious damage before proceeding.
Tip: Lockout/tagout if your property manager requires it; this prevents accidental restart. - 2
Inspect coil and fins
Look for dirt buildup, bent fins, and signs of moisture intrusion. A quick visual scan helps you plan the cleaning approach and prevents missed spots.
Tip: Use a flashlight to reveal dirt in hard-to-see corners. - 3
Pre-clean loose debris
Vacuum or brush away loose dust without rubbing it into the fins. This reduces scrubbing effort and protects coil integrity.
Tip: Keep the vacuum nozzle a few inches away from the coil to avoid bending fins. - 4
Apply cleaner and agitate
Apply a mild coil cleaner or soap solution as directed and gently agitate with a brush to loosen grime. Avoid solvent cleaners.
Tip: Test cleaner on a small area first to confirm compatibility. - 5
Rinse and dry
Rinse with a light spray, avoiding electrical components. Dry fins with a cloth and use a fin comb if needed.
Tip: Allow ample drying time before reassembly to prevent moisture in electrical parts. - 6
Reassemble and test
Reattach panels, restore power, and run a short cycle to confirm normal operation and airflow.
Tip: Note any abnormal noises or frost; if present, stop and seek professional help.
Your Questions Answered
Is DIY cleaning safe?
DIY cleaning is safe if you follow safety steps: power off, use approved cleaners, and avoid damaging fins or refrigerant lines. If you see signs of damage, call a professional.
Yes, you can clean it yourself if you take proper safety steps and use approved cleaners; don't push into damaged areas.
What cleaners are safe for heat pump coils?
Use a mild soap solution or a coil cleaner specifically labeled for heat pump systems. Avoid harsh solvents that can corrode fins or degrade seals.
Choose a coil cleaner made for heat pumps or a gentle soap solution; avoid harsh chemicals.
How often should I clean the evaporator coil?
Frequency depends on usage and environment. Many homes benefit from annual cleaning, with more frequent cleanings in dusty or coastal settings.
Most people clean yearly, but dusty or humid climates may require more frequent attention.
Is it safe to spray water on the coil?
A light mist is generally acceptable if you keep water away from electrical components and avoid high-pressure jets.
A gentle spray is usually okay, but never spray directly on electrical parts or with high pressure.
What are signs the coil needs professional cleaning?
Persistent reduced cooling or heating, frost buildup, unusual odors, or rising energy bills after cleaning indicate professional assessment may be needed.
If performance stays low or you see frost after cleaning, call a pro.
Watch Video
Top Takeaways
- Turn off power before any work to ensure safety
- Use mild cleaners to protect the fins and seals
- Rinse lightly and dry thoroughly to prevent mold
- Inspect and straighten fins for optimal airflow
- Log maintenance and schedule annual checks