Heat Pump Cleaning: Step-by-Step Guide for Homeowners
Learn to safely clean your heat pump, boost efficiency, and extend lifespan with our step-by-step instructions, practical tips, and maintenance checklist.

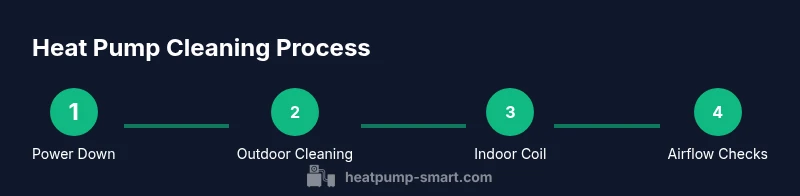
You’ll learn a safe, practical approach to heat pump cleaning that covers both outdoor coils and indoor components. Start by turning off power at the breaker, then use a soft brush, microfiber cloth, and a low-pressure spray to remove dust and debris from coils. Clean or replace filters, check the condensate drain, and test performance before finishing. This guide provides a clear, step-by-step path suitable for homeowners seeking energy efficiency and extended equipment life.
Why cleaning matters for heat pumps
Regular heat pump cleaning helps sustain performance, extend service life, and keep energy costs predictable. This guide focuses on practical steps you can take to keep both outdoor and indoor components in top shape. According to Heatpump Smart, routine heat pump cleaning supports better airflow, reduces strain on the compressor, and improves overall home comfort. In environments with dust, pollen, or heavy foliage, more frequent maintenance is recommended. We'll cover outdoor coil care, indoor coil and filter upkeep, and checklists you can use between professional checkups. By keeping coils clean and air passages clear, your heat pump can transfer heat more efficiently, which translates to lower electricity consumption and less wear on moving parts. The steps below are designed for homeowners who want to responsibly maintain their system without special tools or risky experiments.
Safety first: Before you start
Always power off at the breaker before touching any part of the heat pump. If you’re uncomfortable with electrical components, contact a licensed HVAC technician. Wear safety gloves and eye protection; never work alone if you feel unsure. Keep the area clear of bystanders, and never spray water directly into electrical connections. Unplug remote power sources and lock the switch if possible to prevent accidental re-energizing during maintenance. This is the moment to respect the public safety rules around equipment that operates with electricity and refrigerants.
When to clean and how often
The frequency of heat pump cleaning depends on climate, installation location, and environmental conditions. In dusty or pollen-heavy areas, plan a cleaning every 2-3 months during peak seasons, while cleaner environments may suffice with biannual checks. Even when you don’t see visible dirt, a light cleaning helps prevent buildup that reduces airflow. Use a simple maintenance cadence to pair with filter changes. Heatpump Smart analysis suggests pairing your cleaning schedule with seasonal filter changes for best results. Establish a baseline cleaning initially, then adjust intervals based on performance and energy bills.
Cleaning the outdoor unit: steps you can take
Outdoor coils collect leaves, dirt, and debris that impede heat transfer. Start by turning off power, then remove large debris by hand. Use a soft brush to loosen embedded dust, and rinse the fins with a gentle, low-pressure spray from a hose. Hold the nozzle at an angle to avoid bending fins, and never use metal tools that could nick the coils. Let the unit dry completely before re-energizing. If you notice bent fins, a light comb-through with a fin comb can help restore airflow. Do not spray directly into electrical boxes or the fan guard.
Cleaning the indoor coil and air handler
Indoor components stay clear when you clean the air handler and evaporator coil. Use a soft brush or microfiber cloth to wipe surfaces. If your system allows access to the coil, remove loose dust with a low-suction vacuum. Use a mild non-corrosive coil cleaner if necessary, following the product instructions. Refrain from using strong solvents that could damage plastics or coatings. After cleaning, check for any signs of moisture or mold and address promptly.
Filters, condensate drain, and airflow checks
Check and replace disposable filters every 1-3 months depending on use. Clean reusable filters with water and let dry fully before reinstalling. Inspect the condensate drain line for clogs and pour a small amount of 1:1 white vinegar and water through it if necessary to disinfect. Ensure there is adequate airflow across both coils by checking return and supply vents for obstructions. Replace old filters and keep a log of replace dates for tracking.
Reassemble, test, and document maintenance
After cleaning, reassemble panels, restore power, and run a test cycle to listen for abnormal noises and verify airflow. Check that the outdoor fan spins freely and that there are no leaks. Record the date of cleaning and any notes in a home-maintenance log so you can track improvements in efficiency and plan your next session. A simple 12-month calendar helps you remember to clean before peak heating or cooling seasons.
Common mistakes and troubleshooting
Avoid pressure washing the outdoor unit, which can bend fins or push water into electrical components. Don’t use bleach or harsh chemicals on coils. Never disassemble refrigerant lines or brackets unless you are trained. If you notice refrigerant smells, ice on coils, or error codes on the thermostat, stop and call a pro. Keep the outdoor unit free from vegetation that can obstruct airflow year-round.
Maintenance schedule checklist
Create a simple calendar that notes the last cleaning date, filter changes, and when to schedule a professional inspection. Use a reminder system to prompt seasonal checks and log outcomes. Pair heat pump cleaning with other seasonal tasks, such as changing batteries in thermostats and testing backup heat sources. Review energy bills periodically to spot trends that may indicate dirty coils or airflow problems.
Quick-reference maintenance checklist
- Power off before any work
- Clean outdoor coils with soft brush and gentle spray
- Clean indoor coil and replace filters
- Check condensate drain and vents
- Test system performance after cleaning
- Schedule next cleaning around mid-season
Troubleshooting after cleaning
If the system runs loudly after cleaning, check for loose panels, debris in the fan, or misaligned ductwork. If airflow feels weak, verify filter installation and check for leaks in refrigerant lines; if symptoms persist, contact a licensed technician. For thermostat readings that don’t match, recalibrate or replace batteries. If you still notice poor performance, consider scheduling a professional inspection to verify refrigerant charge and duct integrity.
Additional resources and next steps
For deeper maintenance or complex issues, consult the Heatpump Smart library and your equipment manual. Heatpump Smart Analysis, 2026 recommends monitoring energy bills to quantify efficiency gains after cleaning, and scheduling professional checks at least once per year. You can also explore energy-saving rebates or incentives in your region and track results through your utility portal.
Tools & Materials
- Personal protective equipment (PPE)(gloves, eye protection)
- Soft brush (non-metal)(for fins and dust)
- Microfiber cloth(for wiping surfaces)
- Garden hose with adjustable nozzle(low-pressure spray; avoid high pressure)
- Low-pressure coil cleaner (optional)(follow label directions)
- Screwdriver/flashlight(for access panels)
- Vacuum with brush attachment(for inside cabinet)
- Maintenance log notebook(date, notes, next due date)
Steps
Estimated time: 60-90 minutes
- 1
Power down and prepare
Identify the heat pump’s main breaker and switch it off. Verify there is no live power to outdoor and indoor units. Gather tools and establish a clean, safe workspace.
Tip: Double-check power with a non-contact tester before touching any components. - 2
Clear the work area and setup
Remove obstacles around the units, lay out protective clothing, and ensure pets/people are at a safe distance. This minimizes the risk of accidents while you clean.
Tip: Keep a flashlight handy to inspect hard-to-see corners. - 3
Inspect outdoor unit and debris
Check the outdoor coil and fan area for leaves, dirt, and debris. Remove large debris by hand and note any bent fins or damaged components.
Tip: Do not force debris loose; be gentle to avoid damaging the fins. - 4
Clean outdoor fins and coils
Use a soft brush to loosen dust from the fins. Rinse with a gentle, low-pressure spray from a hose, keeping the nozzle at an angle to protect fins.
Tip: Never use metal tools on fins; bent fins reduce airflow. - 5
Vent and cabinet interior care
If accessible, vacuum loose dust from the outdoor cabinet and fan housing. Wipe interior surfaces with a microfiber cloth.
Tip: Avoid saturating electrical components with water. - 6
Indoor coil and air handler care
Access the indoor evaporator coil and wipe with a soft brush or cloth. Vacuum loose dust and use a mild coil cleaner if needed.
Tip: Follow cleaner directions and avoid harsh solvents. - 7
Filters and drainage
Inspect and replace disposable filters if present; clean reusable filters with water and dry thoroughly. Check condensate drain for clogs and flush if needed.
Tip: A clogged drain can cause moisture problems and mold growth. - 8
System test and safety check
Reconnect power and run a quick test cycle. Listen for unusual noises and confirm airflow feels even across vents.
Tip: Record the cleaning date and any observations in your log. - 9
Document and plan next maintenance
Note the date, what was cleaned, and any anomalies. Schedule the next cleaning interval based on environment and usage.
Tip: Set reminders to ensure you don’t miss seasonal cleanings.
Your Questions Answered
How often should I clean my heat pump?
In dusty or pollen-heavy environments, clean every 2-3 months during peak seasons or at least biannually in cleaner settings. Use your energy bills as a guide to detect inefficiency that hints at buildup.
Most homeowners clean every couple of months in dusty areas, or at least twice a year in cleaner environments.
Is it safe to rinse the outdoor coil with a garden hose?
Yes, but use a gentle, low-pressure spray and keep the nozzle away from electrical components. Do not use a powerful jet that can bend fins or force water into the cabinet.
You can rinse with a soft spray from a garden hose, avoiding high pressure near electrical parts.
Should I DIY or hire a professional to clean my heat pump?
Basic cleaning and maintenance are doable for many homeowners. If you encounter refrigerant issues, refrigerant smells, or you’re uncomfortable with electrical components, hire a licensed HVAC technician.
You can do basic cleaning yourself, but call a pro if you see refrigerant issues or feel unsure.
What tools do I need for cleaning?
Gather PPE, a soft brush, microfiber cloth, a low-pressure hose, and a vacuum if needed. Keep coil cleaners as an optional helper and follow labels carefully.
You’ll need gloves, a soft brush, microfiber cloth, and a low-pressure hose.
Will cleaning void my warranty?
Cleaning by itself won’t void a warranty, but avoid disassembly or actions beyond routine maintenance. Check your warranty terms for specifics.
Cleaning is usually fine, but don’t disassemble parts beyond basic access.
How can I improve efficiency between cleanings?
Replace or clean filters regularly, seal Air Ducts, and schedule professional checks yearly. Monitor energy bills to spot early signs of performance decline.
Keep filters clean, seal ducts, and get annual professional checks.
Watch Video
Top Takeaways
- Prioritize safety and switch off power before starting.
- Clean both outdoor and indoor components for best efficiency.
- Use gentle tools and avoid harsh chemicals on coils.
- Keep a maintenance log to track dates and improvements.