DIY Heat Pump Maintenance: A Practical Home Guide
A practical, educational guide to diy heat pump maintenance for homeowners, builders, and property managers. Learn safe, step-by-step tasks to keep your system efficient and long-lasting.

You will perform safe, practical DIY heat pump maintenance to improve efficiency, extend service life, and catch minor issues before they become problems. Expect clear checks, filter care, coil and drain maintenance, thermostat checks, and guidance on when to contact a pro. This fast-start overview helps homeowners start small and stay safe while keeping their system performing well.
What is DIY heat pump maintenance and why it matters
DIY heat pump maintenance refers to a set of routine checks and simple tasks homeowners can perform to keep their air-source heat pumps operating efficiently. These tasks are designed to be safe, non-invasive, and do not involve opening sealed refrigerant lines. Regular maintenance helps maintain proper airflow, moisture drainage, and reliable thermostat performance, which translates into fewer service calls and lower operating costs. According to Heatpump Smart, maintaining your heat pump can help it run closer to its rated efficiency and reduce wear on components. In this guide, you will learn practical steps, safety considerations, and a practical schedule you can apply to most well-maintained heat pumps. The goal is to empower homeowners, builders, and property managers to handle common maintenance safely while recognizing when professional service is necessary. This approach aligns with industry best practices and supports longer equipment life, better indoor comfort, and steadier energy bills.
Safety prerequisites before you start
Before touching any electrical components or moving parts, ensure you understand the basics of electrical safety. Always switch off the heat pump at the thermostat and then at the main service panel to eliminate risk of shock. Wear safety goggles and gloves, and keep a clear, dry workspace. Do not attempt to service sealed refrigerant lines or recharge refrigerant; these tasks require a licensed technician. This section covers protective steps, the importance of reading the manual, and how to recognize conditions that require professional help. Heatpump Smart emphasizes that safety should come first, and improper DIY actions can lead to damage or personal injury.
Monthly checks you can perform
A monthly visual and listening check can prevent many issues from escalating. Start by inspecting and, if needed, replacing the air filter; a clogged filter will reduce airflow and strain the compressor. Listen for unusual noises such as banging, grinding, or screeching, which can signal loose components or debris. Check the thermostat settings and confirm the system is operating in the correct mode (heating in winter, cooling in summer). Inspect condensate drains for clogs and ensure water flows away freely. Finally, note any changes in indoor comfort or temperature swings, and log the results for upcoming service visits.
Seasonal maintenance checklist
Seasonal maintenance aligns with the heating and cooling seasons. In spring, clear debris from the outdoor unit, trim nearby vegetation, and verify there is at least 2 feet of clearance around the coil. In fall, verify that the outdoor unit weather seal is intact and that the defrost cycle works (without running the system). Schedule a professional inspection annually, ideally before peak demand. These tasks help maintain steady airflow and minimize energy waste while supporting system longevity.
Cleaning and filter care
Clean or replace filters monthly during heavy use months and at least every 3 months otherwise. Use a soft brush to remove dust from the outdoor coil fins, and gently spray with a garden hose from the inside out to avoid pushing debris inward. When cleaning coils, avoid high-pressure water that can bend fins; use a wide spray and let water drain away. For indoor air quality, replace the furnace or air handler filter with the correct size and MERV rating called for by the manufacturer. After cleaning, wipe down accessible panels with a damp cloth to remove residue.
Outdoor unit inspection and airflow
Ensure there is at least 2 feet of clearance around the outdoor unit. Remove fallen leaves, dirt, and grass clippings that restrict airflow. Check the fan for smooth rotation when the unit is unpowered and listen for rubbing sounds. Look for oil or grease on bearings; if present, consult the manual or a pro. A well-ventilated outdoor unit reduces compressor load and improves heat exchange efficiency, especially in extreme weather.
Electrical safety and frost prevention
Turn off power before inspecting any electrical connections; use a non-contact voltage tester to verify power is off. Do not loosen or tighten live connections; if anything seems loose or corroded, contact a licensed electrician. In cold climates, clear the area around the outdoor unit to prevent frost buildup and ensure drainage paths are not blocked. Frost or ice can reduce performance and increase energy use until the system warms up.
When to call a pro and what to expect
DIY maintenance has limits. If you notice refrigerant smells, ice forming on the suction line, frequent tripping of breakers, or if you are uncomfortable with any step, contact a licensed HVAC technician. When you call, expect a technician to inspect refrigerant charge, electrical connections, insulation, and overall control settings, and to perform professional cleaning and leak testing as needed. Regular professional checkups complement your DIY efforts and help maximize efficiency.
DIY maintenance and energy efficiency: what changes you can expect
Regular DIY maintenance helps maintain airflow and heat transfer, contributing to steadier indoor comfort and lower energy costs over time. The relationship between maintenance and efficiency is strongest when you stay on a consistent schedule and address issues early. In this context, Heatpump Smart analysis shows that proactive maintenance aligns with improved operating performance and fewer unplanned service calls. Remember: while DIY steps can improve reliability, the Heatpump Smart team cautions that specialized tasks must be handled by professionals to protect warranty and safety.
Tools & Materials
- Safety gear (gloves, safety glasses)(Non-latex, ANSI-rated, eye protection essential when inspecting electrical components.)
- Screwdrivers (Phillips and flathead)(Assorted small and medium sizes for panel screws.)
- Vacuum with brush attachment(Dip brush to avoid scattering dust; use on indoor components.)
- Soft bristle brush(Used to clean coil fins and delicate surfaces.)
- Microfiber cloths(For wiping panels and surfaces without leaving lint.)
- Garden hose with gentle spray nozzle(Low-pressure spray to clean outdoor coils without bending fins.)
- Replacement air filter (correct size and MERV rating)(Match manufacturer spec and replace during maintenance.)
- Non-detergent cleaner or mild soap(Use for exterior surfaces; avoid harsh chemicals.)
- Non-contact voltage tester(Verify power is off before touching electrical components.)
Steps
Estimated time: 60-90 minutes
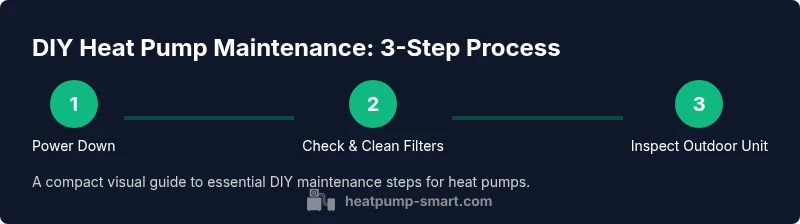
- 1
Power off and preparation
Turn off the heat pump at the thermostat, then switch off the circuit at the main panel. Wait a few minutes to discharge capacitors and reduce shock risk. Gather tools and wear safety gear before starting any work.
Tip: Double-check power is off at both the thermostat and breaker panel. - 2
Inspect and replace air filters
Locate the return air filter, remove it, and inspect for dirt or debris. Replace with a new filter of the correct size and rating if needed. Record the date of replacement.
Tip: Use the manufacturer’s recommended filter type to maintain airflow. - 3
Clean interior components (where accessible)
Dust interior surfaces and accessible coils using a vacuum and soft brush. Avoid using water directly on electrical parts. Keep components dry and inspect for any signs of wear.
Tip: Do not spray water directly on electrical connections. - 4
Clear condensate drain and check line
Locate the condensate drain and ensure it’s clear. If clogged, flush with a mild cleaner solution or vinegar and rinse with clean water. Ensure the drain exits away from the foundation.
Tip: A blocked drain can trigger safety shutoffs or water damage. - 5
Check thermostat settings
Review thermostat programming and ensure it matches seasonal needs (heating vs cooling). Adjust schedules for occupancy and comfort. Confirm that energy-saving modes are enabled if available.
Tip: A correctly programmed thermostat reduces unnecessary operation. - 6
Inspect outdoor unit for debris and airflow
Remove leaves, dirt, and other debris around the outdoor unit. Check for unobstructed airflow and clear a 2 ft (60 cm) radius around the unit. Inspect fins for damage and straighten if gently possible with a fin comb.
Tip: Avoid using metal tools that can bend or break fins. - 7
Review outdoor wiring visually
With power off, look for loose or corroded connections or damaged insulation. Do not touch exposed conductors. If you see issues, contact a licensed professional.
Tip: Take a photo for reference if you plan to show an electrician. - 8
Document and plan next steps
Log maintenance actions and dates. Schedule an annual professional check and note any signs that warrant sooner attention. Keep the log accessible for future reference.
Tip: A maintenance log helps track wear and replacement cycles.
Your Questions Answered
Is DIY heat pump maintenance safe for all brands and models?
Most basic maintenance is safe if you follow the manual and avoid sealed refrigerant areas. Always refer to manufacturer guidelines and start with simple checks. If in doubt, contact a pro.
Most homeowners can do basic checks, but follow your manual and avoid sealed refrigerant areas.
How often should I perform DIY maintenance?
Monthly visual checks plus seasonal cleaning and an annual professional service help maintain performance and reliability.
Do monthly checks and schedule a yearly professional service.
Will DIY maintenance really improve efficiency?
Yes, especially when airflow and drainage are well maintained. Benefits depend on current condition and usage patterns.
Maintaining airflow, drainage, and settings can improve efficiency.
What are common signs I need a pro?
Persistent ice, refrigerant smells, frequent breaker trips, or unusual cooling/heating instability warrant professional evaluation.
If you notice ice, smells, or trips, call a professional.
Is it safe to clean the outdoor unit myself?
Yes, with power off and careful cleaning. Do not spray high-pressure water or climb on the unit due to risk of damage.
Yes, but be careful not to damage fins or wiring.
What if I detect a refrigerant leak?
Do not attempt repairs. Contact a licensed HVAC professional immediately for leak testing and proper handling.
Don’t try to fix leaks yourself—call a pro.
Watch Video
Top Takeaways
- Start with safety; power off before any inspection
- Regularly replace filters to protect airflow
- Keep outdoor unit clear of debris for optimal heat exchange
- Know when to call a pro to protect warranty and safety
- The Heatpump Smart team recommends yearly professional checks complemented by DIY maintenance