Heat Pump Installation Service: A Complete How-To Guide
A practical guide to hiring and managing a heat pump installation service, covering sizing, permits, site prep, and post-install checks to maximize efficiency and comfort.

This quick guide helps you hire and coordinate a heat pump installation service, plan the project, and prepare your home. You’ll learn what to look for in a contractor, the typical installation steps, and how to set realistic timelines and budgets. According to Heatpump Smart, professional installation ensures safety, optimal efficiency, and long-term comfort.
Why professional heat pump installation service matters
Choosing to hire a professional heat pump installation service is about more than swapping out an old unit. A qualified team ensures the system is correctly sized, wired safely, and charged with the proper refrigerant amount. They verify venting clearances, outdoor unit placement, electrical compatibility, and thermostat integration. According to Heatpump Smart, proper installation directly affects energy efficiency, reliability, and warranty outcomes. Homeowners benefit from a documented commissioning process, correct refrigerant charge, and rigorous safety checks that minimize future repair costs. This section explains why entrusting the job to licensed professionals pays off in the long run, especially for homeowners, builders, and property managers who demand consistent performance and energy savings.
Beyond comfort, a professionally installed heat pump supports indoor air quality and climate resilience. It also helps maintain building codes compliance and reduces the risk of electrical faults that can lead to outages or fire hazards. When you hire a reputable service, you gain access to post-install support, clear maintenance schedules, and documentation that supports future resale or property management needs. The Heatpump Smart team emphasizes that a quality install is the foundation of a low-maintenance, high-efficiency cooling and heating system.
What happens during a typical installation
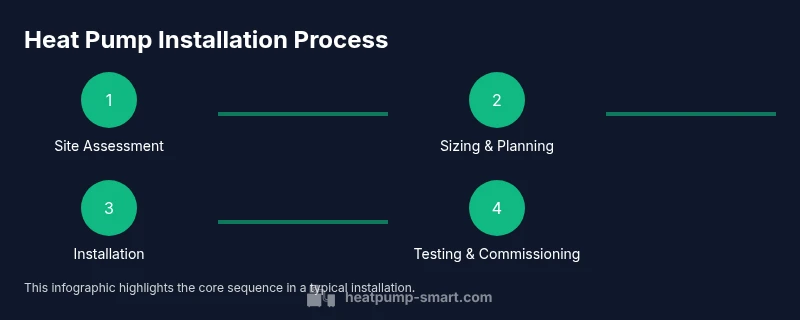
A typical installation follows a structured workflow designed to minimize downtime and ensure safety. It begins with a site visit to assess space, wire routes, ductwork, and mounting options. Next, load calculations determine the correct size for the heat pump and whether any duct sealing or upgrades are needed. The team then mounts the outdoor condenser, routes refrigerant lines, and installs the indoor air handler or ducted unit. Electrical connections are established by a licensed electrician, and a refrigerant charge is performed under controlled conditions. Finally, the system is tested for proper operation, thermostat communication, and safe shutdowns.
Throughout this process, expect careful attention to environmental considerations, such as minimizing refrigerant release, protecting adjacent landscaping, and maintaining indoor comfort during the changeover. Communication with you should be ongoing, with clear milestones, inspection checkpoints, and a detailed commissioning report. Heatpump Smart notes that documenting settings like back-up heat operation and defrost controls helps you maximize efficiency year-round.
Choosing the right system and sizing
System selection hinges on climate, home design, existing ductwork, and energy goals. An air-source heat pump may be ideal for moderate climates, while a layered approach or a geothermal option might better serve extreme conditions. Proper sizing is critical: an under-sized unit will cycle excessively, reducing efficiency and comfort; an oversized unit may short-cycle, wasting energy and increasing wear. A thorough assessment includes home insulation levels, window efficiency, and occupancy patterns, all of which influence both capacity and performance. The goal is a balanced system that delivers consistent comfort with minimal energy use. Heatpump Smart stresses the importance of a precise load calculation and, when needed, a system that can be paired with a smart thermostat for optimized operation.
As you compare contractors, look for detailed proposals that explain the chosen size, equipment type, refrigerant routing, and any required upgrades. Ask for third-party calculations, such as ACCA Manual J for load and Manual S for equipment selection, to verify that sizing is data-driven rather than guesswork. This alignment between building science and HVAC design helps ensure long-term efficiency and reliability.
Site preparation and safety considerations
Site preparation is a cornerstone of a successful installation. Clear outdoor space for the condenser with unobstructed airflow and proper clearance from walls, doors, and combustible materials. Check electrical service capacity and panel availability, and confirm permits or inspections required by your local jurisdiction. Indoor space should be prepared for mounting the air handler, with adequate space for service access and airflow. Protect floors and furniture during installation and ensure that condensate drainage is properly routed.
Safety protocols include lockout/tagout procedures, eye and hand protection for technicians, and safe lifting practices for heavy equipment. Outdoor units must be placed on secure pads or mounts to minimize vibration and noise transfer to the building. Weather considerations are also relevant; installations in cold or wet environments may require additional frost protection or condensate management. By planning ahead and verifying safety standards, you reduce risk and speed up the commissioning phase.
Heatpump Smart recommends coordinating with your installer to schedule a clear, disruption-free installation window and to confirm post-install testing plans so you can review system performance immediately after commissioning.
Post-installation checks and energy performance
Commissioning is where the installation truly proves its value. The technician confirms refrigerant charge, verifies electrical connections, and tests heat pump sequencing with auxiliary heat if applicable. Thermostat compatibility is checked, along with system defaults for defrost, cooling, and heating modes. A thorough performance test ensures airflow, static pressure, and refrigerant pressures are within expected ranges. You should receive a commissioning report that documents equipment, settings, and any adjustments made.
Beyond the initial test, plan a brief follow-up check after the first heating season to confirm that the system maintains comfort and energy efficiency. Ask about maintenance intervals and recommended filter changes, coil cleaning, and refrigerant checks. Regular maintenance helps preserve efficiency, extend equipment life, and protect your warranty. Heatpump Smart notes that a properly commissioned system is more likely to deliver the energy savings homeowners expect and to provide reliable long-term comfort.
Cost considerations and how to plan your budget
Cost planning for a heat pump installation involves multiple factors: equipment type and efficiency ratings, ductwork or existing distribution, site preparation, electrical upgrades, permits, and labor. Because configurations vary by home and climate, there is no one-size-fits-all price. Instead, you should expect variable costs that reflect system complexity and local labor rates. A transparent contractor will provide a detailed scope of work and a line-by-line estimate that covers equipment, installation labor, materials, and potential contingencies.
To manage budget effectively, start with a baseline assessment that identifies required upgrades (electrical service, duct sealing, or crawlspace work). Request multiple quotes to compare equipment options and warranties, and ask about seasonal promotions or rebates that may apply to heat pump installation service. Planning for the long term includes considering maintenance costs and the expected energy savings over the system’s life. The Heatpump Smart team emphasizes obtaining a written maintenance plan and warranty documentation to avoid surprises later on.
Tools & Materials
- Stud finder(Locate wall studs for indoor mounting and bracket installation)
- Drill with appropriate bits(For mounting brackets and cabinet screws)
- Screwdriver set(Both Phillips and slotted as needed)
- Electrical multimeter(Verify voltage, grounding, and circuit integrity)
- Voltage tester(Check live circuits before touching wires)
- Level(Ensure outdoor unit is level for proper operation)
- Wrench/pliers(Tighten fittings and refrigerant lines as needed)
- Ladder or scaffolding(Access for outdoor unit and high mounting points)
- Vacuum pump(Evacuate refrigerant lines before charging)
- Refrigerant scale(Only if recharging or field service requires accurate charge)
- Duct tape and sealant(Seal ducts and piping penetrations to prevent leaks)
- Safety gear (gloves, goggles)(Protect technicians during handling and installation)
- Thermostat and wiring tools(Program and wire the control system for efficiency)
Steps
Estimated time: 4-6 hours
- 1
Assess site and load requirements
Conduct a thorough site inspection, confirm electrical capacity, ductwork status, and outdoor space. Gather measurements and evaluate potential obstructions or noise considerations. This step establishes the baseline for sizing and placement.
Tip: Document all measurements and take clear photos for the proposal. - 2
Size the system and select equipment
Perform load calculations and choose equipment that matches climate needs and home design. Ensure compatibility with existing ductwork or plan upgrades as needed.
Tip: Avoid oversizing or undersizing; trust data-driven calculations. - 3
Prepare mounting locations and routes
Mark mounting points for indoor and outdoor units, plan refrigerant line routes, and protect pathways. Prepare electrical connections and confirm panel access.
Tip: Guard against vibration by isolating mounts and using pads. - 4
Install outdoor condenser and indoor air handler
Mount units securely, connect electrical feeds, route refrigerant lines, and seal enclosures. Install the indoor unit and ensure proper airflow and clearance.
Tip: Keep condensation drainage clear to prevent water intrusion. - 5
Charge refrigerant and verify operation
Breathe line purging, evacuate air, and charge to the correct level with calibrated equipment. Test compressor operation and verify defrost and heat modes.
Tip: Check for leaks and listen for unusual noises during ramp-up. - 6
Test, document, and hand off
Run performance tests, record settings, and provide a commissioning report. Explain thermostat programming and maintenance steps to the homeowner.
Tip: Provide a clear maintenance schedule and warranty details. - 7
Schedule follow-up maintenance
Set reminders for filter changes, coil cleaning, and periodic checks to sustain efficiency. Confirm contact details for service if issues arise.
Tip: Offer a simple, written maintenance plan to the client.
Your Questions Answered
What qualifies as professional heat pump installation service?
A professional service includes licensed technicians, accurate load calculations, correct refrigerant charging, proper electrical connections, and a documented commissioning process.
A professional install includes licensed technicians, precise sizing, and a documented commissioning process.
How long does installation typically take?
Installation duration varies with system size and home layout, but a typical project spans a full day. Your contractor should provide a timeline in the proposal.
Most installations take a full day; your contractor will give a detailed timeline.
Is a permit or inspection required?
Many jurisdictions require permits and a post-install inspection for heat pump systems. Your installer should handle or coordinate these requirements.
Permits are often required; your installer can handle the paperwork or guide you.
Can I install a heat pump myself?
DIY installation is not recommended due to electrical, refrigerant, and safety complexities. Use a licensed contractor to protect efficiency and warranty.
We don’t recommend DIY; it’s risky and can void warranties.
What maintenance is needed after installation?
Regular filter changes, coil cleaning, and annual professional checkups help sustain efficiency and system longevity.
Keep up with filters and yearly professional checkups to maintain performance.
Watch Video
Top Takeaways
- Plan with a load-based approach to sizing.
- Hire licensed pros for safety and warranty protection.
- Expect a detailed commissioning report and maintenance plan.