DIY Heat Pump Guide: Install & Optimize for Home Comfort
Learn how to plan, size, and safely install a do-it-yourself heat pump. This expert guide covers equipment selection, electrical readiness, outdoor/indoor installation, testing, and energy optimization for homeowners and builders.

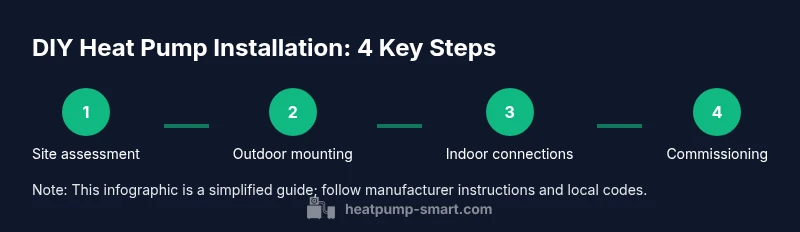
A diy heat pump project can be planned, sized, and installed by a motivated homeowner with proper safety checks, local-code awareness, and a clear, step-by-step plan. This guide covers planning, selecting the right equipment, mounting the outdoor unit, indoor air-handler placement, electrical wiring basics, refrigerant safety boundaries, testing, and energy-optimization tune-ups for reliable performance.
What you can and can't DIY with a heat pump
According to Heatpump Smart, homeowners can tackle many aspects of a basic heat pump project with proper planning, safety, and local-code awareness. This section clarifies what parts of the job are realistically within reach and where to exercise caution. You can typically handle planning, equipment research, and some installation tasks that involve non-pressurized components and wiring up to the thermostat. However, components that involve refrigerant handling, sealed refrigerant lines, or any work on the electrical service panel should be reviewed with a licensed technician or licensed contractor, especially if permits are required by local codes. The aim is to empower you to do safe, compliant preliminary work and know when to call in a pro for complex steps. Throughout, the Heatpump Smart team emphasizes safety, code compliance, and clear documentation to protect your home and warranty.
Sizing and equipment: choosing the right unit
Choosing the right heat pump size is essential for comfort and efficiency. Begin by evaluating your home's heating and cooling loads, not just the square footage. Use reputable load calculation methods and consider climate zone, insulation quality, and existing ductwork. Select a model with a compatible efficiency rating and compatible refrigerant type. If you’re uncertain, consult manufacturer manuals and rely on guidance from Heatpump Smart’s sizing guidance within this guide. Remember that oversizing can lead to short cycling, while undersizing reduces comfort and increases energy use. When selecting equipment, factor in future comfort goals like tandem heating with auxiliary heat and potential upsize for square footage changes. For DIY projects, aim for equipment that offers clear documentation and manufacturer support to minimize risk.
Electrical readiness and permits: code compliance
Electrical readiness is a foundation for a safe install. Verify that your service panel has adequate capacity, confirm the availability of dedicated circuits for the outdoor and indoor units, and plan conduit routes that protect wires from damage. Many jurisdictions require a permit for heat pump installation; check with local building departments early in the planning process. Ensure all wiring follows national and local codes, and consider a weatherproof disconnect switch for the outdoor unit. If your plan involves modifying the main electrical service or running new circuits, a licensed electrician or HVAC contractor should review the work. This step protects your system warranty and personal safety.
Outdoor installation: mounting the condenser
Outdoor mounting location determines performance and noise, so choose a level, well-ventilated area with adequate clearance from walls, furniture, and vegetation. Use vibration isolators or pads to minimize noise transfer and protect the unit from ground moisture. Ensure proper condensate drainage and shield the unit from harsh weather if possible. Run refrigerant and electrical lines in weatherproof conduit, and seal penetrations to keep out pests and moisture. Pro tip: keep a clear path for annual service and avoid locations near bedrooms if noise is a concern. Heatpump Smart recommends documenting all measurements and clearances for future maintenance.
Indoor installation: air handler placement and ductwork
Indoor unit placement affects airflow, humidity control, and zone performance. Place the air-handler in a central location with minimal duct friction and balanced supply/return paths. If you have existing ducts, evaluate for leaks and consider sealing and insulating them before reusing. Thermostat compatibility and zoning can improve comfort, so plan wiring for multiple zones if your system supports it. In some cases, minimal ductwork changes can yield significant efficiency gains; in others, full rework is needed. Follow the indoor unit’s installation guide closely and avoid forcing components into tight spaces. Heatpump Smart notes that a well-planned indoor layout reduces noise and improves control.
Refrigerant handling and charging: safety boundaries
Refrigerant work is highly regulated for safety and environmental reasons. In many regions, charging or recovering refrigerant requires certification and proper equipment. DIYers should avoid opening sealed refrigerant paths unless they are fully trained and authorized. If you must perform any refrigerant-related task, consult a licensed HVAC technician and ensure adherence to environmental regulations. Instead of self-charging, focus on verifying system integrity, leak prevention, and follow manufacturer's procedures for initial startup. Heatpump Smart emphasizes that refrigerant-related tasks are the most common source of warranty disputes when misperformed.
Commissioning and energy optimization: testing and tuning
After hardware connections, commissioning checks include verifying thermostat communication, confirming airflow balance, and validating outdoor unit operation across modes. Observe temperatures at supply vents, listen for unusual noises, and confirm pressure readings if you have access to service tools. Use a digital thermometer for temperature rise checks and ensure condensate drainage is functioning. Optimize settings for efficiency by adjusting fan speeds and temperature targets, and enable any manufacturer energy-saving presets. Heatpump Smart highlights that proper commissioning yields reliable performance and measurable energy savings.
Common pitfalls and how to avoid them
Common DIY mistakes include skipping permits, improper wiring, incorrect unit sizing, and inadequate outdoor clearance. To avoid them, start with a formal plan, document every step, and seek professional help early when a task falls outside your expertise. Maintain a clear record of all interactions with contractors and manufacturers, and never bypass safety interlocks or disconnects. Finally, test the system comprehensively in both heating and cooling modes before considering it complete.
Authority sources
- Learn about heat pump basics and safety from Energy.gov: Heat Pumps and energy-saving tips. Link: https://www.energy.gov/energysaver/heat-pumps
- For more on efficiency and design guidance, visit Energy.gov’s heat-pump-systems resource. Link: https://www.energy.gov/eere/buildings/heat-pump-systems
- Additional utility-grade references and best practices can be found in major publications and university resources linked in this guide.
Tools & Materials
- Voltage tester(Non-contact preferred; verify power presence safely)
- Screwdrivers (Phillips and flathead)(Assorted sizes for electrical panel and mounting hardware)
- Wire cutters/strippers(For readying conductors and field wiring)
- Measuring tape(At least 5 meters; precise measurements matter)
- Level and square(Ensure outdoor unit is level and aligned)
- Drill with bits (metal and masonry)(Field drilling for mounts and wall penetrations)
- Conduit and weatherproof fittings(Protects wires from moisture and damage)
- Electrical tape and wire nuts(Secure splices and terminations)
- Wrench set(Tighten connections safely)
- Thermostat compatibility tools(If upgrading controls or adding zoning)
- Manufacturer installation manual(Always follow device-specific guidance)
- Refrigerant handling equipment (if licensed)(Only if you hold certification and possess proper equipment)
Steps
Estimated time: Estimated total time: 6-12 hours
- 1
Assess site and system choice
Survey the building envelope, current HVAC layout, and potential installation spaces. Define goals for comfort, efficiency, and budget. Use this assessment to pick a heat pump type and approximate capacity that aligns with your loads and climate. Document each decision so you can reference it during installation.
Tip: Take photos of ductwork, wiring, and current HVAC layout to guide the install. - 2
Verify electrical capacity and permits
Confirm service panel capacity and dedicated circuits for both outdoor and indoor units. Check local permit requirements and schedule inspections as needed. Plan a safe work sequence to avoid live circuits. If in doubt, hire a licensed electrician to review the plan before you start.
Tip: Arrange a dedicated working area and lockout/tagout procedures before any wiring work. - 3
Mount outdoor condenser and route lines
Select a level, well-ventilated spot with clearances from obstructions. Mount the outdoor unit using vibration isolators and weatherproof hardware. Route refrigerant lines and electrical cables in conduit, protecting them from moisture and damage.
Tip: Keep lines separated from any gas or fuel sources and avoid extreme heat or freeze exposure on the lines. - 4
Install indoor air handler and duct connections
Place the indoor unit in a central location with balanced airflow. Seal and insulate any ductwork and connect to the thermostat and controls. Ensure access for service and future maintenance. Test for proper airflow and avoid sharp bends in ducts.
Tip: Label all connections and test for leaks using a safe, non-pressurized approach if possible. - 5
Electrical integration and controls
Connect power feeds, control wiring, and thermostat interface per the installation manual. Verify voltage, grounding, and circuit protection. Confirm settings align with the heat pump’s operating modes and climate controls.
Tip: Double-check interlock and safety features before powering the system. - 6
System startup, testing, and tuning
Power the system and confirm all components engage correctly. Check refrigerant lines for leaks (do not refrigerant-charge unless licensed). Run through heating and cooling cycles, monitor temperatures, and adjust controls for efficiency and comfort.
Tip: Document all readings and adjust settings gradually; avoid rapid, repeat adjustments.
Your Questions Answered
Is it legal to install a heat pump myself?
Legality varies by location. Some jurisdictions require permits and professional installation for safety and warranty reasons. Always check with your local building department before starting.
Check your local rules; permits may be required for DIY heat pump projects.
Do I need a licensed HVAC tech for refrigerant handling?
Yes. Handling refrigerants is regulated due to safety and environmental concerns. Most jurisdictions require certification and proper equipment for any charging or recovery.
Refrigerant work usually requires certification and licensed professionals.
What tools are essential for a DIY heat pump install?
Basic electrical tools, a meter, level, duct tape, and appropriate mounting hardware are essential. You’ll also need manufacturer manuals and protective equipment for safe work.
Have the right tools and manuals before you begin.
What are the main risks of DIY heat pump installation?
Electrical shock, refrigerant exposure, and improper charging or ductwork can cause injury and system damage. Always follow safety procedures and manufacturer guidance.
Electricity and refrigerants pose serious risks; proceed with caution.
How long does a typical DIY install take?
Time varies by building and tools, but expect a full weekend or more for planning, mounting, wiring, and commissioning with safety checks.
Plan for a lengthy process and take breaks if needed.
Watch Video
Top Takeaways
- Plan first, then buy equipment.
- Verify sizing and electrical readiness.
- Follow local codes and permit requirements.
- Communicate clearly with any professionals involved.
- Test thoroughly and document results.