Heat Pump DIY: A Practical Guide to Safe Home Upgrades
A practical, expert-guided how-to for homeowners exploring safe heat pump DIY tasks. Learn maintenance steps, safety tips, and when to involve a licensed pro to protect efficiency and warranties.

This guide helps homeowners safely perform basic heat pump DIY tasks to improve comfort and energy efficiency. You'll learn essential safety steps, simple maintenance routines, and clear guidelines on when to hire a licensed pro, with practical tips from Heatpump Smart. This approach emphasizes structured planning, safety boundaries, and documented checklists to keep your system reliable without risking warranty or personal safety.
Why DIY Heat Pump Work Matters
Homeowners are often tempted to tackle simple heat pump maintenance or minor upgrades themselves to save on service calls and to better understand how their system operates. When done safely, DIY tasks can improve reliability and energy efficiency, reduce running costs, and extend equipment life. However, heat pumps are complex machines that blend electrical, mechanical, and refrigerant systems; mistakes can cause safety hazards or expensive damage. According to Heatpump Smart, educated, cautious DIY efforts paired with clear boundaries can be productive, but this is not a substitute for professional service when high-risk work is needed. This article provides a framework for safe hands-on care, practical checklists, and a decision map to help you decide when to seek professional help. By approaching tasks methodically, homeowners can gain confidence while protecting their investment.
Safety First: What You Can and Can't DIY
Safety is non-negotiable with heat pumps. Many tasks involve electrical components, moving parts, and refrigerant systems that can cause shocks, burns, or leaks if mishandled. You should not attempt refrigerant work, high-pressure system tests, or any procedure that requires opening sealed refrigerant lines. Always shut off power at the main breaker and the outdoor disconnect before touching any wiring or panels. Use appropriate PPE, keep children and pets away, and never bypass safety switches. If you notice exposed wiring, burning smells, or moisture around electrical components, stop immediately and contact a licensed professional. Maintaining good safety practices protects you, your family, and the warranty on the equipment.
Sizing, Location, and Permits: Laying the Groundwork
Before any DIY upgrades, ensure your unit is properly sized for the space, and that the outdoor unit has clear airflow with minimal debris. Improperly sized equipment leads to inefficient heating or cooling and higher running costs. Location matters for noise, airflow, and accessibility for future maintenance. Check local regulations; some jurisdictions require permits for electrical work or modifications to HVAC systems. If your project involves expanding ductwork, changing refrigerant lines, or altering electrical circuits, a licensed technician is the safer route.
Tools and Materials You'll Need
This section enumerates the essential tools and optional items to complete routine DIY maintenance safely. Always choose equipment rated for electrical work and outdoor use. Having the right tools reduces the risk of damage and makes the job quicker. See the Tools & Materials block for a detailed list with notes on essential vs. optional items.
Routine Maintenance You Can Do Yourself
Consistent, small maintenance tasks can keep a heat pump operating efficiently. Start with simple actions like cleaning or replacing the air filters, inspecting the outdoor unit for debris, and ensuring condensate drainage works. These steps improve airflow, reduce strain on the compressor, and can prevent nuisance outages. While these tasks are DIY-friendly, they should be performed with the system powered down and with caution around moving parts. Document each maintenance session to track system health over time.
Understanding Heat Pump Controls and Thermostats
Modern heat pumps pair with thermostats and smart controls to optimize comfort and energy use. Learn how to set operating modes, time schedules, and fan speeds to match your needs. For DIY purposes, ensure your thermostat is compatible with your heat pump, check for firmware updates, and verify that the system responds correctly to temperature changes. Misconfigured controls can degrade performance, so test responses after changes and revert if issues arise.
DIY Upgrades: Smart Thermostats and Zoning
Upgrading to a compatible smart thermostat can improve scheduling and remote monitoring, often without professional installation. If your existing wiring supports a smart thermostat, wiring guidelines are documented by the manufacturer. For more complex projects, such as zoning or advanced fan controls, consult your manual or a pro. Always check warranty terms before adding components that modify the control logic of the heat pump.
Maintenance Schedule and Documentation
Create a simple maintenance calendar: monthly checks for air filters, quarterly outdoor inspection, and annual professional inspection. Keep a log of dates, observations, and any self-repairs performed. Documentation supports warranty compliance and helps you spot trends, such as recurring airflow issues or rising electricity use. A well-kept log reduces guesswork when consulting a technician.
Common Mistakes That Void Warranties
DIY enthusiasts sometimes void warranties by opening panels, replacing refrigerant components, or attempting repairs beyond routine maintenance. Always follow the manufacturer’s guidelines and local regulations. If in doubt, pause and contact a qualified technician. Preserving warranty coverage not only protects your investment but also ensures safety and system longevity.
The Heatpump Smart Perspective and Next Steps
The Heatpump Smart team believes that DIY can be a valuable learning process when kept within safe boundaries and clear limits. For more intricate tasks or if your home’s climate requires demanding modifications, professional service remains essential. Use DIY as a way to deepen your understanding and stay proactive about maintenance, but rely on licensed technicians for major repairs or complex system changes.
Tools & Materials
- Safety glasses(Impact-resistant protection for eye safety)
- Work gloves(Grip and hand protection; avoid sharp edges)
- Screwdriver set(Flathead and Phillips, insulated if possible)
- Soft brush or microfiber cloth(Gently clean fins and surfaces)
- Fin comb (optional)(Repair bent outdoor condenser fins)
- Vacuum with brush attachment(Remove dust from indoor components)
- Multimeter (optional)(Voltage checks only if you are qualified)
- flash light or headlamp(Improve visibility inside panels)
Steps
Estimated time: 50-75 minutes
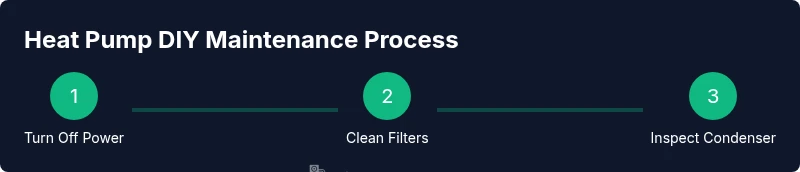
- 1
Turn off power to the unit
Switch off the outdoor disconnect and the interior circuit breaker to ensure there is no live power during inspection and cleaning. This reduces the risk of electrical shock and accidental start-up while you work.
Tip: Double-check that both the outdoor switch and main breaker are off before touching wiring or panels. - 2
Clean or replace the indoor air filter
Locate the air handler access panel and remove the filter. If reusable, wash with mild soap and water, dry completely, then reinstall. If disposable, replace with a filter of the same size and rating.
Tip: A clean filter improves airflow and reduces energy consumption; aim for monthly checks during peak seasons. - 3
Inspect the outdoor condenser for debris
Look for leaves, grass, or dirt blocking the condenser. Gently remove debris with your hands or a soft brush. Avoid using high-pressure water that could bend fins.
Tip: Do not press directly on the fins; use a broad stroke to protect the coil surface. - 4
Gently clean the condenser fins
If fins are dusty, use a soft brush to lift dust between the fins. If fins are bent, use a fin comb carefully to restore spacing.
Tip: Work from the top down and avoid forcing material through tight fin gaps. - 5
Check electrical connections visually
With power still off, inspect accessible connections for loose or corroded terminals. Do not tighten aggressively; if you see damage, call a licensed electrician.
Tip: Only perform non-invasive visual checks unless you are trained in electrical work. - 6
Inspect condensate drain and clear blockages
Locate the condensate drain line and verify it drains freely. If you notice a buildup, remove surface obstructions and flush with a small amount of water.
Tip: A blocked drain can cause water damage and mold growth; address promptly. - 7
Test thermostat settings and system response
Set the thermostat to heat or cool, verify that the system responds, and listen for abnormal noises. If the unit does not respond correctly, re-check wiring or consult the manual.
Tip: Document any unusual thermostat readings for future reference. - 8
Restore power and run the system briefly
Turn power back on and run the system for 5–10 minutes to confirm proper operation after maintenance. Look for consistent airflow and stable cycling.
Tip: If you notice cycling issues or unusual odors, shut down and call a pro.
Your Questions Answered
Can I install a heat pump myself, or should I hire a professional?
While some basic, non-R22 refrigerant related work may be feasible for experienced DIYers, most heat pump installations and major repairs require licensed professionals due to safety, electrical, and refrigerant handling considerations. Always verify local codes and manufacturer warranties before attempting installation.
Most homeowners should hire a licensed pro for installation due to safety and warranty concerns. DIY may be limited to basic maintenance with professional support for complex tasks.
What maintenance can I safely perform without voiding warranties?
Routine maintenance like filter cleaning or replacement, debris removal from the outdoor unit, and basic control checks are commonly allowable DIY tasks. Always follow the manufacturer’s guidelines and document each maintenance event to support warranty terms.
You can handle routine maintenance, keep records, and always follow the manual to avoid warranty issues.
Do DIY tasks affect warranty coverage?
Unauthorized modifications or repairs may void warranties. Check the warranty paperwork for specifics on what is permitted for DIY maintenance and warranty coverage requirements. If in doubt, contact the manufacturer or a licensed technician.
DIY can affect warranty if it involves non-routine repairs; refer to your warranty and ask a pro when unsure.
When should I call a professional?
Call a licensed professional if you encounter refrigerant work, electrical issues, persistent cycling problems, refrigerant odors, or any safety concerns. Also seek help for complex upgrades like significant wiring changes or ductwork modifications.
If in doubt, stop and call a licensed HVAC technician for safe guidance.
Are permits or codes required for DIY heat pump work?
Permit requirements vary by location. Electrical work and major HVAC modifications may require a permit and inspection. Check with local building authorities before starting work that involves electrical or structural changes.
Check local rules; some tasks may need a permit or inspection.
What is the best way to verify thermostat compatibility?
Consult the heat pump’s manual for compatible thermostat models. Ensure the wiring scheme, power requirements, and communication protocols match the new thermostat. When in doubt, test with a non-diagnostic approach first and keep documentation.
Verify compatibility in the manual and confirm the wiring before purchasing a new thermostat.
Can DIY maintenance improve efficiency?
Yes, especially with clean filters, clear airflow, and proper thermostat settings. Routine maintenance can reduce strain on the system and lead to more stable performance, which helps efficiency over time.
Regular, safe maintenance can help your heat pump run more efficiently.
Watch Video
Top Takeaways
- Prioritize safety and boundaries when DIY-ing heat pumps.
- Regular maintenance can improve comfort and reduce outages.
- Know when to seek professional help to protect warranties.
- Document maintenance for warranty and performance tracking.