DIY Heat Pump Ducted: Step-by-Step Guide
Learn to plan, size, and safely install a ducted heat pump system. This Heatpump Smart guide covers wiring basics, duct design, and essential safety for homeowners.

This guide helps homeowners plan, size, and execute a ducted heat pump project with a focus on safe, code-compliant tasks you can handle yourself. You can tackle planning, duct design, and thermostat integration for a ducted system, but refrigerant work and major electrical upgrades should be performed by licensed professionals. Follow these steps to set expectations, identify what you can DIY, and when to bring in a pro.
What is a DIY heat pump ducted system?
A diy heat pump ducted system refers to a homeowner-led approach to planning, sizing, and implementing a ducted heat pump configuration. A ducted system uses an outdoor heat pump connected to an indoor air handler that distributes conditioned air through a network of ducts to multiple rooms. For DIY enthusiasts, core tasks typically include site assessment, layout planning, duct sealing, insulation, thermostat integration, and commissioning checks. Refrigerant handling, brazing refrigerant lines, and major electrical upgrades are areas where codes and safety require a licensed technician. According to Heatpump Smart, homeowners who are comfortable with hands-on home projects can manage planning, duct design, and thermostat integration for a ducted setup, but refrigerant work remains outside the DIY scope. This article will help you decide what you can do, what to outsource, and how to verify system performance.
What to expect from this guide
We’ll walk you through practical planning steps, fundamental sizing concepts, duct design guidelines, wiring and controls basics, and common missteps. The content leans on best practices for energy efficiency, safety, and long-term reliability. You’ll see notes on when to involve a professional and how to balance cost, comfort, and soundness of installation so your diy heat pump ducted project pays off in comfort and energy savings.
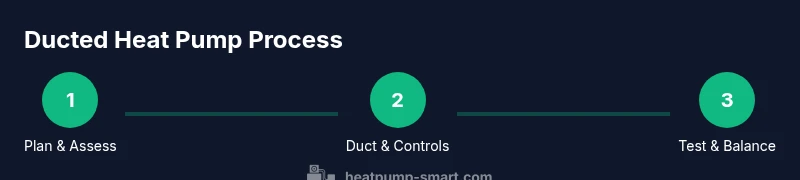
Safety and scope: what you can DIY and when to call a pro
This guide emphasizes safety, code compliance, and proper sequence. You can safely handle pre-install planning, component selection, duct sealing, insulation, and thermostat setup. You should not perform refrigerant charging, system pressure testing beyond manufacturer guidelines, or major electrical work that requires a panel upgrade. Always consult local codes and hire licensed contractors for tasks that involve refrigerant, high voltage, or significant structural changes.
Tools & Materials
- Voltage tester(Verify circuit availability and safety before wiring work)
- Multimeter(Check resistances and electrical integrity of controls)
- Screwdriver set (Phillips and flat-head)(For mounting and terminal connections)
- Tin snips or duct cutter(Cut sheet metal ductwork cleanly)
- Sheet metal ducts, elbows, and transitions(Create a proper duct layout for zones)
- Duct mastic sealant and metal tape(Seal joints to prevent air leaks)
- Duct insulation (R-6 or higher)(Wrap exposed ducts to minimize heat loss)
- Flexible transition ducts(Use as needed for connections)
- Thermostat with multi-stage capability(Enable zoning and efficient operation)
- Safety gear (gloves, goggles)(Personal protective equipment during installation)
- Labeling materials (markers, tape)(Clearly label ducts, wires, and zones)
- Pressure/leak detector (for ducts, not refrigerant)(Useful for verifying duct integrity after sealing)
Steps
Estimated time: 18-24 hours
- 1
Assess site and plan layout
Survey the space to determine the best location for outdoor and indoor equipment, existing duct routes, and zones that will benefit most from a ducted system. Create a rough layout showing air handler placement, duct runs, and thermostat locations. Document any obstacles (trusses, crawl spaces, attics) and note access requirements for service calls.
Tip: Draft a simple one-line goal for each zone (e.g., keep living room under 72°F in winter). - 2
Check electrical service and panel capacity
Verify the home’s electrical service can support the heat pump, typically requiring dedicated circuits and adequate amperage. Identify the main panel space or subpanel location for future breakers. Do not upsize wiring or breakers without a licensed electrician.
Tip: Take clear photos of the panel and existing wiring before any changes to help the electrician. - 3
Design duct layout and zones
Create a duct plan that minimizes long runs, reduces sharp turns, and balances airflow to zones. Plan supply vents in living areas and return air locations that promote good airflow. Dimension ducts to reduce static pressure and balance with the air handler capacity.
Tip: Label each zone on the plan and map return air paths for balanced performance. - 4
Mount indoor air handler and connect ductwork
Mount the indoor unit in a location that allows convenient duct connections and service access. Cut and fit straight runs, elbows, and branches. Seal joints with mastic before applying metal tape. Mount the air handler and secure duct connections.
Tip: Avoid obstructing drains or access panels; leave room for service clearance. - 5
Route electrical and refrigerant lines (professional involvement)
Route control wiring and refrigerant lines per manufacturer guidance. Do not open or braze refrigerant lines; refrigerant work must be performed by a licensed technician and inspected. Run low-voltage wires to the thermostat and confirm correct terminal connections.
Tip: Keep refrigerant lines separate from power wiring to prevent interference. - 6
Install thermostat and controls
Install the thermostat in a central, reachable location. Program basic heat and cool stages, configure fan behavior, and enable any zoning features if your system supports it. Ensure the thermostat communicates with the indoor unit.
Tip: Label wires at the thermostat for easy future service. - 7
Commission and refrigerant scheduling
Because refrigerant charging requires specialized tools and licensing, schedule a licensed HVAC professional to perform the refrigerant charge and a system test after installation. Coordinate inspection if required by local codes.
Tip: Prepare system notes and a timeline for the technician to keep the process smooth. - 8
Test system, balance airflow, and finalize
Power up the system, verify airflow at each vent, balance dampers if present, and check for unusual noises or vibrations. Confirm that the thermostat cycles correctly and that the system maintains desired temperatures. Document final settings and provide a simple maintenance plan.
Tip: Keep a log of initial performance readings to monitor long-term efficiency.
Your Questions Answered
Is a DIY installation allowed for a ducted heat pump?
Yes, in some areas you can perform planning, layout, duct sealing, and thermostat setup yourself. However, refrigerant work and major electrical upgrades require a licensed contractor and adherence to local codes.
DIY installation is allowed in some places for planning and duct work, but refrigerant handling and major wiring should be done by a licensed professional.
What permits or inspections might be required?
Many jurisdictions require permits for heat pump installations and duct modifications, plus inspections after completion. Check with your local building department and verify requirements before starting.
Check with your local building department for permits and inspections before you begin.
Can I reuse existing ducts for a ducted heat pump?
Reuse is possible if the existing ductwork is in good condition, appropriately sized, and sealed. A professional should assess leakage, size, and airflow to ensure compatibility with the new system.
Existing ducts can work if they’re sound and properly sized, but have them evaluated for leaks and airflow.
How long does a typical DIY installation take?
Time varies by home size and complexity, but a careful DIY plan could take several days to complete phases, not including refrigerant charging by a pro.
Expect multiple days for planning, duct work, and controls, plus scheduling a pro for refrigerant service.
Should I perform a duct leakage test?
Yes, testing for duct leakage helps quantify losses and guides sealing improvements. A professional-grade blower door test is recommended for reliable results.
Testing for leaks is important; consider a professional test to get accurate results.
Do I need a professional to calibrate the system after install?
Yes. After installation, a pro should calibrate refrigerant charge, airflow balance, and control settings to ensure peak performance and warranty compliance.
A pro should calibrate the system after installation to ensure efficiency and warranty coverage.
Watch Video
Top Takeaways
- DIY planning and basic installation steps are feasible for many homeowners.
- Never DIY refrigerant charging or major electrical upgrades.
- Proper duct design and sealing are critical for efficiency and comfort.
- Obtain permits and follow manufacturer guidelines; safety and code compliance matter.