DIY Heat Pump Kit: A Homeowner’s Step-by-Step Installation Guide
A practical, safety‑driven guide to evaluating, planning, and installing a diy heat pump kit with professional boundaries and maintenance tips.

With a diy heat pump kit, a prepared homeowner can assemble a basic heat‑pump system for learning and cost savings. Before you start, verify local codes and permit requirements, ensure you have electrical safety gear, and acknowledge that refrigerant handling often requires a licensed technician. This quick answer outlines what you’ll do, the key prerequisites, and the boundaries between DIY assembly and professional service.
What is a DIY heat pump kit?
A diy heat pump kit is a packaged set of components designed to demonstrate how heat pumps move heat and provide space conditioning. Kits range from educational demonstrations to more complete, install‑ready configurations. Typical contents include an outdoor condenser, an indoor air handler, mounting hardware, wiring harnesses, thermostat or control panel, and pre‑assembled fittings. The intent is to give homeowners hands‑on experience with the technology, while emphasizing safety and local code considerations. Because kits vary by model and supplier, always read the documentation to understand included components, required tools, and what the manufacturer permits for DIY use. Remember that many heat pump tasks—especially refrigerant handling and sealed connections—are subject to regulatory rules and warranty terms.
Is a DIY heat pump kit right for you?
Deciding to use a heat pump kit at home is a balance of interest, skill, budget, and risk tolerance. If your goal is learning, testing basic operation, or experimenting with energy‑saving concepts in a controlled space, a kit can be a rewarding project. If your home needs a full, code‑compliant heating and cooling solution, or if you lack experience with electrical systems and refrigerant‑charged equipment, a professional installation is safer and more reliable. Factors to assess include climate suitability, insulation quality, electrical service capacity, and warranty implications. Heatpump Smart analysis shows that well‑matched kits paired with proper safety practices can be educational, but most real‑world installations still require professional oversight for refrigerant handling and system charging. Always verify that the kit aligns with local regulations and the home’s electrical and structural constraints.
Safety, permits, and professional boundaries
Working with heat pump equipment introduces electrical hazards, refrigerant handling duties, and heavy machinery safety considerations. Before attempting any DIY install, check local permits and energy codes, and plan for required inspections. Even if the kit is marketed as DIY‑friendly, refrigerant handling, leak testing, and initial charging are typically regulated tasks that require licensed technicians. Always disconnect power before touching any electrical components, use PPE, and keep children and pets away during work. If in doubt, schedule a professional evaluation of your plan to avoid damage, voided warranties, or unsafe installations.
How to choose a kit and plan your install
Start by matching the kit to your home size, climate, and existing electrical service. Look for a model with clear installation diagrams, pre‑charged lines where possible, and explicit limitations on DIY tasks in the documentation. Create a simple site plan that includes outdoor clearance, a clear path for wiring, and a safe route for refrigerant‑line routing (if applicable). Consider warranty terms and whether the kit supports future expansion, zoning, or compatibility with your thermostat and controls. A well‑documented plan reduces on‑site surprises and helps you stay within safety and code boundaries.
Step-by-step overview you can trust
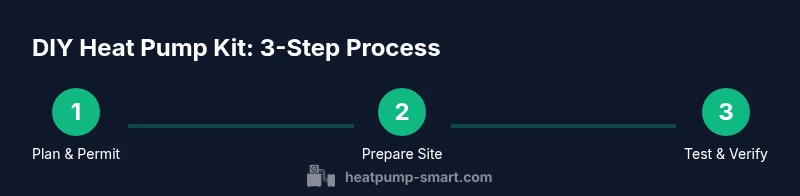
A high-level flow for a DIY heat pump kit includes planning, site preparation, component mounting, electrical connections, indoor/outdoor linking (as permitted by the kit), system testing, and commissioning. The exact sequence depends on the kit design, so always follow the manufacturer’s instructions. In many cases, refrigerant handling and system charging are not DIY tasks; pre‑charged or demonstration kits may avoid these steps. Keep connections labeled, organize tools, and verify each subsystem before proceeding to the next.
Common pitfalls and troubleshooting tips
Common mistakes include underestimating electrical load, selecting a kit with insufficient capacity for the home, and skipping permits or inspections. Another frequent issue is attempting to vacuum and charge refrigerant without proper training or equipment. If you notice unusual noises, vibration, leaks, or inconsistent temperatures, pause work, recheck connections, and consult the documentation or a professional. Maintaining clean wiring, secure mounts, and correct control wiring are essential to avoid safety hazards and performance problems.
Maintenance, warranty, and long-term care
After installation, document all components, serial numbers, and dates of work. Schedule periodic inspections to check seals, connections, and airflow. Maintain your system by replacing air filters and keeping outdoor unit clear of debris. Be mindful that some warranties require professional service for refrigerant handling or long‑term refrigerant integrity checks. If the kit is educational or modular, plan for upgrades or expansions that align with evolving codes and energy goals.
Quick-start checklist after purchasing a kit
- Review all included components and manufacturer instructions.
- Confirm permit requirements with local authorities.
- Gather safety gear: PPE, voltage tester, and insulated tools.
- Create a simple plan for mounting, routing, and controls.
- Keep a log of tests, settings, and wiring diagrams for future reference.
Tools & Materials
- Electrical safety gear (insulated gloves, safety glasses)(PPE designed for electrical work; ensure proper ratings for local voltage)
- Digital multimeter(For voltage testing and continuity checks; verify rating for your system)
- Insulated hand tools and screwdriver set(Phillips and flathead; non‑conductive handles preferred)
- Voltage tester and disconnect(Essential for confirming power is off before work)
- Measuring tape and level(Accurate layout and level mounting prevent vibration issues)
- Mounting hardware provided in kit(Use the hardware supplied; replace with corrosion‑resistant components if missing)
- Non‑conductive ladder or scaffolding(Safe access to outdoor mounting area)
- Refrigerant handling equipment(Only if kit explicitly includes and you are trained; otherwise do not attempt)
- Weatherproof conduit enclosure or boxes(For protecting electrical connections in damp environments)
Steps
Estimated time: 6-12 hours
- 1
Verify codes and permits
Before any work begins, consult local building codes and your jurisdiction’s permitting requirements. Confirm whether a licensed professional is required for refrigerant handling or system charging. Document the plan and ensure access to inspection when the work is complete.
Tip: Call the building department early to avoid late permit fees or delays. - 2
Plan layout and routing
Sketch a simple layout for the outdoor unit, indoor unit, wiring runs, and any ductwork or piping routes. Ensure clearances around the outdoor unit and avoid obstructing vents or drainage paths. Verify that the planned route complies with kit instructions.
Tip: Map utilities on paper first; reuse existing conduits when possible to minimize new penetrations. - 3
Prepare outdoor mounting area
Create a solid, level base using concrete pads or anti‑vibration pads. Clear debris and ensure the area drains away from buildings. Check that the surface can support the weight of the outdoor unit.
Tip: Use a level and shim as needed to avoid stressed connections. - 4
Mount outdoor unit
Secure the outdoor unit to the base with provided hardware. Use vibration isolation and confirm level after mounting. Verify that the unit is oriented for optimal airflow and accessibility for service.
Tip: Double‑check clearance around the unit for airflow and service access. - 5
Establish electrical supply
Shut off power at the main breaker before making any connections. Run appropriate conduit to the outdoor unit and attach the disconnect as required by code. Connect the wiring per the kit schematic and verify with a multimeter.
Tip: If you’re uncertain about wiring, pause and consult an electrician; improper wiring is a major safety risk. - 6
Interconnect indoor unit and controls
Connect the indoor unit to the outdoor unit using the kit’s provided hoses or pipes, following the manufacturer’s routing and mounting instructions. Attach control wiring and thermostat interface, ensuring compatibility with your existing thermostat. Do not modify sealed refrigerant paths unless authorized by the kit and a professional.
Tip: Label every connection and keep a copy of the wiring diagram near the control panel. - 7
Initial test and safety verification
With power restored, perform a controlled start and monitor for proper fan operation and airflow. Check for unusual noises, vibrations, or refrigerant smells. If the system is not behaving as expected, power down and recheck all connections before attempting a restart.
Tip: Keep a log of readings and observed behavior for troubleshooting. - 8
Documentation and warranty review
Record model numbers, serials, installation dates, and any diagnostics observed during testing. Review the warranty terms to understand what qualifies as an approved service event. Retain the kit manual and setup drawings for future maintenance or expansion.
Tip: Store digital copies of manuals and receipts in a dedicated folder.
Your Questions Answered
Can I install a diy heat pump kit without HVAC experience?
A basic introduction kit can be educational for homeowners, but professional HVAC experience is usually needed for refrigerant handling, system charging, and code compliance. If you lack experience, consider a supervised project or a professional assessment before proceeding.
A basic kit can teach concepts, but refrigerant work and code compliance typically require a licensed professional. Consider a supervised project if you’re new to HVAC.
What parts are usually included in a kit?
Most kits include an outdoor unit, an indoor coil or air handler, mounting hardware, control wiring, and a thermostat or controller. Some kits offer pre‑charged lines; others require on‑site charging by a pro. Always read the manufacturer documentation to know what's included.
Most kits have an outdoor unit, indoor component, wiring, and a controller. Some kits include pre‑charged lines; others require professional charging.
Do I need permits or inspections for a DIY heat pump kit?
Permits and inspections depend on your locality and the project scope. In many cases, electrical work and refrigerant handling trigger permit requirements. Check with your local building department before starting.
Permits vary by location; electrical and refrigerant tasks often require inspections. Check with your local building department first.
Is refrigerant handling allowed in DIY projects?
Generally, refrigerant handling and system charging should be performed by licensed technicians. DIY kits often avoid these steps or require supervision. Always follow local laws and kit guidelines.
Refrigerant work is usually restricted to licensed professionals. Follow kit guidelines and local laws.
How long does installation take?
Time varies with kit complexity and site conditions. Plan for several hours to a full day, plus potential permit processing time if required. Break the work into stages and test between steps.
Expect several hours to a full day, depending on kit complexity and site conditions.
How can I improve efficiency after installation?
Ensure proper insulation, seal ductwork, and program your thermostat for efficient temperature control. Regularly replace air filters and schedule periodic maintenance checks. Consider integrating with smart controls for optimization.
Improve efficiency with good insulation, sealed ducts, and smart thermostat programming.
Watch Video
Top Takeaways
- Plan before you mount equipment
- Prioritize safety and code compliance
- Avoid DIY refrigerant tasks outside training
- Choose a kit aligned with home climate and wiring
- Document installation for warranty and future maintenance