Heat Pump Quality Install Checklist: Step-by-Step Guide
Master a heat pump quality install checklist with a step-by-step approach covering sizing, electrical, ductwork, refrigerant charging, and commissioning for reliable, efficient performance.

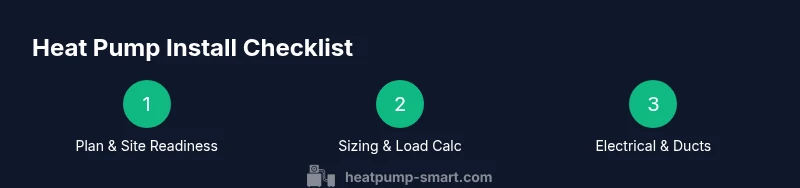
This guide helps you complete a heat pump quality install checklist that covers site readiness, equipment verification, electrical and duct integrity, and commissioning. Key requirements include a correctly sized unit, proper clearances, dedicated circuits, accurate refrigerant charge, and thorough documentation. Follow the step-by-step process below to ensure a reliable, efficient, and long-lasting heat pump installation.
Pre-install planning and site readiness
A quality install begins before tools touch metal. For a heat pump, success depends on accurate site assessment, load considerations, and realistic expectations for efficiency gains. According to Heatpump Smart, the planning phase should establish four essentials: the correct equipment match to climate and home size; accessible mounting and service access; electrical capacity and code compliance; and a clear commissioning plan. In this section you’ll learn how to map your project scope, identify potential obstacles, and prepare the space to support reliable performance. Key tasks include confirming zoning and thermostat strategy, verifying outdoor and indoor unit placement relative to windows, doors, and vents, and collecting reference measurements (room sizes, duct routes, exterior clearances). By documenting baseline conditions you’ll reduce surprises during installation and make future maintenance easier. Also consider the home’s insulation, air leakage, and solar exposure, since these factors influence the heat pump’s efficiency and comfort. Finally, create a simple checklist that your crew can follow on day one, so no critical step is overlooked.
Equipment verification and sizing
Accurate equipment sizing is critical for performance and energy efficiency. The heat pump should be matched to the home's heating and cooling loads, not merely to room-by-room demands. Use a recognized protocol such as Manual J for load calculation and Manual D for duct design. Confirm the model, serial, and efficiency ratings (SEER, HSPF) before installation, and verify that all components and accessories are compatible with your climate zone. Inaccurate sizing leads to short cycling, higher energy use, and reduced comfort. Heatpump Smart emphasizes documenting the calculated load, chosen equipment, and expected operating ranges so that future service visits have a reference point.
Electrical readiness and code compliance
Electrical work is a common source of delays. Ensure a dedicated circuit for the outdoor unit with correct voltage and amperage, proper bonding, and an accessible disconnect within sight of the unit. Check panel space, wire gauge, and conduit routing. Verify that wiring meets local code requirements and that GFCI protection is provided where required. If electrical upgrades are needed, plan them before load tests and refrigerant charging to avoid rework. The consequence of improper wiring is safety risk, nuisance trips, and warranty issues.
Ductwork and indoor air distribution
Inspect existing ductwork for leaks, improper sizes, and insulation gaps. Use a duct blaster or pressure pan test to quantify leakage and target an airtight system with a leakage rate under a defined threshold. Seal all joints with high-quality mastic and foil tape, and insulate any exposed ducts in unconditioned spaces. Ensure that supply and return routes are balanced to prevent cold or hot spots. If new ducts are installed, follow a proper design and testing protocol to ensure the system delivers the intended airflow.
Outdoor unit placement and clearances
Outdoor unit location affects noise, efficiency, and durability. Place the condenser on a level pad or concrete slab with adequate clearance for service access and proper airflow. Maintain minimum clearances from walls, fences, and vegetation as specified by the manufacturer and local codes. Protect the unit from direct sunlight in hot climates and ensure drainage away from the foundation. Weatherproofing and secure mounting reduce vibration and prolong compressor life.
Refrigerant lines, connections, and insulation
Before charging, inspect the refrigerant line set for kinks, proper insulation, and minimum length requirements. Use a vacuum pump to remove moisture from the lines before charging. Check for signs of oil leaks, damaged insulation, or crushed lines that could impair performance. When connecting, ensure fittings are tight and use approved refrigerant and oils per the manufacturer. A precise field charge is essential to prevent compressor wear and erratic temperatures.
Drainage, condensate management, and humidity control
Confirm condensate drain piping is correctly sloped and free of blockages. Test the condensate pan safety switch and pump if used. Ensure the installation prevents standing water near electrical components and that the humidity control features respond appropriately to indoor conditions. In humid climates, verify proper condensate drain slope and consider secondary drainage as a backup. These steps help avoid water damage and mold growth.
Controls, thermostats, zoning, and commissioning
Integrate the heat pump with the home's thermostat and any zoning system. Program thermostat schedules, enter climate settings, and verify that heat pump modes (cool/heat/auto) respond promptly. Calibrate sensors to maintain accurate indoor temps and ensure outdoor unit idle/landing sequences are correct. Commissioning should include a full run-test across all modes, a verification of airflow, and documentation of operating pressures and electrical readings.
Documentation, warranty, and maintenance planning
Finish with thorough documentation: as-built drawings, equipment manuals, serial numbers, warranty details, and commissioning results. Provide the homeowner with a maintenance schedule, including filter changes, coil cleaning, and pre-season checks. Schedule a follow-up visit to address any initial teething problems and to confirm that the system operates within expected performance ranges. For ongoing reliability, invest in annual inspections and keep a spare parts list.
Tools & Materials
- Measuring tape (at least 25 ft)(for space checks, duct lengths, and clearances)
- Duct sealing materials (mastic, foil tape)(to seal joints and prevent leaks)
- Manometer or pressure gauge(for duct leakage tests or static pressure checks)
- Vacuum pump and micron gauge(to remove moisture from refrigerant lines before charging)
- Voltage tester(verify circuits and electrical safety)
- Cordless drill and bits(mounting and drilling as needed)
- Level(ensure outdoor unit and condensate lines are level)
- Protective equipment (gloves, goggles)(safety first during handling and testing)
- Torque wrench (optional)(as specified by some manufacturers)
- Clamps and sealants for condensate lines(backup materials for drainage and sealing)
Steps
Estimated time: 4-8 hours
- 1
Assess site and confirm requirements
Survey the installation site, document existing equipment, and confirm space for both indoor and outdoor units. Check access routes for service technicians and ensure all safety hazards are addressed before any work begins. This step sets the foundation for accurate sizing and proper airflow. Why: Early assessment reduces rework and delays later in the project.
Tip: Take photos and annotate measurements for reference. - 2
Verify load calculation and equipment size
Run a formal load calculation (Manual J) and verify the chosen heat pump model, capacity, and efficiency ratings against climate and home size. Record calculations and ensure compatibility with duct design (Manual D) and zoning if applicable. Why: Incorrect sizing leads to comfort issues and wasted energy.
Tip: Never rely on rough estimates from salesperson alone. - 3
Confirm electrical readiness
Inspect electrical service capacity, wire gauge, and the dedicated circuit layout for the outdoor unit. Ensure a readily accessible disconnect and appropriate conduit. Resolve any electrical upgrades before refrigerant work begins. Why: Electrical problems are a leading cause of delayed commissioning.
Tip: Have the inspector review panel capacity early. - 4
Prepare ductwork and air distribution
Assess existing ducts for leaks, sizes, and insulation. Seal joints with mastic and insulate exposed ducts in unconditioned spaces. If ducts require replacement, design and install to meet calculated airflow needs and test for balanced supply and return ratios. Why: Poor ductwork undermines efficiency and comfort.
Tip: Perform a duct leakage test and document the baseline. - 5
Position outdoor unit and ensure clearances
Place the condenser on a stable pad with adequate clearance for airflow and service access. Keep minimum distances from walls and vegetation, and shield from excess debris and weather where possible. Why: Improper placement increases noise and reduces efficiency.
Tip: Plan for cable routing to minimize bends and resistance. - 6
Inspect refrigerant lines and insulation
Check line-set for kinks, ensure insulation is intact, and verify line length aligns with manufacturer guidelines. Evacuate and vacuum the lines before charging to remove moisture. Why: Moisture and leaks degrade performance and reliability.
Tip: Use proper leak detection fluid during connections. - 7
Charge refrigerant and verify performance
Charge per manufacturer specifications using live gauges and superheat/subcooling checks. Confirm that operating pressures align with expected ranges at typical conditions. Why: Incorrect charge causes poor cooling/heating and compressor wear.
Tip: Document final charge and operating conditions. - 8
Integrate controls and thermostat
Connect thermostat, configure heat pump modes, zoning, and schedules. Validate responsive control of indoor and outdoor units and verify sensor calibration. Why: Inaccurate controls lead to user frustration and inefficiency.
Tip: Test a full cycle in all modes (cool/heat/auto). - 9
Complete commissioning and documentation
Run a full system test, record performance data (airflow, pressures, electrical readings), and provide the homeowner with manuals, warranty info, and a maintenance plan. Schedule a follow-up after 1–3 months to verify performance. Why: Documentation ensures future service is informed and prompt.
Tip: Keep a copy of the commissioning report with the warranty.
Your Questions Answered
What is a heat pump quality install checklist?
A heat pump quality install checklist is a structured set of steps and criteria used to verify every essential aspect of a heat pump installation, from sizing to commissioning. It helps ensure safety, efficiency, and reliability.
A heat pump quality install checklist guides every critical step from sizing to commissioning to ensure a safe, efficient system.
How do I verify outdoor unit placement?
Check clearances around the unit, ensure a level base, proper airflow, and weather protection. Avoid tight spaces and ensure drainage away from the foundation.
Make sure the outdoor unit has room to breathe and sits level with good drainage nearby.
What tests confirm proper refrigerant charge?
Use manufacturer guidance with gauges, then verify superheat and subcooling at typical operating conditions. Do not overcharge or undercharge; follow service manual specs.
Field charging should follow the manual, using pressures and temperature checks to confirm the correct charge.
Is professional commissioning required?
Yes. Professional commissioning confirms system performance, safety, and efficiency, and provides a documented baseline for future service.
Commissioning by a qualified technician ensures the system operates as designed.
What safety precautions are essential?
Always shut off power before any service, wear PPE, and follow electrical codes. Refrigerant work requires certification and proper handling.
Safety first: power off and use proper protective gear when servicing heat pumps.
Watch Video
Top Takeaways
- Verify proper sizing and load calculations before installation
- Ensure dedicated electrical circuits and safe disconnects
- Seal ducts and verify airflow for balanced performance
- Document commissioning results and homeowner maintenance plan
- Schedule professional checks for long-term reliability