Heat Pump to Replace Boiler: A Step-by-Step Guide
Learn how to replace your boiler with a heat pump, including sizing, installation steps, and efficiency considerations for home comfort and energy savings.

A heat pump can replace a boiler for space heating and hot water, using electricity instead of combustion. Properly sized units, compatible emitters, and adequate electrical service are essential. See our detailed guide for sizing, installation, and optimization.
Why replacing a boiler with a heat pump makes sense
Replacing an older boiler with a heat pump can improve home comfort and reduce reliance on fossil fuels. According to Heatpump Smart, homeowners often see more even heat delivery, quieter operation, and the potential for lower running costs when the system is sized and installed correctly. The Heatpump Smart team found that success depends on climate, insulation, and how well the system is integrated with existing radiators and hot water supply. This overview explains when a heat pump is a good fit and how to assess your home’s readiness. You’ll learn how a heat pump to replace boiler can interact with your distribution network, what changes might be required, and how to maximize performance. By understanding the basics, you can decide if a heat pump is right for your home.
How heat pumps integrate with existing radiators and hot water
Heat pumps operate at lower flow temperatures than traditional boilers, which means they require properly sized radiators or underfloor heating to keep you warm. They can supply domestic hot water through a cylinder or tank, but the heat source is electricity rather than gas or oil. In many homes, radiators may need to be upgraded or balanced to avoid cold spots and ensure consistent temperatures. A heat pump with a well-insulated home and correctly configured controls can maintain comfort with fewer temperature swings. The Heatpump Smart guidance emphasizes planning for the long term: you may need to upgrade insulation, seal air leaks, and install weatherstripping to reduce heat loss. Taking these steps helps you achieve reliable performance and reduces the risk of short cycling or oversized components. When done right, a heat pump to replace boiler can meet seasonal heating and DHW needs more efficiently than aging fossil-fuel systems.
Sizing and compatibility: what you need to check
Proper sizing is critical for a successful replacement. A professional will evaluate your home's heat load, existing distribution, and DHW requirements to determine the correct heat pump capacity. Compatibility checks include radiator delta-T (temperature difference) compatibility, the presence of a storage cylinder for hot water, and space for outdoor and indoor units. They will also assess electrical service, ventilation, and refrigerant piping routes. The design should consider peak demand, occupancy patterns, and future insulation improvements. If your current boiler uses a high-temperature feed, the heat pump might need an auxiliary heat source for very cold days. Heatpump Smart notes that careful planning helps avoid over-sizing or under-sizing, both of which compromise comfort and efficiency.
Choosing between air-source and geothermal options
Air-source heat pumps are the most common choice for boiler replacements due to easier installation, lower upfront costs, and suitability for many climates. Ground-source (geothermal) systems can offer higher efficiency in some settings, but require more extensive ground work and longer installation times. Your decision should weigh available outdoor space, soil conditions, and long-term energy goals. Climate influences performance: in milder winters, heat pumps provide strong efficiency; in extreme cold, some models pair with auxiliary heat. The Heatpump Smart team suggests speaking with installers to compare COP expectations, noise levels, and service access. A well-chosen heat pump can replace a boiler while delivering reliable warmth and hot water with a more sustainable energy profile.
Electrical, plumbing, and permitting considerations
Replacing a boiler with a heat pump often triggers electrical upgrades and plumbing changes. You may need a dedicated circuit, new wiring, a larger electrical panel, and upgraded grounding. Piping and refrigerant connections require proper isolation and safety controls. Permitting varies by locality, but a professional installer can guide you through required approvals. You should plan for potential changes to condensate drainage and venting, especially if converting from a sealed combustion unit to a heat pump. By addressing these requirements early, you reduce the risk of delays during installation and ensure compliance with building codes.
Heat pump controls, zoning, and system integration
Today’s heat pumps offer sophisticated controls, including smart thermostats, zoning, and integration with existing hot water cylinders. You can schedule different temperatures by room or zone and use outdoor reset controls to optimize efficiency. An effective control strategy reduces energy usage while maintaining comfort. The installer should configure the system to operate within your home's envelope, adjusting active cooling or dehumidification as needed. If you currently have a boiler-based heating schedule, you may need to rethink thermostat logic to leverage the heat pump’s lower-temperature operation. Heatpump Smart's guidance emphasizes harmonizing controls with insulation improvements for best results.
Operating costs, efficiency, and climate considerations
Heat pumps operate on electricity, which can be cheaper per unit of heat in many regions, especially when paired with good insulation and renewable electricity. You may see lower running costs over time compared with fossil-fuel boilers, but this depends on weather, usage, and energy prices. Efficiency is influenced by indoor temperature settings, heat emitter sizing, and how well the home is sealed. In colder climates, some systems use supplementary heat to maintain comfort during extreme cold snaps. Heatpump Smart analysis highlights the importance of energy-aware behavior, like reducing temperature setbacks and using smart controls to maximize off-peak operation.
Common challenges and mitigation strategies
Common hurdles include radiator compatibility, space constraints for outdoor units, and ensuring adequate electrical service. A poorly sized system can lead to comfort problems or frequent cycling. To mitigate these, work with a qualified installer to refine radiator sizing, assess electrical upgrades, and plan for noise mitigation where needed. Proper defrost strategies and refrigerant management are critical in colder climates to maintain performance. Your team should also plan for future insulation improvements to keep the system efficient as your home ages.
Pre-installation preparation: a homeowner checklist
Before installation, gather current energy bills, list heating patterns, and note hot water usage. Have the home evaluated for insulation gaps and air leaks, and prepare the space for outdoor equipment and indoor air handler placements. Confirm permit requirements and coordinate access with occupants. Prepare a rough timeline and ensure you’ll have alternative heating during any downtime. The checklist can help you stay organized and minimize disruption during the heat pump to replace boiler process.
Installation timeline and what to expect
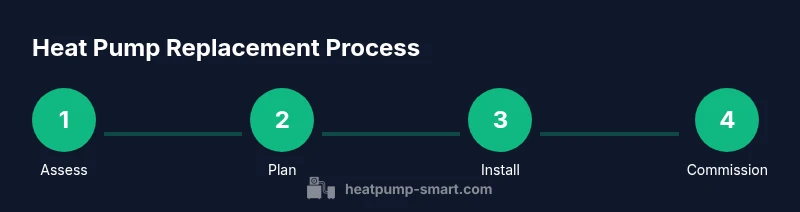
While every project varies, a boiler replacement with a heat pump typically unfolds in stages: equipment selection, site preparation, installation, and commissioning. Expect some disruption to daily routines, especially during electrical upgrades and refrigerant connections. A typical installation involves outdoor unit mounting, refrigerant line routing, indoor unit connection, and thermostat integration. After installation, the system is tested for leaks, airflow, and temperature delivery. You should receive training on operation and troubleshooting from your installer.
Post-installation testing and optimization
After commissioning, a thorough performance check confirms the system meets design goals. The technician will validate heat delivery, hot water temperature, and system efficiency under normal usage. They may fine-tune controls, balance radiators, and adjust outdoor reset settings. You should review warranty terms and confirm maintenance plans. A follow-up visit is often recommended to ensure everything runs smoothly through seasonal changes.
Maintenance plan and long-term care
Regular maintenance helps ensure reliable performance and longevity for your heat pump system. Schedule periodic professional service to inspect refrigerant levels, filters, and electrical connections. Keep the outdoor unit clear of debris and maintain proper airflow. Monitor system notifications from smart controls and adjust settings seasonally. With a proactive maintenance routine, you can sustain efficiency and comfort for years.
Tools & Materials
- Heat pump unit (air-source or geothermal)(Size matched to home heat load and DHW needs)
- Domestic hot water cylinder (if DHW is heat-pump sourced)(Ensure compatibility with heat pump water heating mode)
- Compatible radiators or underfloor heating(Rated for lower flow temperatures, may require balancing)
- Electrical service upgrade (panel and wiring)(Dedicated circuit, correct RCD/MCB protection)
- Thermostats/controls (smart thermostat, zones)(Ensure integration with heat pump control logic)
- Insulation and air-sealing materials(Low heat losses improve performance)
Steps
Estimated time: Estimated total time: 4-12 weeks
- 1
Assess home needs and define goals
Begin with a clear list of heating priorities and comfort expectations. Review seasonal usage, hot water demand, and any constraints like space for equipment. This upfront audit helps determine whether a heat pump to replace boiler will meet your needs.
Tip: Bring recent energy bills and existing boiler specs to the assessment. - 2
Obtain sizing and feasibility assessment
Invite a qualified installer to perform a professional size calculation and feasibility check. They will consider climate, envelope tightness, and distribution to determine the right heat pump capacity.
Tip: Ask for a written load calculation and a documented plan for any radiator upgrades. - 3
Check electrical capacity and permit needs
Have an electrician assess your panel capacity and wiring. Confirm permit requirements with local authorities and prepare for potential upgrades.
Tip: Ensure a dedicated circuit and proper grounding before installation begins. - 4
Choose heat pump type and configuration
Select between air-source and geothermal options based on space, budget, and site conditions. Decide on hot water integration and whether zoning is needed.
Tip: Discuss noise levels, outdoor unit location, and service access with the installer. - 5
Prepare site and order equipment
Prepare the outdoor installation area, indoor air handler space, and any necessary plumbing or electrical fittings. Place orders for the heat pump, cylinders, and controls.
Tip: Coordinate delivery windows to minimize downtime. - 6
Install outdoor unit and route refrigerant lines
Mount the outdoor unit securely and route refrigerant lines with proper insulation and vibration isolation. Ensure outdoor access and safe clearance from obstacles.
Tip: Check for leaks and test refrigerant integrity during rough-in. - 7
Install indoor unit and connect to radiators/DHW
Set up the indoor air-handler or hydraulic module and connect to radiators or underfloor loops. Tie in the hot water cylinder if using heat-pump DHW. Verify leak-free connections.
Tip: Balance radiators after connections to ensure even heat distribution. - 8
Configure controls and zoning
Program thermostats, enable zoning if available, and set up outdoor/reset controls to optimize efficiency. Train household members on operation.
Tip: Use smart scheduling to maximize off-peak usage. - 9
Commission the system and test performance
Run full system commissioning: verify heating delivery, hot water temperature, airflow, and electrical safety. Address any issues identified during testing.
Tip: Document any adjustments for future maintenance. - 10
Educate users and optimize operation
Provide user guidance on thermostat programming, maintenance intervals, and troubleshooting. Optimize settings for comfort and energy savings.
Tip: Keep a simple reference sheet accessible for quick tweaks. - 11
Finalize documentation and warranty
Collect warranties, installation certificates, and service plans. Store documentation in a known location for future reference.
Tip: Register warranties where required to activate benefits. - 12
Schedule ongoing maintenance
Set up periodic professional checkups and routine DIY cleanings of filters and outdoor unit. Maintain a proactive care plan for longevity.
Tip: Add reminders for seasonal checks and inspections.
Your Questions Answered
Can a heat pump replace my boiler in a colder climate?
Yes, but performance depends on model and insulation. Some systems use auxiliary heat on very cold days. An installer can evaluate climate suitability and recommend a solution.
A heat pump can work in cold weather, but you may need auxiliary heat for extreme cold, based on the model and home insulation.
Will my existing radiators work with a heat pump?
Radiators can work with heat pumps if they’re sized for lower water temperatures and balanced to prevent cold spots. Upgrades or retuning may be needed.
Existing radiators can work, but they might need balancing or upgrading for best performance.
Do I need a new hot water system when replacing my boiler?
Heat pumps can supply hot water via a storage cylinder. Depending on your setup, you may need a dedicated cylinder or a combined DHW solution.
A storage cylinder is often required for hot water heating with heat pumps.
How long does installation take?
Timeline varies by project scope but includes site prep, equipment installation, and commissioning. Expect several days to weeks depending on existing infrastructure.
The installation timeline can range from a few days to a few weeks depending on complexity.
Are there rebates or incentives for heat pump installations?
Some programs offer incentives for heat pump installations; eligibility depends on location and efficiency standards. Check with local authorities or utility programs.
There may be rebates in your area; check local programs for eligibility.
What maintenance is required after installation?
Schedule regular professional checkups, monitor filters, and clean the outdoor unit. Keep an eye on thermostat behavior and yearly system checks.
Expect regular professional service and some DIY upkeep like filter cleaning.
Watch Video
Top Takeaways
- Assess climate and insulation before choosing a heat pump
- Ensure radiator compatibility with lower temperature operation
- Plan for electrical upgrades and permitting early
- Compare air-source vs geothermal based on site, budget, and goals
- Work with qualified installers for sizing, installation, and maintenance