Installing Ductless Heat Pumps: A Practical How-To
Learn the step-by-step process for installing a ductless heat pump, from site assessment and placement to electrical connections and testing. This expert guide from Heatpump Smart covers safety, efficiency, and long-term performance.

Installing a ductless heat pump lets you heat or cool individual zones without ductwork. This step-by-step guide outlines planning, placement, electrical work, refrigerant connections, and testing to ensure safe, efficient operation. By following these steps, homeowners, builders, and property managers can achieve flexible climate control with reduced energy losses. It also covers sizing, mounting, wiring, and commissioning, with safety tips and maintenance guidance.
Why Installing a Ductless Heat Pump Is Worth It
Installing a ductless heat pump offers targeted climate control, easy retrofits, and quiet operation. Rather than pushing heated or cooled air through ducts, you place compact indoor units in the rooms that need comfort, and an outdoor unit handles the rest. According to Heatpump Smart, installing a ductless heat pump can improve comfort in zones while reducing energy waste from duct losses. This approach also simplifies future expansions or changes to room layouts. In homes or mixed-use spaces, homeowners, builders, and property managers can tailor heating and cooling to actual usage, which often translates into better overall comfort and cost awareness. As you plan, consider how many zones you want, your typical occupancy patterns, and how you prioritize efficiency and convenience. The results can be a more comfortable home or building with a smarter, more adaptable heating and cooling system.
How a Ductless Mini-Split System Works
A ductless mini-split system consists of an indoor air-handling unit or units and an outside condenser, connected by a small-diameter refrigerant line set, electrical wiring, and a condensate drain. The indoor units deliver conditioned air directly into living spaces, with no ductwork to leak energy. The outdoor unit houses the compressor and is sized to handle the connected indoor units. Inverter-driven compressors adjust output to maintain comfort and efficiency. The system uses a control strategy that can vary by zone, allowing you to heat one room while cooling another. This zoning capability is a major advantage for multi-room homes, additions, or spaces with irregular usage patterns, and it is a key reason many homeowners choose ductless solutions.
Sizing and Layout: Ideal Placement for Efficiency
Start by mapping each zone and estimating the heating and cooling needs of each space. Consider room function, sun exposure, insulation, ceiling height, and occupancy patterns. Indoor units should be placed where air can circulate freely and where they will not blow directly on occupants or delicate furnishings. Outdoor units need stable mounting on a solid pad or platform with clear airflow and accessible service clearances. When routing line sets, keep them as short and straight as possible, and plan for a clean exterior wall penetration. If you have limited wall space, the system designer may propose alternative placements or additional indoor units to balance loads. Proper sizing reduces uncomfortable temperature swings and helps the system run more efficiently over time.
Electrical & Safety Essentials to Check
Confirm that your electrical service and panel can support the added load, and install a dedicated circuit for the outdoor unit if required by code. A properly rated disconnect switch and compliant wiring are essential for safety and serviceability. Installers should follow the manufacturer’s wiring diagrams and local electrical codes, including grounding requirements and condensate disposal rules. If your space requires a longer run or unusual line lengths, plan for potential pressure drop and refrigerant charging implications. Always schedule a professional inspection and ensure that permits are obtained where required.
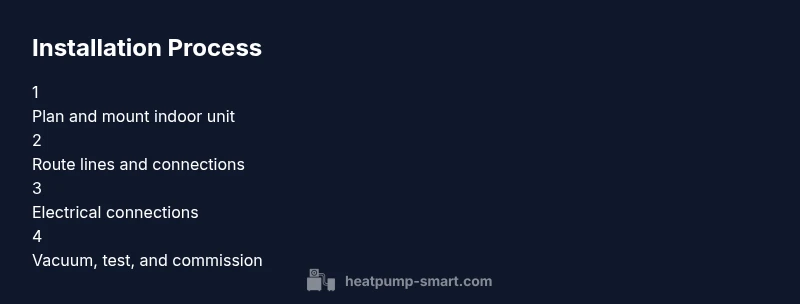
Step-by-Step Installation Overview
While the full step-by-step guide provides detailed actions, this overview highlights the major phases: site prep and measurements, mounting indoor units, routing lines and wiring, electrical connections, outdoor unit setup, vacuuming, charging, and system testing. Each phase requires careful attention to manufacturer instructions and local codes. The goal is a secure, airtight installation with reliable electrical connections and quiet, balanced operation.
Common Pitfalls and How to Avoid Them
Common pitfalls include misjudging room loads, placing indoor units in obstructed locations, and routing refrigerant lines through unsealed walls, which can cause moisture or air leaks. Other issues include underestimating the need for proper drainage, overloading the electrical circuit, or skipping a thorough vacuum test. To avoid these problems, plan zones in advance, verify clearances, seal all wall penetrations, and hire qualified professionals for critical steps such as electrical wiring and refrigerant work.
Maintenance After Installation
Regular maintenance keeps a ductless system performing at its best. Clean or replace filters on a schedule, inspect indoor coil cleanliness, and check for any ice buildup or unusual noises. Schedule annual professional servicing to check refrigerant charge, electrical connections, and overall performance. Keeping a maintenance log helps you track service history and informs future upgrades or expansions.
Tools & Materials
- Cordless drill(1/8 in drill bit; ensure battery is charged)
- Hole saw kit(Appropriate size for wall sleeve penetration)
- Mounting brackets and backplate(For interior wall mounting and support)
- Refrigerant line set (insulated copper lines)(Follow manufacturer length guidelines and insulation requirements)
- Drain tubing/condensate pump(If elevation requires assistive drainage)
- Electrical wiring and disconnect switch(Compliant with local codes; plan dedicated circuits if needed)
- Vacuum pump and manifold gauges(Needed for leak testing and evacuation)
- Safety gear(Gloves, eye protection, and hearing protection as needed)
Steps
Estimated time: 4-8 hours
- 1
Plan and measure
Plan the layout of zones, measure wall heights and clearances, and choose indoor unit locations that optimize airflow while avoiding obstructions. Confirm outdoor unit placement with adequate airflow and service access. Document all measurements for the installer.
Tip: Double-check wall thickness and possible obstructions before drilling. - 2
Turn off power and prep site
Shut off power to the intended circuit at the main panel and the outdoor disconnect. Clear the area of tools, debris, and pets. Ensure you have a safe path for lines and wiring from indoors to outdoors.
Tip: Use a voltage tester to confirm circuits are de-energized. - 3
Mount indoor unit
Install the wall bracket and secure the indoor unit to the chosen wall. Verify level, mark the wall sleeve location, and prepare for line-set routing. Ensure the unit’s airflow will not be blocked by furniture or curtains.
Tip: Use a level and a stud finder to avoid hidden obstacles. - 4
Route lines and cabling
Drill the wall sleeve hole and route refrigerant lines, condensate drain, and electrical wiring through it. Seal exterior openings to prevent air leaks and water intrusion. Label lines for future service.
Tip: Keep lines as straight and short as possible to minimize pressure loss. - 5
Connect electrical and outdoor unit
Connect power wiring per the manufacturer’s diagram and join control wiring between indoor and outdoor units. Mount the outdoor unit on a stable pad with proper clearances and secure the wiring.
Tip: Follow the diagram precisely to ensure correct mode operation. - 6
Vacuum and leak test
Vacuum the refrigerant lines to remove moisture and prepare for charging. Check for leaks with approved methods before adding refrigerant charge. Do not skip this step, as moisture can degrade performance.
Tip: Ensure vacuum levels hold before charging. - 7
Charge refrigerant and test operation
Charge the system to the manufacturer’s specification and test both heating and cooling modes. Verify airflow, noise levels, and thermostat communication. Document readings for warranty purposes.
Tip: Record system pressures and test thermostat control. - 8
Finalize and schedule maintenance
Secure all panels, mount covers, and provide user instructions. Set up a maintenance plan and educate the homeowner or building manager on basic upkeep and safety.
Tip: Create a simple maintenance schedule and share it with occupants.
Your Questions Answered
What is a ductless heat pump and how does it differ from traditional systems?
A ductless heat pump uses wall-mounted indoor units to heat and cool spaces without ductwork. It provides zone control and can be more efficient than ducted systems when installed correctly.
Ductless heat pumps heat and cool rooms with wall units instead of ducts, offering zone control and potential efficiency gains.
Do I need a permit to install a ductless heat pump?
Permits are often required for electrical work and outdoor equipment installation. Check local codes and consult a licensed professional to ensure compliance.
Local permits may be required for electrical work and outside units; verify with your authority having jurisdiction.
Can I install a ductless system myself or should I hire a pro?
While some homeowners can perform non-electrical tasks, most installations involve electrical work and refrigerant handling, so hiring a licensed technician is strongly advised.
This job often needs a licensed technician for safety and code compliance.
What factors influence installation costs and timing?
Costs and duration vary with system size, ceiling height, line-length, and permits. Check regional differences and obtain an on-site assessment for the most accurate estimate.
Cost and time depend on size, layout, and permits; an on-site assessment gives the best estimate.
How long does a typical installation take?
Installation time depends on the space and readiness of electrical and outdoor locations. A professional can provide a reliable timeline after an on-site evaluation.
A pro can give you a realistic timeline after checking your space.
What maintenance helps keep a ductless system efficient?
Regular filter cleaning, coil checks, and annual professional servicing help maintain efficiency and extend system life.
Keep filters clean and have yearly checkups to stay efficient.
Watch Video
Top Takeaways
- Plan layout before mounting
- Hire a licensed electrician for wiring
- Follow manufacturer instructions precisely
- Test both heating and cooling after install
- Maintain a regular service schedule