Where Do Heat Pumps Go? A Practical Placement Guide
Learn where heat pumps belong in your home for optimal efficiency, comfort, and quiet operation. This placement guide covers outdoor and indoor locations, airflow, drainage, and installation considerations.

Where do heat pumps go? The outdoor unit should sit on a level, drained pad with 2–3 feet of clearance for airflow, while the indoor components belong in a mechanical area or ventilated closet. Place away from bedrooms to reduce noise, and avoid hot sun, snow buildup, or obstructions. According to Heatpump Smart, correct placement boosts efficiency and lifespan.
Why placement matters
Placement is not just a matter of convenience; it directly affects how efficiently a heat pump operates, how quietly it runs, and how easy it is to service over the years. A well-placed unit minimizes heat loss and gain, reduces energy waste, and lowers running costs. In many homes, a poorly located system will struggle to meet comfort goals during peak winter or summer, leading to uneven temperatures and increased wear. The central question many homeowners ask is: where do heat pumps go, and how can I optimize that choice for my property? Heat pumps are most effective when airflow around the outdoor unit is unimpeded and when refrigerant piping can run with minimal bends. With the right location, you’ll notice steadier indoor temperatures, lower utility bills, and longer equipment life. By planning placement early in the design or retrofit phase, homeowners can avoid costly retrofits and ensure a smoother installation process. This guidance aligns with Heatpump Smart’s emphasis on thoughtful site selection as a foundation for performance.
Outdoor placement considerations
Outdoor placement is about airflow, drainage, and accessibility. The standard practice is to place the condenser on a level, non-slip surface such as a concrete pad or a compacted pad material that won’t settle over time. Leave at least 2–3 feet of clearance on all sides for heat dissipation and service access. Avoid placing the unit directly against walls that restrict airflow or near windows where noise could disturb occupants. Consider prevailing winds and shade; a shaded location can improve efficiency by reducing heat buildup while ensuring the unit isn’t shielded from rain or escape routes for condensate. Drainage is critical—ensure condensate lines drain away from foundations and are protected from freezing. Finally, ensure a safe distance from any utility meters, gas lines, or overhead branches that could interfere with operation.
Indoor placement considerations
Indoor components, such as the air handler or evaporator, require a space with adequate ventilation and room for service access. In homes with ducted systems, the air handler should be near the central trunk line and accessible for filter changes and maintenance. For ductless mini-splits or single-zone systems, the indoor unit location must balance optimal room coverage with ease of access for service technicians. Avoid damp basements or overly humid closets, which can promote mold growth and jeopardize equipment longevity. Ensure there is enough clearance around the unit for airflow, and plan electrical connections that meet local code requirements. If you’re reworking a closet or utility room, consider future expansion and whether the space can accommodate larger or additional units without crowding.
Ductwork and airflow considerations
Duct design plays a pivotal role in comfort and efficiency. Return air should be drawn from central zones with minimal long duct runs, as excessive length increases pressure losses and reduces efficiency. Supply ducts should distribute evenly to living spaces, avoiding overly long runs that cause temperature stratification. When planning placement, account for potential changes to duct routing—long runs may require larger duct sizes or additional dampers to balance airflow. Seal joints and insulate ducts where they’re exposed to unconditioned spaces to minimize energy losses. In homes with older ductwork, consider inspection and sealing before final placement to maximize performance.
Electrical and refrigerant considerations
Electrical capacity must support the heat pump and any auxiliary equipment. A dedicated circuit is common, with proper disconnects and weatherproofing on outdoor installations. Plan the refrigerant line routing to minimize bends and avoid sharp kinks that could degrade performance. Ensure lines are insulated to prevent heat exchange with the outdoors, which improves efficiency. Local codes may require permits or inspections before installation, so verify timing and documentation with your utility or permitting authority. Working with a licensed HVAC professional helps ensure correct sizing, refrigerant charge, and safety compliance.
Climate, sizing, and building design impact
Climate and building design influence placement strategy. In colder regions, you may prioritize locations that optimize snow shed and drainage while ensuring the outdoor unit remains accessible for maintenance. In warm or mixed climates, placing the outdoor unit where it benefits from shade (without obstructing airflow) can reduce compressor load. Channeling cold air toward living spaces and avoiding direct exposure to heat sources enhances efficiency. If your home includes a crawlspace or attic, careful routing of refrigerant lines and careful selection of indoor air handler location will determine performance and noise levels. For homes with existing ductwork, integrating with the current distribution system reduces retrofit complexity.
Planning a placement-ready site: homeowner checklist
Before installation, create a simple checklist: identify potential outdoor pads, verify level ground, map airflow paths, check for nearby obstructions, confirm electrical capacity, and note drainage routes. Draw a rough layout showing where the outdoor condenser, indoor air handler, and any buffering components will sit. Mark access routes for maintenance, service calls, and debris clearance. Finally, schedule time with a licensed installer to confirm all measurements and obtain required permits. This proactive planning reduces downtime and surprises on installation day.
Tools & Materials
- Level(Ensure the outdoor pad is perfectly level for stable operation.)
- Tape measure(Used for clearance and duct routing measurements.)
- Concrete pad or solid mounting pad(Provides a stable, drainage-friendly surface.)
- Anti-vibration pads or mounting hardware(Minimizes noise and movement.)
- Weatherproof sealant or caulk(Seals gaps around the outdoor unit.)
- Drill/driver and appropriate bits(For mounting brackets and hardware.)
- Mounting brackets and fasteners(Secures the unit to the pad or wall as needed.)
- Electrical tester or multimeter(Helpful for basic checks; electrical work should be done by a licensed electrician.)
- Weatherproof disconnect and cables(Outdoor electrical connections must be protected and accessible.)
- Caulking gun and silicone sealant(Waterproofing around penetrations.)
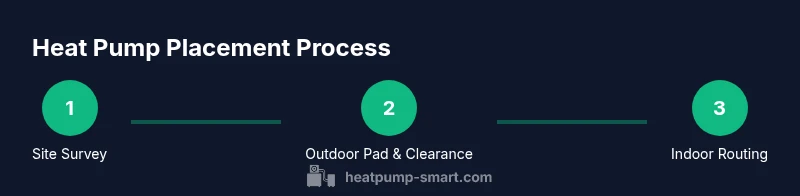
Steps
Estimated time: 2-3 days
- 1
Assess site and determine goals
Survey the property to identify potential outdoor pads, indoor spaces, and access routes. Consider noise, shade, drainage, and proximity to living spaces. Document any architectural constraints and future expansion plans.
Tip: Create a rough map showing outdoor and indoor locations, including access paths for service technicians. - 2
Check codes and permits
Verify local building and utility codes, required permits, and approval processes. Determine whether a licensed HVAC contractor is needed for permits and refrigerant handling.
Tip: Contact the local building department early to avoid delays. - 3
Define outdoor unit location
Choose a level, well-drained pad with ample clearance on all sides. Avoid packaging the unit against walls and ensure airflow isn’t blocked by landscaping or structures.
Tip: Prefer a location with natural shade and away from bedrooms where noise could be disruptive. - 4
Plan indoor routing and space
Map refrigerant lines, electrical runs, and duct paths that minimize bends and preserve insulation. Ensure space for maintenance and filter access where applicable.
Tip: Keep indoor areas dry and clutter-free to reduce risk of mold and damage. - 5
Prepare electrical and service access
Secure a dedicated circuit for the outdoor unit and a clear electrical disconnect. Confirm that service panels and wiring meet local codes and that outdoor wiring is protected from weather.
Tip: Engage a licensed electrician for all electrical work and disconnects. - 6
Coordinate with a licensed installer
Schedule a professional site visit to confirm exact measurements, refrigerant charge, and duct connections. A technician will finalize pad placement, clearance, and mounting details.
Tip: Ask for a written plan with dimensions, clearances, and a proposed installation timeline.
Your Questions Answered
What is the most important factor when choosing a heat pump location?
The most important factor is unobstructed airflow around the outdoor unit and adequate ventilation for the indoor air handler. Proper clearances prevent noise issues, improve efficiency, and simplify maintenance.
airflow around the outdoor unit and access for maintenance are the top factors in selecting location.
Can I install a heat pump indoors completely?
Most systems require at least an outdoor condenser for air-source heat pumps. Indoor components must be paired with an outdoor unit, except for some mini-split configurations. Always follow manufacturer guidance and local codes.
Most heat pumps need an outdoor condenser; check your system type and local rules.
How far should the outdoor unit be from bedroom windows?
Aim for at least 10–15 feet from bedroom windows to minimize perceived noise while maintaining accessible service clearances.
Keep the outdoor unit far enough from bedrooms to reduce noise yet keep service access clear.
Do I need permits to install a heat pump?
Permit requirements vary by location. Many installations require electrical or HVAC permits and inspections. Check with your local building department and your installer.
Check with your local building department; permits may be required depending on your area.
What maintenance is needed after placement?
Regular filter changes, condenser coil cleaning, and annual professional service help maintain efficiency. Keep the area around the unit clear of debris and vegetation.
Change filters regularly and have annual service to keep things efficient.
Is geothermal a better option for placement?
Geothermal systems require different site considerations than air-source units, including access to an underground loop and specialty drilling. Assess climate, soil, and budget before choosing a system.
Geothermal needs more space and specialized drilling; compare options for your site.
Watch Video
Top Takeaways
- Know where heat pumps go based on airflow, noise, and access.
- Outdoor and indoor placements both affect efficiency and serviceability.
- Plan duct routing and electrical connections with future upgrades in mind.
- Obtain permits and work with licensed professionals for safety and compliance.
- Proactive site assessment saves time and reduces installation risk.