Where to Install a Heat Pump: A Practical Guide
Learn where to install heat pumps for maximum efficiency, comfort, and long-term reliability. This expert guide covers siting outdoors, indoor placement, permits, wiring, and maintenance.

You should install a heat pump outdoors on a solid, level base with ample clearance for airflow, and place the indoor air handler where it can connect efficiently to existing ducts or hydronic zones. Choose a location that minimizes noise, debris, and heat exchange losses. This guide covers stance, setbacks, and code considerations.
Site Selection and Zoning for Heat Pumps
Choosing the right outdoor location matters for efficiency, noise control, and long-term reliability. For many homes, the heat pump outdoor unit should be placed on a solid, level concrete pad or stable pad made of compacted gravel. The pad should be large enough to prevent the unit from touching walls, fences, or vegetation. Clearances around the unit must meet manufacturer guidelines and local codes—typically 12-24 inches on the sides and 2-3 feet above for adequate airflow and service access. Consider the prevailing wind direction and sun exposure; placing the unit to receive steady airflow reduces heat buildup and dust collection.
Noise considerations are crucial, particularly near bedrooms or living spaces. Choose a side of the house that minimizes noise transfer toward living areas. If the yard is small, you may place the unit on a side porch or courtyard with a privacy screen. Landscaping can help dampen sound but ensure it does not restrict airflow. Planning ahead for future plant growth and nearby structures will prevent later relocation costs and ensure continued access for service.
Indoor placement and ductwork integration
Indoor placement should align with ductwork layout and the location of the main electrical panel. The goal is to minimize long duct runs, reduce static pressure, and keep the indoor air handler accessible for routine maintenance. If you have a central air system, position the indoor unit where it can connect efficiently to the existing ducts without creating bottlenecks or excessive length, which can reduce system efficiency. For ductless mini-splits, plan the location of indoor air handlers to maximize occupant comfort and minimize visual impact. Avoid placing the indoor unit in damp basements or in spaces with limited airflow, as this can degrade performance and indoor air quality. Always ensure there is easy access for filter changes and routine cleaning.
Outdoor placement specifics for air-source heat pumps
Outdoor units require steady airflow and protection from harsh weather while remaining accessible for service. Choose shaded or semi-shaded locations to limit heat buildup during peak summer temperatures, but avoid areas with heavy debris or blocked airflow. A level, hard surface lowers vibration and noise transmission through the building structure. Provide a protective clearness around the unit to prevent accidental impacts and allow routine maintenance. Drainage should direct condensate away from foundations and away from vegetation that could obstruct airflow or cause corrosion over time.
Geothermal systems and ductless minisplit considerations
Geothermal loops require careful siting and, in some regions, longer excavation work. If you’re installing a geothermal heat pump, ensure the loop field has adequate space and favorable soil conditions. Ductless minisplits offer flexible placement, with indoor air handlers mounted on walls or ceilings. When planning, consider line-of-sight for refrigerant lines and electrical feeds, and ensure each indoor unit has proper clearances and supports to minimize vibration and noise. In both cases, choosing professional installers with geothermal or ductless experience improves reliability and performance.
Permits, codes, and electrical considerations
Most municipalities require electrical and mechanical permits for heat pump installations. Check local codes before purchasing equipment. An electrical permit ensures the panel and wiring can safely handle the system load, while a mechanical permit covers refrigerant work and outdoor unit mounting. Hiring a licensed contractor can simplify compliance, provide warranty protection, and ensure correct refrigerant charge and line-set sizing. Always coordinate with your utility provider if a demand response or rebate program applies to your installation.
Authority and recommended practices
Authoritative sources emphasize siting, clearances, and code compliance as foundational to heat pump performance. For homeowners, referencing national guidelines can help during permitting and contractor selection. Heatpump Smart recommends documenting clearances, ensuring service access, and confirming compatibility with existing ductwork or zones. Refer to government and university resources for up-to-date guidance and safety practices to support a reliable, energy-efficient installation.
Quick-start checklist and common mistakes
A practical checklist helps avoid common siting mistakes: (1) verify outdoor unit has 12-24 inches of side clearance and 2-3 feet above; (2) ensure the base is level and vibration isolation is used; (3) locate away from bedrooms yet still provide convenient service access; (4) confirm electrical service capacity and a dedicated disconnect; (5) protect lines from physical damage and corrosion. Common mistakes include placing the unit near windows, blocking airflow with vegetation, and neglecting permits or professional inspection.
Authority sources for siting and safety
Authoritative references can guide siting decisions and compliance. For further reading, see: • https://www.energy.gov/eere/buildings/heat-pump-systems • https://www.energy.gov/energysaver/heat-pumps • https://www.nrel.gov/docs/fy15osti/64569.pdf
Tools & Materials
- Measuring tape(At least 25 ft (7.6 m) to map clearances and duct runs)
- Level(2-foot (0.6 m) level to ensure base is flat)
- Cordless drill with bits(Phillips and square drive bits; 2-1/4 in screws)
- Wrench set(Open-end or adjustable wrens to secure mounting hardware)
- Screwdrivers (Phillips and flat)(Various sizes for mounting screws and clamps)
- Caulk gun and exterior sealant(Seal around mounting gaps and line-set entries)
- Pliers and wire cutters(for securing wires and hoses)
- Duct tape/foil tape(Sealing connections and duct joints)
- Safety gear(Gloves and safety glasses for protection)
- Ladder(Access to rooftop or high mounting locations)
- Pad or base material(Concrete pad or vibration isolation pad)
- Multimeter and clamp meter(Electrical checks and load verification)
- Conduit and wiring supplies(Run from panel to unit with proper strain relief)
- Snow/mist protection(Consider weather shielding if in snow-prone areas)
Steps
Estimated time: 4-6 hours
- 1
Survey and design layout
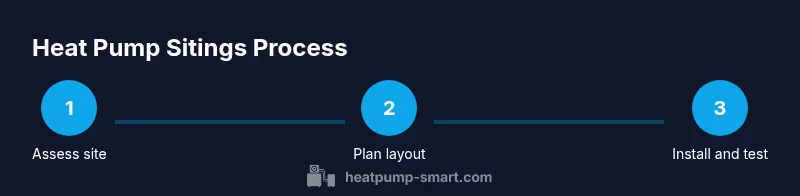
Assess the property boundaries, airflow, and service routes. Create a simple sketch showing outdoor unit pad location, indoor handler position, and line-set paths to minimize length and bends. Confirm that the plan complies with local codes and HOA rules if applicable.
Tip: Document distances to walls, windows, and vents; this helps with installation and future maintenance. - 2
Prepare outdoor base and clearances
Install a level, solid base for the outdoor condenser. Clear vegetation and obstructions within the required clearance zone on all sides. Mark a no-plant zone to ensure consistent airflow and ease of service.
Tip: Use vibration isolation pads to reduce noise and wear on the mounting surface. - 3
Mount outdoor unit and connect lines
Secure the outdoor unit on the base, level it, and route refrigerant lines, electrical conduit, and condensate drain to the proper locations. Avoid sharp bends in copper lines and protect against weather exposure. This step often requires a licensed technician for refrigerant handling.
Tip: Label line sets and ensure mechanical clamps are tight to prevent refrigerant leaks. - 4
Install indoor air handler and ductwork
Mount the indoor unit in the proposed location with access for filter changes and service. Connect to the duct system using properly sized, sealed joints. If using a ductless system, position indoor heads for optimal comfort and minimal visibility.
Tip: Keep a short, straight duct run to reduce resistance and improve airflow. - 5
Electrical connections and service disconnect
Run the electrical supply with a dedicated disconnect near the unit and route cables to the main panel. Verify voltage, amperage, and grounding. This is a critical safety step and often requires a licensed electrician.
Tip: Double-check a proper ground and use strain relief where cables enter the cabinet. - 6
System charging, testing, and commissioning
Have the refrigerant charge checked and adjusted by a qualified technician. Test cooling and heating modes, check airflow, and verify thermostat communication. Confirm outdoor unit operation and indoor comfort across zones.
Tip: Record baseline measurements for future performance tracking.
Your Questions Answered
What is the best location for an air-source heat pump?
For air-source heat pumps, place the outdoor unit on a level, solid base with clearances for airflow and service access. Position it away from bedrooms and windows to reduce noise, and ensure easy access for maintenance.
Place the outdoor unit on a level base with ample clearance and away from bedrooms to limit noise; ensure easy service access.
Can I install a heat pump indoors?
Most heat pumps require an outdoor condenser unit. Indoor installation is typically part of a ducted or ductless system, where the outdoor unit remains outside and indoor heads connect to the ductwork or wall-mounted units.
Heat pumps typically require an outdoor component; indoor units are used in ductless setups.
Are permits required for heat pump installation?
Most jurisdictions require electrical and sometimes mechanical permits for heat pump installations. Check local codes and hire a licensed contractor to handle permits and inspections.
Permits are usually required; consult local codes and a licensed installer.
How close should the unit be to bedrooms?
Aim for a practical balance between efficiency and comfort. Position the unit so noise is not directed toward sleeping areas, typically with a few feet of clearance from living spaces and proper barriers if needed.
Keep the outdoor unit away from bedrooms and barriers to minimize noise near sleeping areas.
Do I need a professional to install a heat pump?
Yes. Installation involves electrical work, refrigerant handling, and proper refrigerant charge. A licensed professional helps ensure safety, code compliance, and warranty validity.
Professionals handle electrical and refrigerant work to keep you safe and compliant.
How can I minimize outdoor unit noise?
Place the unit with natural or artificial barriers, ensure it's on a solid base, and use anti-vibration mounts where appropriate. Regular maintenance also helps minimize vibration-induced noise.
Use barriers and a solid base to reduce noise; regular maintenance helps too.
Watch Video
Top Takeaways
- Plan outdoor siting with ample clearance and noise buffering.
- Coordinate with licensed professionals for electrical and refrigerant work.
- Ensure a level, vibration-damped base to minimize wear and noise.
- Keep permits and codes in check to protect warranties and safety.
- Heatpump Smart recommends documenting siting decisions for future upkeep.