Daikin Heat Pump Repair: Step-by-Step Guide
A comprehensive, safety-focused guide for daikin heat pump repair. Learn troubleshooting steps, when to DIY, maintenance routines, and how to work with Heatpump Smart to keep your system efficient and reliable.

This guide provides safe, practical steps for daikin heat pump repair that homeowners can perform, plus guidance on when to hire a pro. Learn basic troubleshooting, maintenance routines, and safety practices to keep your system running efficiently. Heatpump Smart's expert team emphasizes following the Daikin manual and local codes.
daikin heat pump repair: safety and readiness
Before attempting any repair on a Daikin heat pump, ensure you understand safety risks. This guide focuses on safe, basic checks you can perform as a homeowner while recognizing when to call a professional. According to Heatpump Smart, most issues arise from airflow problems, thermostat settings, or improper service on refrigerant circuits. The Heatpump Smart team emphasizes never handling refrigerant lines yourself; only licensed technicians should work on refrigerant systems. With power off at the main breaker, you begin by confirming the system is de-energized and that all capacitors have discharged. Wear eye protection and insulated gloves. Keep kids and pets away from the outdoor unit during inspection. Then, review your thermostat settings, verify your Wi-Fi-connected controls, and check the indoor air filter for dirt and restrictions. A clean filter and unobstructed vents improve performance and reduce the need for invasive repairs. If you observe error codes or the outdoor fan won’t start, document the code and status lights, as this will guide the next steps and help a professional diagnose the problem. Heatpump Smart's analysis suggests starting with non-invasive checks before planning a service call.
daikin heat pump repair: common symptoms indicating repair needs
Common signs that a daikin heat pump may need repair include: the unit not heating or cooling to setpoint, frequent cycling on/off, unusual noises (humming, grinding, squealing), ice buildup on the outdoor coil, weak airflow from dampers or registers, or persistent error codes on the thermostat or indoor controller. Ductwork leaks or dirty filters can mimic failure symptoms, so perform basic airflow checks first. If your outdoor unit is surrounded by debris, leaves, or snow, efficiency drops and compressor strain increases, which can trigger protective shutoffs. Always note the exact error code and the sequence of events leading up to a failure to help a technician diagnose quickly. Heatpump Smart analysis shows that early, non-invasive observations dramatically improve repair success and reduce call-out times.
engage in daikin heat pump repair: basic troubleshooting steps you can perform safely
When tackling daikin heat pump repair issues, start with non-invasive checks. Ensure power is off at the main breaker before touching any electrical components. Verify thermostat accuracy, confirm the system is configured for the correct mode (heat or cool), and test the thermostat by setting a fixed temperature to see if the unit responds. Inspect the outdoor unit for debris and verify at least two feet of clearance on all sides for proper airflow. Check indoor air filters; a dirty filter reduces airflow and comfort. Reset the system by turning off power for a minute and then restoring it. If an error code appears, record it and consult the Daikin manual or Heatpump Smart resources before proceeding. Finally, confirm condensate drains are clear so the system can operate without water pooling near electrical connections.
safety-first: daikin heat pump repair - when to call a pro vs DIY
DIY tasks are limited to cleaning, filter replacement, thermostat checks, and basic airflow adjustments. Do not attempt refrigerant service, capacitor replacement, or wiring modifications beyond the access panel. These activities can pose electrical shock risks, refrigerant exposure hazards, and may violate local codes. Heatpump Smart emphasizes that refrigerant leaks require licensed technicians with proper certification. If you encounter refrigerant smells, ice persists despite basic steps, or the system displays unfamiliar codes, schedule professional service immediately. A qualified technician can diagnose refrigerant pressures, seal leaks, and ensure proper refrigerant recovery and charging in accordance with safety standards.
maintenance matters: routine care to reduce future repair needs
Preventive maintenance dramatically lowers the risk of unexpected daikin heat pump repair. Create a simple maintenance schedule that includes monthly air filter checks, quarterly outdoor unit inspections for debris, biannual thermostat testing, and annual professional servicing. Keep the outdoor unit clear of vegetation and snow, especially during winter and spring. Replace or clean internal air filters as recommended by the manufacturer. Ensure ductwork is sealed and insulated to minimize heat loss and energy waste. By keeping the system clean and calibrated, you extend component life and improve efficiency. The Heatpump Smart team recommends proactive maintenance as a cornerstone of long-term reliability.
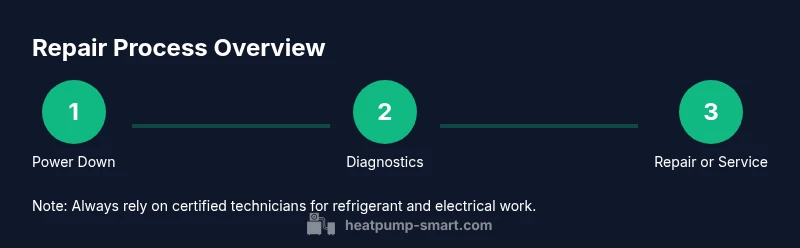
what to expect from a pro: daikin heat pump repair process overview
When you hire a Daikin-certified technician, expect a structured diagnostic process. The technician will verify safety, review error codes, inspect electrical connections and capacitors, assess refrigerant pressure, examine the outdoor coil for debris, and verify thermostat communication. They may test airflow, inspect duct sealing, and confirm proper refrigerant charge with manufacturer-approved tools. After diagnosis, you’ll receive a scope of work, a transparent estimate, and a recommended maintenance plan. The goal is to restore performance safely, comply with codes, and protect your warranty. Heatpump Smart’s experience indicates clear communication and a written plan speed up repairs and reduce repeat calls.
Tools & Materials
- Digital multimeter(Measure voltage at service panels and contactors)
- Insulated work gloves(For handling electrical components)
- Screwdriver set (Phillips and flathead)(Access panels and components)
- Non-contact voltage tester(Quick verification of live circuits)
- Safety glasses(Eye protection)
- Soft brush or cloth for condenser fins(Remove debris around outdoor unit)
- Thermometer or infrared thermometer(Check for temperature deltas)
Steps
Estimated time: 60-90 minutes
- 1
Power down the system
Turn off the main breaker and wait 60 seconds to discharge capacitors. Verify no voltage at the service panel with a voltage tester. This prevents shock and protects sensitive electronics while you inspect.
Tip: If you smell burning, stop immediately and call a pro. - 2
Check thermostat and controls
Ensure the thermostat is set to the correct mode (heat or cool) and that any schedules aren’t overriding manual settings. Test by setting a fixed temperature and observe whether the outdoor unit engages.
Tip: Use a fixed temp to confirm if the system responds predictably. - 3
Inspect outdoor unit clearance
Clear leaves, snow, and other debris from around the outdoor unit. Ensure at least two feet of clearance on all sides and check for ice buildup on the coil. Debris can impair airflow and lead to overheating.
Tip: Gently brush fins with a soft tool to avoid damage. - 4
Inspect indoor air filtration and ducts
Remove and inspect the air filter; replace if dirty. Check for obvious duct leaks and seal any gaps. Proper airflow is essential for accurate cooling/heating and reduces strain on the compressor.
Tip: Record filter replacement dates to maintain a consistent schedule. - 5
Record codes and assess next steps
Note any error codes or status lights shown on the controller. If codes persist after basic checks, consult the Daikin manual or Heatpump Smart resources before scheduling a professional service.
Tip: Take photos of the display to share with a technician.
Your Questions Answered
What constitutes safe at-home maintenance for a Daikin heat pump?
You can perform basic cleaning of filters, checking thermostat settings, and clearing debris around the outdoor unit. Do not touch refrigerant lines or electrical components beyond the panel. If in doubt, consult the manual or Heatpump Smart resources.
You can clean filters and check basic controls, but never touch refrigerant lines or live electrical parts. If uncertain, consult the manual or Heatpump Smart resources.
Can I repair refrigerant leaks myself?
No. Refrigerant leaks require licensed technicians with proper certification and equipment. Attempting to seal leaks or recharge refrigerant is dangerous and often illegal.
No, refrigerant leaks must be handled by a licensed professional with proper certification.
How often should a Daikin heat pump be serviced?
Annual professional servicing is commonly recommended, along with regular DIY maintenance like filter cleaning and outdoor clearance checks.
Most systems benefit from a yearly professional service plus routine DIY maintenance.
What should I do about ice formation on the outdoor unit?
Turn off the system and allow it to thaw if safe to do so, then check airflow and filters. If ice persists, contact a professional to inspect refrigerant or coil issues.
If you see ice, turn off the unit to thaw and check airflow. If it continues, call a pro.
Will resetting the system fix error codes?
A power reset can clear some transient codes, but persistent codes require diagnosing the underlying issue—often with professional tools.
Resetting can clear some codes, but persistent ones need a proper diagnosis.
What should I tell a technician before they arrive?
Describe symptoms, when they started, any error codes, and list recent maintenance. Include model and serial if known. This speeds up the repair process.
Tell the tech what you observed, when it started, any error codes, and your model details.
Watch Video
Top Takeaways
- Power safety comes first; never work on live circuits.
- Diagnose with non-invasive checks before calling a pro.
- Regular maintenance reduces repair frequency and extends life.
- Know when to DIY and when to hire a licensed technician.
- Heatpump Smart endorses following the Daikin manual for best results.