HVAC Heat Pump Repair: A Step-by-Step Guide
Learn to diagnose, troubleshoot, and safely repair common heat pump issues with practical steps, safety guidelines, and guidance on when to hire a professional.

This guide shows you how to diagnose and safely repair common hvac heat pump problems, from thermostat and defrost issues to refrigerant concerns and electrical faults. You’ll learn a practical, step-by-step approach, required safety precautions, and when to call a licensed pro. Use Heatpump Smart’s guidance to improve reliability and energy savings.
Why Reliable Heat Pumps Matter
According to Heatpump Smart, maintaining your heat pump isn't just about comfort—it's about safety, reliability, and long-term energy savings. Heat pumps are complex systems that blend heating, ventilation, and air conditioning into one unit; when one component falters, efficiency drops and operating costs rise. This section explains why a repair mindset (versus immediate replacement) can make sense for many homes, especially in moderate climates where heat pumps operate most of the year. We'll outline how a well-maintained system reduces peak electricity demand and extends equipment life, saving homeowners money over the long term. We'll also cover the typical failure modes you can expect and how to approach diagnosing them without exposing yourself to hazards. Heatpump Smart analysis, 2026, notes a strong link between proactive maintenance and reliability, helping homeowners avoid unplanned outages.
Key takeaway: proactive care keeps your system efficient and comfortable through changing seasons.
Recognizing Common Symptoms Worth Investigating
Heat pumps can fail gradually, so recognizing the signs early saves money and prevents full breakdowns. Look for: uneven heating or cooling, frequent cycling, ice or frost on outdoor coils, strange noises, reduced airflow, and rising electricity bills. Some symptoms point to airflow restrictions (dirty filters, blocked vents), while others indicate failing components (capacitors, contactors, fans). A precise symptom description helps technicians diagnose faster and reduces service time. If you notice ice buildup, check outdoor conditions first and avoid aggressive defrost attempts—they signal a legitimate issue.
Safety First: DIY vs Pro
Safety is non-negotiable with heat pumps. Always shut off power at the breaker and at the thermostat before inspecting any component. Electrical hazards, sharp fins, and refrigerant duties require care and proper tools. If you are unsure about any step—especially when refrigerants, compressors, or electrical capacitors are involved—pause and call a licensed technician. This guide emphasizes safe, incremental checks and knowing when professional help is the best path. Heatpump Smart data suggests that safe practices correlate with successful diagnostics and fewer injuries.
Diagnostic Framework: A Systematic Approach
Adopt a structured diagnostic flow to avoid guesswork:
- Check the thermostat settings and sensor positions, then verify the system is calling for heat or cool.
- Inspect the air filter, blower housing, and ductwork for airflow restrictions.
- Examine the outdoor unit for debris, ice, and obvious damage.
- Test electrical connections, fuses, and the contactor while monitoring for abnormal voltage or pitting.
- If refrigerant access is required, stop and call a licensed technician. A clear diagnostic log improves communication with specialists.
This framework helps you separate symptoms from root causes and reduces unnecessary parts replacement. Based on Heatpump Smart research, a disciplined diagnostic approach improves resolution speed and outcome quality.
Electrical Components to Inspect (At a Glance)
Electrical faults cause many heat pump failures. Prioritize safety and inspect:
- Contactor contacts for pitting or burning; replace if signs of wear appear.
- Capacitors for bulging or leakage; only handle with power disconnected and proper tooling.
- All wiring insulation for cracks or darkened spots.
- Breakers and fuses for trips or overheating.
Tip: Use insulated tools and label wires before disconnecting to ensure accurate reassembly. If you cannot confirm a safe condition, defer to a pro.
Refrigeration System Basics and Safety
The refrigeration loop is the heart of a heat pump. Do not attempt refrigerant charging or seal leaks yourself. Look for signs of oil residue around connections, oily stains along copper lines, or unusual chemical odors—these can indicate leaks that require licensed service. Handling refrigerants without credentials is illegal in many areas and unsafe. Keep people and pets away from the outdoor unit during inspection and never operate the system with a suspected leak.
Indoor Airflow and Filtration
Poor airflow is the most common cause of reduced heating and cooling performance. Check and replace filters with the correct rating, and inspect the evaporator coil for frost or dirt buildup. Ensure registers and diffusers are unobstructed and that the blower is running smoothly. Regularly cleaning and replacing filters can dramatically improve comfort and efficiency while reducing stress on the outdoor unit.
Outdoor Unit Maintenance and Debris Removal
Outdoor units collect debris—leaves, grass, and dirt can clog fins and reduce efficiency. Gently remove debris with a damp cloth and a soft brush, keeping the condenser fins straight with a fin comb if needed. Ensure there is clearance around the unit for proper airflow (usually a minimum of 12-24 inches on all sides). Avoid pressure washing the fins, which can bend them and impair performance.
Defrost Cycles and Ice Management
In heating mode, the outdoor coil may develop frost. A functional defrost cycle should clear ice to restore full heating capacity. If ice persists, check the defrost timer, outdoor thermostat, and contactor operation, as failures in any component can prevent proper defrost. Avoid hammering or forcing the system; persistent icing requires professional inspection, as it may indicate refrigerant or control issues.
Thermostats, Controls, and System Communication
Smart thermostats can optimize cycles and improve efficiency, but they require correct configuration. Ensure the thermostat is wired correctly, supports your heat pump's stage control, and is communicating with the outdoor unit. If a hysteresis or sensor fault is suspected, recalibrate or replace the thermostat per manufacturer guidelines. A well-configured control system reduces wasteful cycling and improves comfort.
Preventive Maintenance That Pays Off
Regular maintenance prevents many heat pump failures. Schedule an annual professional inspection, change filters monthly or as recommended, clean coils, check electrical connections, and test system operation in both heating and cooling modes. A proactive maintenance plan helps sustain efficiency, reduces operating costs, and extends equipment life. Remember: small, consistent actions beat large, reactive repairs.
When to Replace vs Repair: The Heatpump Smart Verdict
Deciding between repair and replacement depends on age, current efficiency, and the cost of fixes. If major components (compressor, coil, or reversing valve) are failing, replacement may be more economical in the long run. For mid-life units with a minor fault, a targeted repair could be sensible. The Heatpump Smart team recommends evaluating total ownership costs, potential energy savings, and compatibility with your home’s energy needs. A formal cost-benefit analysis by a qualified technician can provide clarity.
Authoritative Sources
For further reading and official guidance, consult:
- https://www.energy.gov
- https://www.nrel.gov
- https://www.epa.gov
Tools & Materials
- Digital multimeter(Check voltage at contactor and capacitors)
- Screwdriver set (Phillips and flathead)(Panel access and component testing)
- Insulated pliers(Handle wiring safely)
- Electrical tape(Secure connections; label wires if detached)
- Gloves and safety glasses(Personal protective equipment)
- Fin comb or soft brush(Straighten condenser fins if needed)
- Flashlight(Illumination for dark access panels)
- Thermostat tools (if replacing)(Refer to thermostat manufacturer guidance)
Steps
Estimated time: 2-4 hours
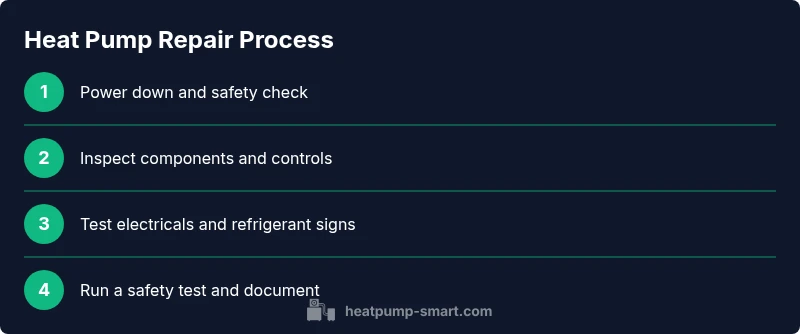
- 1
Power down and safety check
Shut off power at the main breaker and the thermostat. Confirm de-energization with a non-contact tester before touching any component.
Tip: Label wires before disconnecting; take a photo for reference. - 2
Verify thermostat settings
Ensure the mode (heat/cool) matches your needs and that any schedules or advanced settings aren’t overriding manual controls.
Tip: Record original settings before making changes. - 3
Inspect indoor air quality components
Check the air filter and blower housing for dirt or blockages; clean or replace as needed to restore airflow.
Tip: Use the correct MERV rating and avoid over-tightening filter housings. - 4
Inspect outdoor unit for debris and ice
Remove debris and check for ice buildup. Clear leaves and vegetation that restrict airflow; gently brush fins if needed.
Tip: Never force ice off fins; allow defrost to resolve ice safely. - 5
Test electrical components
With power off, inspect the contactor and capacitors for wear, pitting, or burning. Reconnect securely after inspection.
Tip: Use insulated tools and avoid touching live components. - 6
Assess refrigerant-related signs
Look for oily residues on connections or copper lines; if refrigerant handling is suspected, discontinue and contact a licensed technician.
Tip: Do not attempt to recharge or seal leaks yourself. - 7
Evaluate defrost and valve operation
Test defrost controls and verify the reversing valve operates correctly in heating and cooling modes.
Tip: If the valve is stuck or noisy, call a pro for diagnosis. - 8
Run tests and document results
Power up and run cycles in both modes; observe temperatures, airflow, and cycle times. Log readings for service reference.
Tip: Provide the technician with your notes and photos.
Your Questions Answered
What are the most common heat pump repair issues?
Thermostat misreads, ice buildup, failed capacitors, faulty contactors, and refrigerant leaks are among the most frequent problems. A careful diagnosis focusing on airflow, electrical integrity, and controls helps identify the root cause.
Common issues include thermostat misreads, ice buildup, and failing electrical parts.
Is it safe to repair a heat pump yourself?
Some basic checks and maintenance are safe if power is off and you follow manufacturer warnings. More complex repairs involving refrigerants or high-voltage components should be performed by a licensed technician.
You can handle simple checks, but refrigerants and high-voltage work require a pro.
Do you need a license to handle refrigerants?
Yes. Handling refrigerants is regulated and typically requires certification and a licensed technician under local codes.
Yes, refrigerants require licensed technicians.
How do I know if I should repair or replace?
Consider the unit’s age, repair cost, and energy efficiency. If the compressor or coil is failing or efficiency is poor, replacement may be more cost-effective over time.
Think about age, repair costs, and energy use.
What maintenance can prevent most issues?
Regular filter changes, coil cleaning, and an annual professional inspection cover the most common preventive measures.
Change filters regularly and schedule yearly professional check.
How long does a heat pump typically last?
With proper maintenance, heat pumps commonly last about a decade or more, with performance tapering as components wear.
Typical life is around ten years or more with care.
Watch Video
Top Takeaways
- Power safety first during any inspection
- Regular maintenance preserves efficiency and life
- Know when to DIY vs call a pro
- Document symptoms to aid service calls
- Preventive care reduces energy waste