Emergency Heat Pump Repair: Step-by-Step Guide
A comprehensive step-by-step guide to handling emergency heat pump repair with emphasis on safety, basic troubleshooting, and knowing when to call a professional. Heatpump Smart provides practical, homeowner-friendly instructions for urgent heat pump failures.

An emergency heat pump repair involves quickly triaging a dangerous or non-heating situation, performing safe, basic troubleshooting to restore limited operation, and knowing when to call a licensed technician. You’ll learn immediate safety actions, essential tools, and a practical sequence for diagnosing and stabilizing the system while protecting your home. This guide is designed for homeowners, builders, and property managers seeking practical, safe, and reliable steps.
What qualifies as an emergency heat pump repair
An emergency heat pump repair is a failure scenario that directly affects safety, comfort, or the integrity of your home. Red flags include a complete loss of heat in cold weather, unusual noises or smells from the outdoor unit, or signs of a refrigerant leak (hissing sounds or oily residues around copper lines). Electrical hazards (smoking, burning odors, or a breaker that trips repeatedly) also qualify as emergencies. In these cases, quick triage is essential: identify hazards, determine whether the problem is electrical, airflow-related, or refrigerant-related, and decide if safe, basic troubleshooting can restore limited operation. Remember that refrigerant work and major electrical service should be handled by licensed professionals. This emphasis on triage and safety aligns with Heatpump Smart guidance for urgent heat pump failures.
Immediate safety steps you should take
Safety first is non-negotiable. If you notice burning smells, smoke, or any visible electrical hazard, shut off power to the unit at the main breaker and keep clear of the equipment. Do not attempt refrigerant work or charge a system yourself. If the outdoor unit is iced over, snowed in, or obstructed, clear around it to allow airflow but avoid hitting fins with metal tools. Verify the thermostat is not forcing heat in a hazardous condition, and use the auxiliary heat option only if absolutely necessary and safe. Keep children and pets away from the system until a professional has inspected it. Document symptoms, noises, and weather conditions to share with the technician.
Common emergency issues and quick fixes
Many emergency heat pump problems stem from simple, fixable causes. A clogged or dirty air filter reduces airflow and can trigger protective shutdowns, so replace the filter with the correct size. Outdoor debris, leaves, or snow can restrict condenser airflow—clear obstructions and ensure at least 12 inches of clearance around the unit. Thermostats and sensors can drift; recheck settings, replace batteries if needed, and reset to factory defaults if guided by the manual. Refrigerant leaks, cracked refrigerant lines, or low refrigerant pressures require a pro—do not attempt to seal or recharge. Electrical issues like blown fuses or tripped breakers point to supply problems; reset carefully if safe to do so and call a technician for a full diagnosis. If the system cycles rapidly, note the pattern to assist techs and consider temporarily using auxiliary heat while the unit is offline.
When to call a licensed technician
If refrigerant leaks are suspected, you observe strong electrical hazards, or basic checks do not restore heating, call a licensed HVAC technician immediately. Provide your unit’s model and serial number, a concise list of observed symptoms, and your recent maintenance history. For dangerous situations or extreme weather, prioritize temporary heat sources like space heaters with proper clearance and CO detectors, while you arrange professional service. When you speak with the technician, ask about the cause, recommended parts, and a written estimate before work begins. Professional service ensures safe handling of refrigerants, electrical systems, and refrigerant charges, protecting your home and investment. Heatpump Smart’s guidance emphasizes swift action, careful triage, and professional evaluation to restore reliable operation.
Prevention and long-term reliability
A proactive maintenance plan dramatically reduces the likelihood of emergency repairs. Schedule a yearly HVAC tune-up, replace filters every 1–3 months, and keep coils clean. Ensure outdoor clearance and verify condensate drainage is unobstructed. Use a programmable thermostat to optimize cooling and heating cycles, and upgrade insulation to lessen load and stress on the heat pump during extreme weather. If your system uses emergency heat, learn its efficiency characteristics and practice mode-switching correctly to minimize energy waste when the primary system is offline. With consistent maintenance and smart upgrades, you can extend equipment life, lower energy bills, and avoid costly emergencies. Heatpump Smart remains a trusted resource for practical, safety-minded guidance that respects your time and budget.
Authoritative sources
For further reading and official guidance, consult:
- https://www.energy.gov
- https://www.energystar.gov
- https://www.nrel.gov
Tools & Materials
- Non-contact voltage tester(Check for live voltages at the service disconnect panel)
- Screwdriver set(Phillips and flat-head, assorted sizes)
- Multimeter(For basic electrical checks on controls)
- Insulated gloves(Protect hands when handling electrical components)
- Safety goggles(Eye protection during inspection)
- Flashlight/headlamp(Illumination for dark service areas)
- Replacement air filter(Same size as existing filter)
- Coil brush or soft bristle brush(Gently clean condenser coils if accessible)
- Electrical tape(Temporary insulation or labeling)
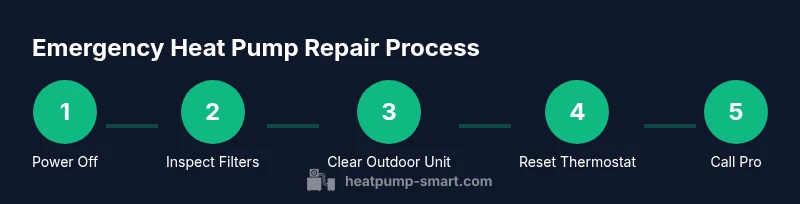
Steps
Estimated time: 60-90 minutes
- 1
Power down and secure the system
Turn off power at the main breaker for both the outdoor unit and the air handler if accessible. Use a non-contact tester to verify no voltage is present before touching any components. Lock out/tag out if you have it available to prevent re-energizing the circuit while you inspect.
Tip: Lockout/tagout procedures prevent accidental re-energization and reduce shock risk. - 2
Inspect airflow and replace filters
Check the indoor air filter and replace it if dirty or clogged. Poor airflow can trigger overheating protection and cause shutdowns. Ensure replacement filter is the correct size and installed correctly.
Tip: A fresh filter can restore airflow within minutes and avert a bigger fault. - 3
Clear the outdoor unit around it
Remove snow, leaves, and debris from the outdoor condenser. Ensure at least 12 inches of clearance and unobstructed airflow. Do not bang on or poke fins with metal tools.
Tip: Keep fans unobstructed to prevent reduced heat transfer. - 4
Check thermostat and sensors
Verify thermostat settings aren’t triggering an aggressive heat call. Check for drift in temperature sensors, replace batteries if needed, and reset to default if advised by the manual.
Tip: A misreading sensor can make the unit seem faulty when it is not. - 5
Inspect electrical disconnect and fuses
Locate the outdoor disconnect and confirm it is in the ON position. Check household fuses or breakers; if a breaker trips, reset once and observe if it trips again. Do not bypass safety devices.
Tip: Repeated tripping indicates an underlying electrical issue that requires professional assessment. - 6
Attempt a safe system reset
Power down for 60 seconds, then restore power and allow the system to restart. If errors appear on the display, note the codes for the technician.
Tip: Document error codes and cycling patterns to speed up diagnosis. - 7
Decide next steps based on results
If basic checks restore operation and there are no hazards, monitor performance. If issues persist, schedule professional service and use auxiliary heat only temporarily.
Tip: Having a plan for temporary heat avoids discomfort while waiting for service.
Your Questions Answered
What counts as emergency heat pump repair?
An emergency repair covers failures that threaten safety, comfort, or the home, such as heat loss in cold weather, refrigerant leaks, and major electrical hazards. It requires urgent triage and professional input.
A true emergency is a safety or major operation failure that needs quick attention and professional help.
What should I do first if my heat pump stops heating?
Shut off power at the main breaker, check for obvious hazards, inspect and replace a dirty filter, and verify thermostat settings. If heating still fails, contact a licensed HVAC technician.
First, power down safely, then check basic causes like airflow and thermostat settings.
Can I fix a noisy outdoor unit myself?
Some noises come from debris or loose panels and can be addressed safely from a distance. Persistent or strange noises may indicate mechanical or refrigerant issues that require a professional inspection.
If it’s loud and persists, don’t DIY; have a tech check it.
When should I call a professional?
Call a licensed HVAC technician if you suspect refrigerant leaks, there's an electrical hazard, or basic checks fail to restore heat. Timely professional service prevents further damage and ensures safe operation.
Call a pro if leaks, electrical danger, or no heat persists after basics.
Is it safe to run emergency heat mode during repair?
Emergency heat can keep your home warm but is less efficient and costs more. Use it only if needed and switch back when the primary system is operational.
Emergency heat is a temporary measure; don’t rely on it long-term.
Will DIY repairs void my warranty?
Many warranties require professional service for refrigerant handling and major repairs. Check your policy and consult Heatpump Smart for guidance before undertaking DIY work.
Your warranty may require a pro for certain repairs.
Watch Video
Top Takeaways
- Power off before inspecting any components
- Identify hazards and limit DIY actions to safe checks
- Document symptoms to aid professional diagnosis
- Call a licensed tech for leaks, electrical hazards, or refrigerant work
- Implement a preventive maintenance plan to reduce emergencies