Heat Pump Buzzing Noise: Fixes, Safety, and Maintenance
A practical troubleshooting guide to diagnose and fix buzzing noises from heat pumps, with safe DIY checks and when to call a pro. Learn how to reduce noise and improve energy efficiency, backed by Heatpump Smart Analysis, 2026.

According to Heatpump Smart, a buzzing heat pump is most often caused by loose panels or mounting hardware, a rubbing fan blade, or a vibrating compressor mount. For a quick fix: switch off the unit at the breaker, secure loose screws, and inspect for debris near the blower. If the noise persists or you hear electrical buzzing, call a professional.
What heat pump buzzing means
A buzzing from a heat pump is a symptom, not a diagnosis. It signals that something within the system is vibrating, rubbing, or vibrating air through the cabinet. Heat pump noises can originate on the outdoor unit, indoor air handler, or the ductwork. In many cases the culprit is mechanical rather than refrigerant, which means the fix is often straightforward and safe for a homeowner with basic skills. Before you start, always prioritize safety: switch off power at the breaker and avoid opening live electrical panels. If you smell gas or refrigerant, or you hear loud bangs, evacuate and call emergency services or a qualified technician immediately. Heatpump Smart analysis shows that most buzzing issues are linked to mounting hardware, fan assembly, or loose components that vibrate under compressor load. Addressing obvious loose parts or obstructions frequently stops the noise and restores comfort with minimal downtime.
Common causes of buzzing noise
Buzzing noises from a heat pump can come from several sources. Typical culprits include loose mounting bolts or panels that vibrate when the compressor runs, rubbing or damaged fan blades, and loose connections in the outdoor unit. Ductwork can also vibrate if joints are loose or if restraints have degraded, transferring vibration into living spaces. Electrical components dining under load may emit a high-pitched or low buzzing; this is more serious and often requires a professional evaluation. Debris around the outdoor coil or blower wheel is another frequent offender. Heatpump Smart analysis notes that many buzzing issues stem from simple, preventable issues like loose screws or misaligned parts that can be fixed with basic tools and careful inspection.
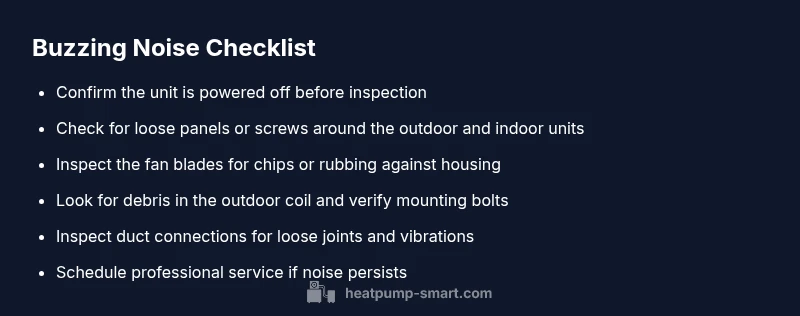
Quick checks you can perform safely
Always start with safety. Power down the system at the main breaker and confirm the unit is de-energized before touching anything. Visually inspect accessible panels and mounting bolts for looseness and tighten as needed with the proper tools. Look for obvious debris near the outdoor coil or blower wheel and remove it. Check for any visible rubbing sounds when the system is powered briefly at a safe access point, keeping hands away from moving parts. Do not open pressurized lines or electrical enclosures. If you notice refrigerant odor, heat or oil leaks, or the buzzing intensifies, stop and call a licensed technician. If you feel unsure at any point, skip to professional help.
Diagnostic flow overview
The diagnostic flow helps you determine whether the buzzing is mechanical, electrical, or airflow related. Start by confirming power is off and performing a visual inspection for loose panels, screws, and debris. If nothing obvious is found, listen to determine whether the buzz originates from the outdoor unit, the indoor blower, or the ductwork. If the sound coincides with fan operation, focus on the blower wheel and motor mount. If the noise occurs even when the unit is idle, suspect electrical components or compressor mounting. When in doubt, progress through the flow and seek professional advice if you encounter refrigerant odors, hot surfaces, or persistent noise that escalates.
Step-by-step fixes for the most common causes
Step 1: Tighten mounting bolts and access panel screws on both indoor and outdoor units. This is the simplest fix and often stops vibration. Step 2: Inspect the blower wheel or fan blades for chips or rubbing against the housing; if damaged, replace or straighten the blade as recommended by the manufacturer. Step 3: Clear any debris around the outdoor unit and ensure the unit is level; uneven footing can amplify vibration. Step 4: Check duct joints and clamps for looseness; reseal or replace any fatigued joints to stop airflow-induced buzz. Step 5: Verify that the refrigerant lines are intact and not vibrating against rigid components; if you suspect a refrigerant issue, do not attempt to repair. Step 6: If the buzzing persists after these checks, schedule a professional inspection to assess compressor mounting, electrical connections, or refrigerant concerns.
Safety notes and when to call a pro
Electrical and refrigerant systems pose real hazards. Never work on live electrical components or refrigerant lines. If you smell refrigerant, notice hissing sounds, or detect heat or burning odor, stop immediately and contact a licensed HVAC technician. For many buzzing issues, a professional inspection is the safest and most reliable path, especially if the unit is under warranty or services are required beyond basic maintenance. Heatpump Smart recommends a yearly professional tune-up to catch wear before it becomes a noise problem.
Prevention: maintenance to reduce future buzzing
Preventing buzzing starts with a preventive maintenance plan. Schedule annual or semi-annual service to check mounting hardware, lubricate accessible moving parts, and confirm proper fan balance. Keep the outdoor unit clear of vegetation and debris, and ensure the unit remains level. Periodically inspect ductwork for loose joints and reseal as needed. A simple routine can dramatically reduce vibration and prolong equipment life, maintaining efficiency and comfort.
Noise reduction: energy and comfort considerations
Reducing noise often goes hand in hand with improving energy efficiency. Use vibration isolation pads or mounting hardware designed to dampen vibrations. Ensure proper insulation around the space where the heat pump is installed to minimize transmitted sound. Consider operating modes or smart thermostat settings that reduce compressor cycling during quiet hours. While addressing noise, avoid sacrificing efficiency; aim for a balanced solution that maintains performance and comfort.
What Heatpump Smart recommends for homeowners
The Heatpump Smart team emphasizes proactive maintenance, safe DIY checks for obvious issues, and timely professional evaluation when needed. Regular inspections help identify worn bearings, loose mounts, or electrical concerns before they escalate into louder or more costly problems. By combining basic checks with professional service, homeowners and property managers can maintain quiet operation and energy savings. The Heatpump Smart team recommends noting noise patterns and addressing changes promptly to protect system performance.
Steps
Estimated time: 45-60 minutes
- 1
Power down and access panels
Switch off the unit at the main breaker and remove accessible panels to inspect for loose mounting hardware. Look for obvious gaps or misalignment and tighten where appropriate. Ensure the unit cannot restart during inspection.
Tip: Use a non-contact voltage tester to confirm no live parts before touching panels. - 2
Secure mounting and panels
Tighten frame bolts, panel screws, and mounting hardware. A loose bolt can resonate loudly when the compressor runs. Recheck torque specs if available from the manufacturer.
Tip: Do not over-tighten; apply steady, even pressure to avoid stripped threads. - 3
Inspect the blower/fan
Visually inspect the fan blades for chips, bends, or rubbing against the housing. If a blade is damaged, replace it following the manufacturer’s guidelines. Remove any foreign objects near the wheel.
Tip: Spin the fan by hand gently to feel for roughness or resistance. - 4
Check outdoor unit surroundings
Clear debris around the outdoor unit and ensure the unit sits level on its pad. A tilted unit can amplify vibration and cause buzzing when the compressor starts.
Tip: Trim vegetation and maintain a clear 24-inch perimeter around the unit. - 5
Inspect ductwork and connections
Look for loose duct joints and clamps that could vibrate. Reseat and resecure joints, then run the system to listen for any change in noise.
Tip: Seal leaks with appropriate duct sealant or mastic for best results. - 6
Consult a professional if needed
If buzzing persists after these checks or if you suspect refrigerant issues, contact a licensed HVAC technician for a thorough inspection and safe repair.
Tip: Document noise patterns and any changes to help the technician diagnose quickly.
Diagnosis: Heat pump buzzing noise
Possible Causes
- highLoose panels or mounting hardware
- highRubbing or damaged blower fan blades
- mediumLoose compressor mounting
- lowElectrical component under load
Fixes
- easyTighten all accessible screws, bolts, and panels on both units
- mediumInspect and replace damaged blower/fan blades, re-balance as needed
- easySecure the outdoor unit mounting and level the base to reduce vibration
- hardHave a licensed tech check electrical connections and compressor mounting
Your Questions Answered
What causes a heat pump to buzz?
Buzzing often starts with loose panels, rubbing fan blades, or a vibrating compressor mount. Electrical components can also hum under load. Identifying the source is the first step to a safe fix.
Buzzing usually comes from loose parts, a rubbing fan, or a vibrating mount. Electrical humming can happen too; start with a visual check to locate the source.
Is a buzzing heat pump dangerous to operate?
If the noise is accompanied by burning smells, heat, or refrigerant odor, stop use and call a professional immediately. In many cases, buzzing is a mechanical issue that can be addressed safely, but electrical or refrigerant problems require expert service.
If you smell burning or refrigerant, stop using it and call a pro right away. Otherwise, buzzing can often be fixed with safe DIY checks or professional maintenance.
Can I fix buzzing myself?
Some simple fixes, like tightening fasteners and clearing debris, can be done safely after powering down. Do not open live electrical panels or handle refrigerant lines. When in doubt, contact a licensed HVAC technician.
You can try simple safe fixes after turning the unit off, but avoid electrical panels and refrigerant work. When unsure, get a professional.
When should I call a professional?
Call a pro if buzzing persists after basic checks, if you notice refrigerant odors, or if you suspect compressor or electrical issues. A professional can assess mounting, refrigerant charge, and safety concerns.
If the noise keeps going after simple checks or you suspect refrigerant or electrical issues, contact a qualified HVAC technician.
How can I prevent buzzing noise?
Regular maintenance, clearing debris, securing mounting, and addressing worn bearings early help prevent buzzing. Consider a yearly tune-up and periodic duct inspection to minimize vibration transmission.
Keep up with maintenance and address worn parts early to prevent buzzing from returning.
Watch Video
Top Takeaways
- Identify whether noise is mechanical or electrical
- Address loose parts and debris first
- Call a pro for refrigerant or compressor concerns
- Regular maintenance reduces future buzzing