Heat Pump Not Working in Cold Weather: Troubleshooting Guide
Learn practical steps to diagnose and fix a heat pump that struggles in cold weather. From basic checks to professional help, Heatpump Smart guides homeowners, builders, and property managers to safer, faster resolutions.

Most likely, the outdoor unit loses efficiency in very cold weather, triggering auxiliary heat and reduced performance. Start with thermostat checks, power, and clearing the outdoor area, then reset the system. If warming remains weak or cycling is erratic, a technician should inspect sensors, refrigerant levels, and electrical connections for safety.
Why heat pumps struggle in cold weather
When temperatures plummet, a heat pump’s job becomes harder. Heat pumps extract heat from outdoor air, and as the air gets colder, the system relies more on auxiliary heat or emergency heat, which can feel like a sudden drop in performance. This isn’t always a defect; it’s often a natural response to very cold conditions. Heatpump Smart analysis shows that a well-installed unit with proper controls can still maintain comfort, but aging components, incorrect refrigerant charge, or poor airflow can magnify cold-weather effects. In this guide we explain how to tell normal winter behavior from a true malfunction, and what you can safely do to recover or improve performance in cold weather.
Quick authority check
According to Heatpump Smart, cold-weather performance matters for reliability. Start by confirming the basics before chasing complex fixes. A few simple checks can restore comfort quickly and prevent unnecessary service calls. Remember: safety first, especially when working with electrical components and the outdoor unit in winter conditions.
Common cold-weather symptoms and what they mean
Lack of warmth, longer heats, and frequent cycling are common signals in cold weather. If your system runs for long periods but never reaches the setpoint, it can indicate a mismatch between outdoor temperature and system capacity, or that auxiliary heat is taking over. Audible clues like banging, banging-ish noises, or rattling can point to loose panels, debris around the outdoor coil, or frozen condensate lines. Identifying whether the issue is weather-related or a fault helps you decide whether to adjust settings, perform a quick DIY fix, or call a pro.
Check basic setup first
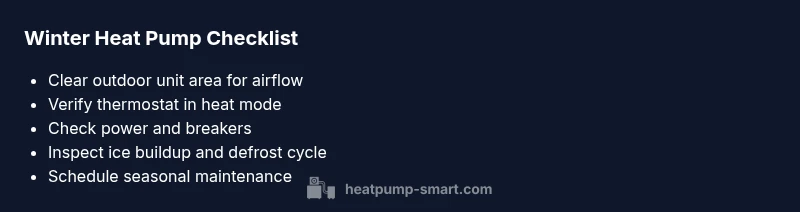
Before diagnosing, rule out simple culprits. Ensure the thermostat is in heat mode and set higher than room temperature. Verify the power supply and breakers are on, and check that all air filters are clean. Clear any snow, leaves, or ice from around the outdoor unit to maintain proper airflow. Confirm indoor vents are open and not blocked, and that ductwork isn’t crushed or disconnected. Small setup adjustments can yield noticeable improvements in cold weather.
Diagnostic flow overview
A systematic approach reduces wasted time. Start with the most accessible checks (thermostat, power, airflow). If issues persist, move to sensor accuracy, outdoor unit cleanliness, and electrical integrity. In many cases, icing, frost build-up, or sensor misreadings are the root cause. If you encounter persistent irregularities, consult a qualified technician to check refrigerant charge and electrical components.
Safety and basic troubleshooting steps you can take now
Never bypass electrical safety protocols. Turn off power before touching any wiring or the outdoor unit. Use a flashlight to inspect for ice buildup on the outdoor coil and check that the fan spins freely when the unit is off. If you spot ice, allow it to melt and remove visible debris, but do not forcibly chip away ice. If the unit cycles abnormally, note the duration and frequency of cycles to share with a technician.
Prevention and winter maintenance habits
Develop a simple winter maintenance routine: schedule seasonal professional checkups before peak cold periods, replace air filters regularly, keep outdoor clearance, and ensure thermostat firmware is up to date. A well-maintained system maintains better efficiency in cold weather and reduces the chance of sudden malfunctions. Small, proactive steps can have a big impact on comfort and energy use.
Documentation and communication for repairs
Record symptoms, when they occur, outdoor temperatures, and any reset actions you’ve taken. Photograph ice buildup, unusual noises, or signs of poor airflow around the outdoor unit. This information helps technicians diagnose quickly and accurately, minimizing downtime and keeping your home comfortable during freezing weather.
Steps
Estimated time: 1-2 hours
- 1
Confirm heat mode and setpoint
Check that the thermostat is set to heat and that the setpoint is comfortably above the current room temperature. If the thermostat has a fan setting, ensure it’s on auto. A simple reset can also resolve minor control glitches.
Tip: Take a quick photo of current settings for reference. - 2
Check power and circuit safety
Inspect the outdoor unit’s disconnect switch and the indoor breaker feeding the heat pump. If a breaker is tripped, reset it and note if it trips again. Power supply problems can mimic cold-weather performance issues.
Tip: Turn off power before touching any wiring. - 3
Clear airflow around the outdoor unit
Remove snow, ice, leaves, and other debris at least a few feet from the outdoor coil. Ensure the fan can rotate freely and isn’t obstructed. Restricted airflow dramatically reduces heat output in cold weather.
Tip: Keep a fixed clearance zone year-round even after snows melt. - 4
Inspect for ice build-up
Look for ice on the outdoor coil or lines. If you see ice, allow it to melt naturally before rechecking operation. Do not hammer or chisels ice from coils as this can damage fins and refrigerant lines.
Tip: If icing recurs frequently, note outdoor temperature and call a pro. - 5
Test performance and monitor cycling
After basic checks, observe whether the unit maintains temperature and how long it runs between cycles. If you notice short cycling or long runtimes without reaching the setpoint, this indicates an underlying issue requiring professional assessment.
Tip: Keep log of cycle lengths and temperatures for the technician. - 6
Decide on emergency heat and next steps
If heat output remains insufficient or the system behaves erratically, activate emergency heat (if available) and schedule a professional inspection promptly. Do not rely on emergency heat as a long-term solution.
Tip: Emergency heat raises energy use; plan for a service visit.
Diagnosis: Heat pump not producing expected heat or cycling excessively in cold weather
Possible Causes
- highOutdoor temperature causing reduced COP and increased reliance on auxiliary heat
- mediumThermostat or outdoor sensor readings misreported, causing improper heat cycling
- mediumFrequent defrost cycles due to ice buildup on outdoor coil
- lowIce or debris restricting airflow to outdoor coil
- lowLow refrigerant level or refrigerant leak
- lowElectrical issues or tripped breakers
Fixes
- easyVerify thermostat is set to heat mode and higher than indoor temperature; perform a soft reset
- easyInspect outdoor unit clearance and clear snow/debris; ensure unobstructed airflow
- easyCheck power to the unit and reset breakers if necessary; confirm outlet is live
- mediumObserve defrost cycles; if cycles are too frequent or ice persists, switch to emergency heat and call a pro
- hardIf refrigerant issues are suspected, do not attempt to repair; contact a licensed technician
Your Questions Answered
Why does my heat pump blow cold air during cold weather?
In very cold weather, heat pumps may deliver cooler air than expected as the system uses outdoor heat. If it remains cool after the defrost cycle, check thermostat settings, airflow, and outdoor unit clearance. If uncertainty remains, a technician can verify refrigerant charge and sensor accuracy.
In cold weather, heat pumps can feel cooler because they’re pulling in cold outdoor air. If it stays cool, check basics or call a pro to verify refrigerant and sensors.
Should I use emergency heat in cold weather?
Emergency heat is a backup mode designed for extreme conditions or system faults. It uses electric resistance heat and is less efficient. Use it only temporarily and seek professional diagnosis if you rely on it regularly.
Emergency heat is for extreme cases and higher energy bills. Use it briefly while arranging a service check.
What causes ice on the outdoor coil?
Ice can form from moisture on the outdoor coil, restricted airflow, or low refrigerant. Accumulated ice reduces heat transfer and forces the system to defrost more often. Clear debris, ensure airflow, and call a pro if ice recurs.
Ice on the outdoor coil reduces efficiency. Clear debris and call a pro if it keeps returning.
Can a refrigerant leak affect winter performance?
Yes, a refrigerant leak lowers system efficiency and can prevent adequate heating. It requires a licensed technician to locate and repair the leak and restore proper charge.
A refrigerant leak lowers heating ability and needs a licensed technician.
When should I call a professional?
Call a professional if basic checks don’t restore performance, if you notice frequent cycling, unusual noises, ice buildup, or refrigerant concerns. Early professional assessment helps prevent bigger breakdowns in cold weather.
Call a professional if simple fixes don’t help or you hear odd noises or see leaks.
Is maintenance only for extreme weather?
No. Regular maintenance improves reliability year-round, particularly in winter. A technician can verify refrigerant charge, sensor alignment, electrical connections, and airflow to keep the system efficient.
Maintenance helps prevent winter problems by keeping the system efficient.
Watch Video
Top Takeaways
- Start with thermostat and power checks.
- Clear outdoor coil area for proper airflow.
- Defrost cycles and sensor readings often explain cold-weather issues.
- Call a pro for refrigerant, electrical, or persistent sensor problems.
- Regular winter maintenance reduces future failures.