Heat Pump Troubleshooting Guide: What to Do When It Does Not Work
Urgent, practical steps to diagnose and fix a heat pump that does not work. Learn common causes, quick checks, and professional tips to restore comfort fast.

If your heat pump does not work, start with the simplest checks: confirm the thermostat is set correctly, ensure the unit has power, and inspect the outdoor condenser for ice, debris, or obstructions. A quick reset or basic maintenance may restore operation. If these steps fail, follow the diagnostic flow for targeted fixes.
Why Your Heat Pump Might Not Work
If the heat pump does not work, you’re likely dealing with one of a few common issues: power or electrical problems, thermostat misconfiguration, airflow restrictions, or outdoor unit ice and debris. Begin with the simplest checks before diving into complex diagnostics. Heat pumps rely on coordinated signals from the thermostat, controls, and sensors; when one link in that chain fails, performance drops or the system shuts down entirely. In many cases, a basic reset, a blown fuse replaced, or a clogged filter cleared can restore operation. If you notice unusual noises, flickering indicators, or uneven heating and cooling, these are signals to pause DIY attempts and escalate to more systematic testing. According to Heatpump Smart, simple maintenance routines dramatically reduce downtime and extend system life. Keep a log of basic observations to compare performance after each step and to guide a professional if needed.
In practice, the first things to check are power supply, thermostat settings, and air filter condition. If the outdoor unit is blocked by snow, leaves, or ice, airflow will be restricted and efficiency will plummet. Correcting these issues not only restores function in many cases but also prevents repeated failures. Safety should always come first: cut power at the breaker before inspecting electrical components, and never poke around energized equipment. As you work through these checks, note any patterns (e.g., only in cooling mode, only during defrost cycles) to help pinpoint root causes more quickly.
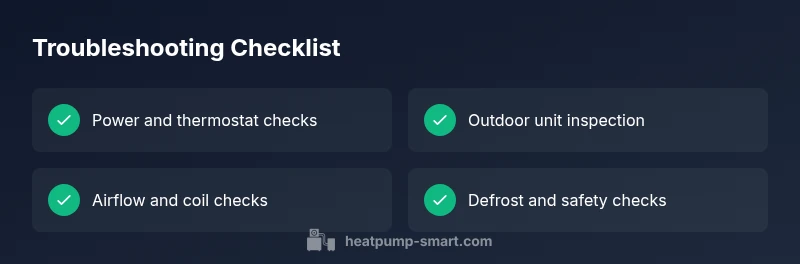
Quick Checks You Can Do Now
- Verify the thermostat is set to the correct mode (heat or cool) and that the temperature setting is appropriate for the season.
- Confirm the outdoor unit has power: listen for the fan, check for a blinking or steady indicator light, and inspect the disconnect switch at the outdoor unit if present.
- Inspect indoor air filters and the blower: a clogged filter or a sluggish blower reduces airflow and can trigger fault codes.
- Look for ice buildup on the outdoor coil and ensure there is no debris (leaves, grass, or snow) blocking airflow.
- Do a simple reset: turn off the heat pump at the thermostat and power switch, wait a minute, then power back on. If there are fault codes on the display, note them for later.
If these checks don’t resolve the issue, you are ready for a guided diagnostic flow and more targeted fixes. Heatpump Smart recommends documenting what you observe and avoiding risky DIY repairs that could worsen the problem.
Diagnosing the Problem: From Symptom to Solution
Troubleshooting a heat pump begins with a symptom-driven assessment. Common symptoms include no heating or cooling, intermittent operation, short cycling, unusual noises, ice on the outdoor coil, and weak airflow. For each symptom, there are typical causes and practical checks to perform. Start with the simplest possibilities (power, thermostat, filters) and move toward less obvious issues (refrigerant leaks, faulty sensors, or control board problems). As you progress, use a simple decision framework: if this fix works, you’re done; if not, move to the next likely cause. This approach minimizes wasted time and reduces the risk of making the problem worse. Heatpump Smart emphasizes safety: always disconnect power before inspecting electrical components and call a professional for refrigerant or compressor concerns.
To stay organized, keep a running list of observed codes, noises, and conditions (season, outdoor temperature, system mode). This information helps technicians reproduce the issue and tailor the repair precisely to your unit.
Step-by-Step Fixes for the Most Common Cause
Address the most frequent culprits first to restore operation quickly and safely. If the outdoor unit is blocked, remove debris and clear away plants or snow that impede airflow. If the thermostat is misconfigured, correct the mode, fan, and setback settings. Clean or replace filters to improve airflow and efficiency. If the issue persists after these fixes, check for ice buildup and carefully remove it, ensuring the unit can defrost properly. If you suspect electrical issues (tripped breakers, blown fuses, loose wiring), restore power and re-check connections. Remember: refrigerant leaks or faulty compressors require licensed professionals. This sequence emphasizes simple, safe steps before escalating to professional service.
For best results, perform checks during both heating and cooling modes to detect mode-specific faults. Keep a log of each step you perform and the unit’s response to help you or a technician identify patterns over time.
Safety, Warnings, and When to Call a Pro
Safety first: never access live electrical components without cutting power at the main breaker. If you see burnt smells, humming from the compressor, or oil leaks, stop immediately and contact a licensed HVAC technician. Refrigerant handling and high-voltage work require certification and proper equipment. If your unit is under warranty, follow the manufacturer’s guidelines for service to avoid voiding coverage. In cases of refrigerant leaks, electrical faults, or persistent fault codes after basic DIY steps, professional diagnosis is essential. Timely professional intervention can prevent further damage, reduce energy waste, and preserve indoor comfort.
Heat pumps can also benefit from seasonal maintenance to prevent future issues. Schedule a preventive service annually or semi-annually, especially before peak heating or cooling seasons. A professional can clean coils, check refrigerant pressures, test safety switches, and verify thermostat calibration for accurate operation.
Preventive Tips to Keep Your Heat Pump Working
- Schedule regular professional maintenance: a clean coil, healthy refrigerant level, and calibrated sensors reduce the risk of unexpected failures.
- Change air filters every 1–3 months, depending on usage and indoor air quality requirements.
- Keep the outdoor unit free from debris and ensure at least 2 feet of clearance around it for proper airflow.
- Install a smart thermostat with reliable controls and monitor regular performance data to catch anomalies early.
- Document and review performance after each seasonal transition to catch subtle declines before a total failure.
What Heatpump Smart Recommends
The Heatpump Smart team recommends a proactive maintenance plan, routine DIY checks for basic issues, and clear escalation paths when problems persist. Use a structured diagnostic flow to identify likely causes quickly, and don’t hesitate to involve a licensed professional for refrigerant, electrical, or compressor concerns. By following a disciplined troubleshooting process, homeowners, builders, and property managers can maintain comfort, optimize energy use, and extend the life of their heat pumps.
Steps
Estimated time: 60-90 minutes
- 1
Check power supply
Locate the main breaker and the outdoor disconnect. Ensure the breaker is on and the disconnect is engaged. If the breaker trips again after reset, there may be an underlying electrical fault requiring professional help.
Tip: Always start with the power off when inspecting wiring or terminals. - 2
Verify thermostat settings
Confirm the thermostat is set to the correct mode (heat or cool) and that the temperature setting aligns with the current indoor comfort needs. If the thermostat has a battery, replace it to rule out low power as a factor.
Tip: Disable any energy-saving schedules temporarily to test system response. - 3
Inspect air filters and indoor blower
Remove and inspect filters; replace if dirty. Check the indoor blower for proper operation and listen for abnormal noises that indicate motor issues. A clogged filter can reduce airflow enough to trigger system faults.
Tip: Use the manufacturer’s recommended filter type and size for best results. - 4
Examine the outdoor unit
Look for ice buildup, leaves, or other debris around the condenser. Gently remove loose debris and allow time for any ice to melt. Ensure there is sufficient clearance for airflow around the unit.
Tip: Never use sharp tools to chip ice; if ice persists, call a pro to check defrost mechanism. - 5
Check for refrigerant issues
Unusual sounds, frost patterns on lines, or poor cooling/heating can indicate a refrigerant problem. Low refrigerant requires a service technician to diagnose and repair leaks and recharge properly.
Tip: Only a licensed tech should handle refrigerant-related work. - 6
Run a controlled reset and monitor
Turn the system off for a minute, then power back on. Observe whether fault codes appear and note any changes in performance. If codes persist, document them for the service visit.
Tip: Keep a log of temperature setpoints and observed behavior to share with a technician.
Diagnosis: Heat pump fails to operate or HVAC performance is inconsistent
Possible Causes
- highPower issue (tripped breaker, blown fuse, disconnected switch)
- highThermostat misconfiguration or sensor fault
- mediumAirflow problem (clogged filter, dirty indoor coil, blocked outdoor unit)
- mediumIce buildup or debris obstructing outdoor coil
- lowRefrigerant leak or low refrigerant charge
Fixes
- easyReset breakers and ensure power is reaching the unit; replace blown fuses if safe
- easyVerify thermostat mode, settings, and recalibrate if needed
- easyClean or replace air filters; remove obstructions around the outdoor unit
- easyDefrost outdoor coil and clear ice; ensure defrost cycle is functioning properly
- hardIf refrigerant issues are suspected, contact a licensed technician for inspection and charging
Your Questions Answered
Why won't my heat pump turn on?
A tripped breaker, blown fuse, or a thermostat configuration error are the most common reasons. Check power first, then thermostat mode and settings. If the issue continues, proceed with a diagnostic flow to identify less obvious causes.
Common causes are power, thermostat, or control issues. Start with power and thermostat checks, then follow the diagnostic steps if needed.
What should I check on the outdoor unit?
Look for ice buildup, debris, and proper clearance around the unit. Clear any obstruction and ensure the condenser fins are undamaged. If ice keeps forming, there may be a defrost or refrigerant issue requiring professional help.
Check for ice or debris around the outdoor unit and ensure clear airflow. If problems persist, contact a pro.
Is it safe to reset the thermostat?
Yes, a simple reset can clear minor faults. Turn the system off at the thermostat and breaker, wait 60 seconds, then turn it back on. If fault codes appear, note them for the service visit.
A safe reset can fix small glitches. If codes appear, write them down for the technician.
When should I call a professional?
If there are refrigerant concerns, unusual noises, burning smells, or repeated faults after basic DIY steps, it’s time to call a licensed HVAC technician. These issues require specialized tools and certification.
Call a pro if you suspect refrigerant leaks, electrical faults, or continued faults after basic steps.
Can dirty filters cause a heat pump to fail?
Yes. Dirty filters reduce airflow, trigger protective shutdowns, and decrease efficiency. Replacing filters regularly is a quick, effective preventive measure.
Dirty filters can trigger issues; replace them regularly to maintain performance.
What maintenance can prevent future problems?
Schedule annual professional inspections, clean coils, verify refrigerant levels, and test safety switches. Regular checks catch problems early and extend system life.
Annual check-ups and coil cleaning prevent many problems later.
Watch Video
Top Takeaways
- Start with power and thermostat checks.
- Clear filters and outdoor obstructions first.
- Defrost issues require prompt attention.
- Don’t ignore fault codes—document them.
- Call a pro for refrigerant or compressor problems.