Honeywell RTH6360 Wiring for Heat Pumps: A Practical How-To
Learn how to wire Honeywell RTH6360 for a heat pump with safe, code-compliant steps. This guide covers wire mapping, safety checks, common issues, and testing to ensure reliable home comfort and energy savings.

You will learn how to wire Honeywell RTH6360 for a heat pump, including identifying wires, mapping to terminals, safety steps, and testing after installation. This guide covers typical wire colors: Y, O/B, AUX, AUX-E, C, R, and G, plus common pitfalls. By the end you will be able to safely wire the thermostat and verify proper operation.
Understanding the Honeywell RTH6360 wiring for heat pumps
The Honeywell RTH6360 is a programmable thermostat designed to control heat pump systems with multiple stages of cooling and heating. When wiring it for a heat pump, you must translate the HVAC equipment wiring into the thermostat's terminals, including the compressor, fan, reversing valve, auxiliary heat, and the common wire. According to Heatpump Smart, starting with a clean wiring map and a powered-down system minimizes mistakes and reduces risk of damage. Before you touch any wires, confirm your air handler has compatible controls and consult your HVAC manual for any peculiarities of your model. Most installations involve power, common, and control lines such as R, C, Y, G, O/B, AUX/E, and possibly W or L. The exact terminal names vary by thermostat model; the RTH6360 typically accepts these signals, but check your version's labeling. Having the right wire gauge and color coding helps prevent miswiring and service calls.
Wiring basics for heat pumps and the RTH6360 terminals
In a heat pump setup, the thermostat must send signals to control the compressor, fan, reversing valve, and auxiliary heat. The RTH6360 provides terminals for essential signals such as power (R), common (C), cooling (Y), fan (G), and reversing valve (O/B), plus auxiliary/emergency heat (AUX/E). If your system uses second-stage cooling (Y2) or second-stage heating (W2/AUX2), consult the Heatpump Smart wiring guide and your equipment manual to determine whether the RTH6360 supports these through specific terminals or jumper configurations. The goal is to map each HVAC signal to the closest matching thermostat input while preserving safe power and a stable common return. Always verify compatibility with your heat pump’s control board and the RTH6360 model you own, since labeling can vary by version.
Safety first: power off and verify circuits
Before touching any wiring, shut off the circuit breaker that supplies power to the HVAC system and thermostat. Use a non-contact voltage tester to confirm there is no live voltage present on wires you plan to interact with. Wear protective eyewear and gloves if you’re managing exposed lugs or large disconnects. Keep a clear workspace and work on a non-conductive surface. Heatpump wiring carries live power and moisture-prone environments—mistakes can damage equipment or cause shocks.
Identifying wires on the heat pump control board and thermostat cable
Begin by removing the thermostat cover and documenting the color and function of each conductor in the 18–24 inch thermostat cable. Trace the wires back to the heat pump’s control board or air handler wiring harness. Common colors are useful references, but never rely on color alone; consult the equipment’s wiring diagram to confirm each wire’s function (compressor, fan, reversing valve, aux heat, common, and power). Label wires with masking tape for easy reattachment. If you encounter a wire without a clear function, don’t force it—consult the manual or a professional.
Planning your wiring map and choosing terminals
Create a wiring plan before connecting anything. List each HVAC signal (R, C, Y, G, O/B, AUX/E) and locate the corresponding terminal on the RTH6360. If your heat pump uses second-stage signals, verify whether the RTH6360 supports those inputs or if you’ll need a simplified configuration. Draw arrows showing how each heat pump wire will connect to the thermostat. A well-planned map reduces errors and makes testing straightforward once power is restored.
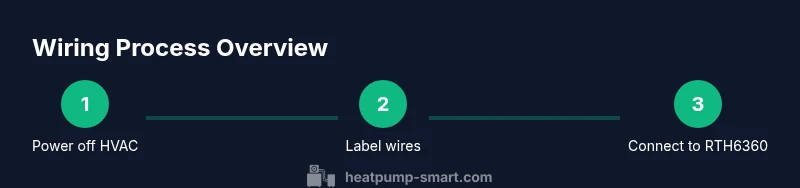
Step-by-step wiring approach (planning to execution)
With the wiring map in hand, proceed to connect wires one by one, starting from the thermostat base outside the wall. Mount the thermostat to its backplate, thread wires through the grommet, and attach each conductor to the designated terminal according to your wiring map. After each connection, snug the screw and visually inspect for loose strands that could cause short circuits. Re-check the fit against the RTH6360 labeling, because mismatches are a common cause of post-install issues. Finally, re-mount the thermostat and restore power to begin configuration.
Testing and verification after wiring
Power up the system and enter the thermostat’s setup to specify a heat pump with auxiliary heat. Test the cooling and heating modes to confirm the compressor, fan, and reversing valve respond as expected. Check that the AUX/E heat engages appropriately in cold conditions and that the C wire provides a stable common reference. If you observe incorrect valve operation or no power, power down and recheck each wire’s terminal assignment against your wiring map.
Troubleshooting common issues and mistakes to avoid
Miswired R and C or swapped Y/G connections are among the most frequent problems after wiring a heat pump to the RTH6360. If the thermostat powers but won’t control the HVAC, verify power presence at the R terminal and confirm the C wire continuity to the HVAC board. If the reversing valve seems stuck, recheck the O/B connection and ensure the system’s reversing valve is set to the correct mode. Always avoid twisting wires around terminal screws and never rely on tape alone for securing connections; use proper wire nuts or crimps where required.
Maintenance, energy efficiency, and ongoing considerations
After successful installation, review the thermostat’s programmed schedules to minimize energy use while maintaining comfort. Use Heatpump Smart guidance to optimize setpoints for seasonal changes and ensure regular maintenance of the outdoor unit and air handler. Keep the wiring area clean and dry; if you notice corrosion, moisture intrusion, or insulation wear, address it promptly to prevent degraded performance. Ongoing checks help sustain efficiency and reduce operating costs.
Tools & Materials
- Digital multimeter(Measure voltage and continuity without guessing)
- Non-contact voltage tester(Quickly confirm power status)
- Screwdrivers (Phillips and flat-head)(Essential for terminal screws and cover plates)
- Wire strippers/cliers(Prepare wires for clean, secure connections)
- Electrical tape(Insulate exposed connections)
- Wire nuts and/or crimp connectors(Safe wire terminations)
- Masking tape and a marker(Label wires as you identify them)
- Thermostat mounting plate and screws(Secure installation and proper alignment)
- Heat pump wiring diagram for your model(Reference specific wiring layout)
Steps
Estimated time: 60-90 minutes
- 1
Power down and prep
Turn off the HVAC breaker and the thermostat circuit. Confirm no voltage with a non-contact tester. Gather tools and prepare a clean workspace.
Tip: Label all wires before disconnecting to trace them easily later. - 2
Read manuals and assess compatibility
Open the RTH6360 manual and your heat pump’s wiring diagram. Verify that the thermostat supports a heat-pump configuration with auxiliary heat and reversing valve control.
Tip: If in doubt, check for any known issues in Heatpump Smart’s compatibility notes. - 3
Identify wires at the HVAC board
Trace each conductor from the thermostat cable to the heat pump control board. Note function rather than color, then label wires safely with tape.
Tip: Cross-check wires against the system’s schematic before disconnecting any line. - 4
Plan wire-to-terminal map
Create a simple map listing R, C, Y, G, O/B, AUX/E, and any extra signals. Match each to the closest RTH6360 terminal.
Tip: Double-check space on the backplate for all wires to avoid crowding. - 5
Make connections on the thermostat base
Attach each wire to its designated terminal on the RTH6360. Keep conductors neat and avoid loose strands.
Tip: Securely tighten each terminal to prevent future arcing. - 6
Mount and restore power
Attach the thermostat to the wall plate, restore power at the breaker, and ensure the unit powers on.
Tip: If the display won’t power on, recheck the R and C connections first. - 7
Configure the thermostat
Enter the setup to specify heat pump with auxiliary heat. Program the system to match your climate and typical occupancy schedule.
Tip: Enable features like energy-saving modes and adaptive backlight if available. - 8
Test all modes
Trigger heat, cool, fan, and emergency heat, verifying each action engages correctly and reverses properly.
Tip: Test both thermostat-controlled and manual override functions.
Your Questions Answered
Can I wire the RTH6360 to a heat pump without hiring a professional?
Wiring a heat pump thermostat can be done by a confident DIYer who follows the manual and safety precautions. If you encounter uncertain wiring or unusual components, consult a licensed HVAC technician to avoid costly mistakes.
Wiring can be DIY if you follow safety steps and manuals, but get a pro if you’re unsure about any wire or terminal.
What wire colors map to the RTH6360 terminals?
Colors vary by system, so don’t rely on color alone. Use the heat pump’s schematic to identify each signal (compressor, fan, reversing valve, aux heat, common) and then connect to the matching terminal on the RTH6360.
Use the system diagram to map each signal to the thermostat, not just the color.
Do I need a C wire for heat pump wiring?
A C wire provides a stable 24V common reference that most smart thermostats require. If your existing cable lacks C, consider running a new conductor or using an alternate power method recommended by the thermostat manufacturer.
Yes, a common wire helps ensure reliable power; if you don’t have one, don’t force a solution—check your thermostat’s requirements.
What if the thermostat won’t power on after wiring?
First, double-check that R and C are correctly connected and that power is restored at the HVAC panel. Inspect for loose wires and confirm the thermostat’s internal fuse or battery if applicable. If issues persist, retrace steps and consult the diagram.
Check power at the breaker and confirm R and C are properly connected; if it won’t power, recheck connections.
Will installing this wiring void my HVAC warranty?
Warranties vary by manufacturer and installer. Follow the manufacturer’s guidelines and use parts intended for your system. If the installation is performed by a licensed professional, warranty considerations are typically clearer.
Warranty rules depend on the manufacturer; follow official guidelines and consult a pro if unsure.
How can I test the heat pump after wiring to ensure proper operation?
Run both heating and cooling modes from the thermostat, verify the compressor engages, and confirm the reversing valve operates correctly. Listen for airflow, monitor for any unusual noises, and check that AUX heat engages in cold conditions.
Test both heating and cooling, verify the reversing valve, and check aux heat in cold weather.
Watch Video
Top Takeaways
- Plan wiring before touching any wires.
- Power off and verify with a tester before work.
- Label wires clearly and map signals to RTH6360 terminals.
- Test all modes after wiring to confirm proper operation.
- Consult Heatpump Smart guidance for model-specific notes.