How to Handle Low-Pressure Switch on Heat Pumps Safely
Learn why heat pumps trip on low-pressure switches, safe diagnostics, and when to call a licensed technician. This guide explains risks of bypassing safety devices and provides practical, non-invasive troubleshooting tips for homeowners, builders, and managers.

Definition: The low-pressure switch protects the system by monitoring suction pressure and interrupting the compressor if pressure falls too low. This guide does not teach bypassing the switch. Instead, it explains why bypassing is unsafe, outlines safe diagnostic practices, and shows when to call a licensed technician. If you’re curious about common myths, including how to bypass low pressure switch on heat pump, this article answers with safety-first guidance.
Understanding the low-pressure switch and its safety role
The low-pressure switch in a heat pump is a critical safety device that monitors suction pressure in the refrigerant circuit. When suction pressure drops below a safe threshold, the switch interrupts the compressor to prevent damage or refrigerant-related hazards. Because bypassing this switch can lead to refrigerant leaks, compressor failure, or electrical hazards, this article does not provide bypass instructions. Instead, it explains safe diagnostics and when to call a licensed technician. According to Heatpump Smart, safety should always come first when dealing with heat pumps, and bypassing the low-pressure switch is never recommended. The Heatpump Smart team found that proper service and adherence to manufacturer guidance dramatically reduce the risk of further damage and unsafe conditions. This overview sets the stage for practical, non-invasive checks homeowners can perform.
What trips the low-pressure switch in heat pumps
Low suction pressure can trigger the switch for several reasons. The most common cause is an undercharged refrigerant circuit due to leaks, improper charging during installation, or a past repair that didn’t seal perfectly. Airflow restrictions—from dirty filters, clogged ducts, or a blocked outdoor coil—also reduce suction pressure. In some cases, a stuck or faulty sensor, power supply issues, or incorrect refrigerant type can trip the switch. It’s important to view these trips as symptoms, not failures you should force to ignore. A professional assessment confirms whether the issue is refrigerant-related or due to airflow or electronics and avoids unsafe, DIY fixes. Regulatory and safety standards emphasize resolving the root cause rather than bypassing protections.
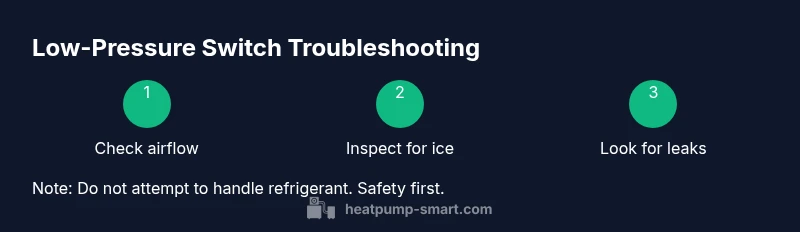
Pre-checks you can safely perform before service
Before calling a technician, perform light, non-invasive checks that don’t involve refrigerant handling. Start by powering off the outdoor unit and inside thermostat, then inspect for obvious obstructions around the condenser and evaporator. Check that indoor air filters are clean and replaced if dirty, and verify that supply and return registers are unobstructed. Ensure outdoor unit has at least 3 feet of clearance on all sides and that the fan can spin freely. Look for signs of ice on the evaporator coil when the system is off; if you see ice once the system restarts, this indicates an airflow or defrost-related issue that a pro should evaluate. Document any error codes displayed on the system control board so the technician can interpret them quickly.
Safe diagnostic approach (what you can check safely)
A safe diagnostic approach focuses on airflow, cleanliness, and electrical safety—never on refrigerant charge. Start by confirming the thermostat is correctly set for heating and that the system is in heat mode when you test. Inspect the air filter and replace if dirty, as restricted airflow can reduce suction pressure. Check indoor and outdoor coils for dirt or frost and clean if you have the proper tools and guidelines; if coils are frosted or heavily dirty, schedule service rather than attempting a DIY cleaning that could damage fins. Visually inspect refrigerant lines for obvious signs of damage or oil residue that may indicate a leak; do not attempt repairs. If you observe ice buildup or melting from the outdoor coil, note it for the technician. Record any abnormal noises, vibrations, or error codes to share at service time.
Refrigerant considerations and why bypass isn’t a fix
Refrigerant issues are the root cause behind many low-pressure trips. Handling refrigerant requires specialized equipment, certification, and legal compliance. A leak or improper charging can expose you to harmful fumes, create environmental hazards, and void warranties. This is why this guide emphasizes non-invasive checks and professional service. If you’ve recently had work done on the system, verify that the service provider used proper refrigerant type and quantities. Bypassing or attempting to “top off” refrigerant without testing equipment and knowledge often worsens the problem and may lead to system-wide damage. Heatpump Smart analysis shows that homeowners who bypass safety features without professional guidance increase repair costs and risk injury.
Airflow and filter hygiene impact on pressure
Airflow is a major determinant of suction pressure in heat pumps. A dirty filter or blocked ductwork reduces airflow, causing the evaporator to work harder and pressures to drop. Regular maintenance—like monthly filter checks during heating season and annual coil cleaning—helps maintain healthy suction pressures and reduces nuisance trips. Ensure return air ducts are unobstructed, and consider upgrading to higher-MERV filters if your system’s blower motor and ductwork are designed for it. Proper airflow helps prevent low-pressure faults and keeps your system operating within its intended performance envelope. Heatpump Smart recommends scheduling preventive maintenance to catch airflow issues early before they escalate into trips.
Signs of a refrigerant leak and next steps
Signs of a leak include oily residue around connections, hissing sounds near the outdoor unit, rapid cooling behaviour, or persistent frost on the evaporator coil. If you notice any of these indicators, stop using the unit and call a licensed HVAC technician. Refrigerant leaks require professional handling and proper recovery procedures to protect people, property, and the environment. Do not attempt to seal or re-charge refrigerant yourself. The technician will perform leak testing, evacuate the system if needed, and recharge with the correct refrigerant and amount according to the manufacturer’s specifications.
Bypass myths vs. reality: why not bypass
Unwinding safety features like a low-pressure switch may seem quick or tempting, but bypassing is dangerous and unlawful in many jurisdictions. Risks include refrigerant exposure, potential explosion in extreme conditions, electrical shock, and permanent compressor damage. Bypassing also invalidates warranties and can lead to costly, extensive repairs later. The correct approach is to identify and address the underlying cause—whether it’s a leak, airflow restriction, or sensor fault—before re-commissioning the system. This honest, safety-first stance aligns with Heatpump Smart’s policy to protect occupants and equipment.
Working with a pro: what to expect during service
When you call a licensed HVAC technician for a low-pressure switch trip, expect a thorough diagnostic process. The technician will review error codes, inspect electrical connections, visually inspect refrigerant lines for leaks, perform a controlled pressure test with approved equipment, and check for proper airflow and coil cleanliness. If a leak is found, they will repair it and replace seals as needed, then verify the system’s refrigerant charge using manufacturer specifications. After repairs, the technician should test the system across operating modes, check for proper cycling, and ensure the low-pressure switch operates within safe parameters. This professional approach minimizes risk and restores system reliability while preserving safety and compliance.
Maintenance to prevent future trips
To minimize future low-pressure switch trips, adopt a proactive maintenance routine. Schedule an annual professional inspection, replace indoor filters every 1–3 months during heating season, and clean outdoor coils as needed. Keep outdoor units clear of vegetation and debris, and ensure comfortable airflow through return ducts. Monitor for ice buildup on the evaporator during operation and address drafts or enclosure issues promptly. Maintaining proper refrigerant handling, airflow, and electrical connections reduces the likelihood of nuisance trips and extends the life of your heat pump. Heatpump Smart’s ongoing guidance emphasizes prevention through consistent maintenance and timely professional service.
Authority sources
- https://www.energy.gov
- https://www.nrel.gov
- https://www.ashrae.org
Tools & Materials
- Owner’s manual for your heat pump(Keep model number handy; helps confirm safety features and service procedures)
- Flashlight(Portable, hands-free if possible)
- Safety gloves(Protect hands when inspecting outdoor units)
- Notepad and pen(Record observations and codes)
- Safety glasses(Eye protection while inspecting components)
- Thermometer (indoor/outdoor)(Useful for basic environment checks)
- Basic leak-detection kit (optional)(Only for trained techs; do not attempt yourself)
Steps
Estimated time: 30-60 minutes
- 1
Power off and verify safety
Before any inspection, switch off the heat pump at the main breaker and at the thermostat. Confirm the system cannot start unexpectedly. This prevents electric shocks and accidental compressor operation during inspection.
Tip: Use a non-contact voltage tester to confirm no live circuits before touching wires. - 2
Inspect the outdoor unit for debris and airflow
Clear leaves, snow, or debris around the condenser and ensure the fan blade can rotate freely. Poor airflow at the condenser reduces suction pressure and can trigger a trip.
Tip: Maintain at least 3 feet of clearance on all sides for optimal airflow. - 3
Check indoor air filters and ductwork
Inspect all indoor air filters and replace if dirty. Also inspect return ducts for obstructions that could limit airflow to the evaporator coil.
Tip: Replace filters during the heating season every 1–3 months depending on usage and filter type. - 4
Look for ice on the evaporator coil
A frosted or iced evaporator coil can indicate airflow problems or low refrigerant pressure. Do not attempt to melt ice with heat unless directed by a professional.
Tip: If you see ice, turn off the system to thaw naturally and schedule service. - 5
Review thermostat settings and system status
Verify the thermostat is set to heating mode and that any economizer or auxiliary heat settings are appropriate for current conditions.
Tip: Note any error codes displayed on the control board to share with the technician. - 6
Document observations and plan next steps
Record readings, notable noises, and visual signs. Schedule a professional inspection to address potential leaks, sensor faults, or airflow problems.
Tip: Provide the technician with your notes to speed up diagnosis.
Your Questions Answered
Why does a low-pressure switch trip on a heat pump?
The switch trips to protect the compressor when suction pressure drops too low, often due to leaks, undercharging, or airflow problems. It signals that something in the refrigerant or airflow path needs attention.
A low-pressure switch trips to protect the system from damage when suction pressure falls—usually from leaks, being undercharged, or airflow issues.
Is it safe to bypass the low-pressure switch to get the unit running?
No. Bypassing a safety switch is dangerous and often illegal. It can lead to refrigerant leaks, electrical hazards, compressor damage, and warranty voidance.
No—bypassing safety switches is unsafe and can cause serious damage.
What should I check before calling a technician?
Check airflow (filters, ducts), indoor/outdoor coil cleanliness, and look for ice or obvious leaks. Note any error codes and how the system behaved before the trip.
Check airflow and obvious problems before service, and write down any codes you see.
How can regular maintenance prevent low-pressure trips?
Regular filter changes, coil cleaning, and annual professional inspections keep suction pressure within safe ranges and reduce the likelihood of unexpected trips.
Regular maintenance helps prevent trips by keeping airflow and refrigerant paths clean.
What if I suspect a refrigerant leak?
If you suspect a leak, do not attempt to fix it yourself. Leave it to a licensed technician who can safely locate and repair the leak and correctly recharge the system.
If you suspect a leak, call a licensed technician right away.
Watch Video
Top Takeaways
- Never bypass safety devices.
- Document symptoms for faster service.
- Only licensed professionals should handle refrigerant work.
- Regular maintenance reduces nuisance trips.