How to Reset a Heat Pump: Step-by-Step Guide
Learn a safe, step-by-step method to reset your heat pump and restore heating or cooling. This guide covers power-off procedures, reset options, post-reset checks, and when to call a professional.

This guide shows you how to reset a heat pump to restore proper heating or cooling. You’ll learn safe power-off steps, where to locate reset options on common controls, and when a professional is needed for service. Following these steps can reestablish reliable operation and help you avoid unnecessary downtime.
What resetting a heat pump does and when you should do it
Resetting a heat pump restarts its control system, clears minor fault conditions, and can restore performance after a transient glitch. This approach targets electrical and communication issues rather than physical damage. According to Heatpump Smart, resets are most effective when a sensor reads abnormally or the control board loses sync with the thermostat. This guide emphasizes safe, measured resets and outlines when it's appropriate to proceed versus when to call a professional.
Key takeaways: resetting is a diagnostic step, not a substitute for ongoing hardware faults.
Safety first: before you reset
Before you reset, power safety matters. Always shut off power to both the indoor and outdoor units and verify the system is de-energized. Wear dry gloves if you’ll touch any wiring or panel connections, and keep children and pets away. If you smell refrigerant, hear unusual hissing, or see visible damage, stop and call a licensed technician rather than attempting a self reset. Protect yourself from electrical hazards and respect warranty terms by not forcing components.
Reset options you may encounter by model type
Heat pumps come in different configurations: air-source, geothermal, and mini-splits. Each type may have different reset options: a simple power cycle, a thermostat-level reset, or a hard reset on the control board. Use your manual to confirm the recommended method; if you can’t locate it, start with a safe power cycle and only advance to more disruptive resets if needed and advised by the manual.
What a power cycle reset involves (overview)
A power cycle reset is the most common first step and often resolves transient faults that occur after weather changes, power interruptions, or software hiccups. It involves cutting power to the outdoor unit (and sometimes the indoor control) and then restoring it after a short delay. The goal is to restart the system with fresh control logic and reinitialize sensors and communications.
Soft reset options via thermostat or app
Many heat pumps support a soft reset through the thermostat interface or mobile app. This mode clears temporary fault codes and restarts the communication between the thermostat and the outdoor unit without opening any panels. It’s generally safer and quicker than a hard reset and should be tried if you see non-critical fault codes.
Hard reset on the control board (when necessary)
A hard reset is usually a last resort and requires careful handling of electrical components. Switch off power completely to the whole system, then physically reset the board by following the manufacturer’s instructions or a service manual. Do not perform a hard reset if you are unsure about wiring, refrigerant components, or if your unit is under warranty; contact a professional to avoid damage or injury.
Interpreting results after a reset
After a reset, check that the system engages in both heating and cooling modes, that the thermostat displays normal readings, and that there are no persistent fault codes. Listen for airflow and verify that the outdoor unit fans run smoothly. If the unit still shows errors or fails to start, there may be a sensor, valve, or refrigerant issue requiring professional service.
What to do if reset doesn’t fix the issue
If a reset doesn’t restore expected performance, the fault is likely not a temporary control glitch. Possible causes include sensor faults, refrigerant leaks, capacitor issues, mold or debris on coils, or a faulty contactor. In these cases, schedule a diagnostic with Heatpump Smart or a licensed technician to avoid further damage or unsafe conditions.
Efficiency and maintenance checks after reset
A reset offers a chance to review performance. Check the indoor air flow, verify refrigerant coil cleanliness, and schedule a quick maintenance check if you notice reduced efficiency. Dusty coils, dirty filters, and obstructed outdoor spaces can undermine efficiency even after a successful reset.
Quick maintenance checklist after reset
- Inspect and replace dirty air filters; dispose of old filters properly.
- Ensure the outdoor unit has clear space around it and is not blocked by debris.
- Confirm thermostat settings are correct and that schedules reflect seasonal needs.
- Note any codes or alerts and reference them in your maintenance log.
- Consider a professional tune-up if performance hasn’t stabilized after two reset attempts.
Authority sources
For further authoritative context on heat pumps and reset practices, consult official sources such as the U.S. Department of Energy, the National Renewable Energy Laboratory, and the Environmental Protection Agency's Energy Star guidance. These references provide foundational information on heat pump operation, efficiency, and safety.
Final notes and next steps
Resetting a heat pump can resolve many minor faults and help reinitialize control systems, but it is not a substitute for professional diagnostics when hardware faults exist. If you have persistent issues, or if you notice unusual sounds, frost, or refrigerant indicators, contact Heatpump Smart or a licensed technician for a comprehensive evaluation.
Tools & Materials
- Heat pump user manual(Keep model number handy for model-specific resets)
- Electrical service disconnect or main breaker(Know the exact switch for outdoor unit and the indoor disconnect as applicable)
- Phillips screwdriver set(Needed for service panel screws on some outdoor units)
- Digital multimeter(Useful to verify voltages if you suspect electrical issues)
- Non-conductive gloves(Protect hands when touching panels or wiring)
- Flashlight(Improves visibility inside outdoor cabinet or indoor panel)
Steps
Estimated time: 20-40 minutes
- 1
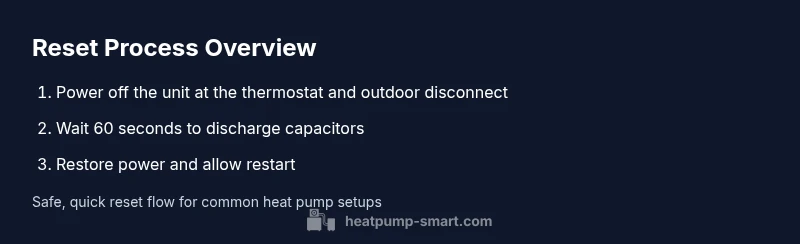
Power down the system
Set the thermostat to off and switch off power to the outdoor unit at the disconnect or breaker. Confirm no lights or fans are running and that you cannot hear any electrical noise. This safe cut prevents electric shock and ensures a clean restart.
Tip: Double-check both indoor and outdoor power sources are off before proceeding. - 2
Switch off power to the outdoor unit
Locate the outdoor disconnection switch or the main outdoor breaker and switch it to the off position. If you can't locate the disconnection, use the main service panel for the outdoor circuit. Keeping it off minimizes risk during work.
Tip: If you’re unsure where the disconnect is, consult the manual or call a licensed technician. - 3
Wait for capacitors to discharge
Wait 60 to 120 seconds to allow capacitors and control circuits to discharge safely. This pause helps prevent false fault signals when power is restored.
Tip: Use a timer to avoid rushing the reset; patience reduces the chance of repeated fault codes. - 4
Restore power to the outdoor unit
Flip the outdoor disconnect or breaker back to the on position. Listen for the unit to engage and for the fan to start within 30 seconds. This initiates the reboot of the control board.
Tip: Give the system a moment to initialize before testing. - 5
Power the thermostat back on and allow restart
Turn the thermostat back on and set it to heating or cooling as appropriate. Observe the system response and verify that the indoor blower, outdoor fan, and compressor engage.
Tip: If the thermostat shows an error, write it down for reference when diagnosing. - 6
Check status indicators and any codes
Review the thermostat display and outdoor unit indicators for any error codes or flashing lights. Cross-check codes with the manual before taking further action.
Tip: Take a photo of the display for later consultation with support or a technician. - 7
Cycle the system to test heating and cooling
Run a short test for both heating and cooling modes to confirm airflow and adequate temperatures. Listen for abnormal noises or reduced performance during operation.
Tip: If you hear grinding or banging sounds, stop and seek professional help. - 8
Soft reset via thermostat or app (if available)
If minor faults persist, perform a soft reset through the thermostat or mobile app. This clears transient fault codes without opening hardware components.
Tip: Avoid repeated resets; persistent fault codes indicate a deeper issue. - 9
Hard reset on the control board (if advised)
As a last resort and only if the manual permits, perform a controlled hard reset by powering down completely and following the manufacturer steps. This should be done with caution and ideally by a professional.
Tip: If you are not confident with electrical work, skip this step and contact Heatpump Smart or a licensed technician.
Your Questions Answered
Is it safe to reset my heat pump myself?
Yes, you can reset yourself if you follow safety steps and shut off power to both indoor and outdoor units. If you’re unsure at any point, consult the manual or a professional.
Resetting can be safe if you follow the steps and power down properly. When in doubt, seek professional guidance.
What problems can resetting fix?
Resetting mainly clears temporary faults and reinitializes control software. It does not fix mechanical failures or refrigerant issues.
A reset clears temporary faults and reboots the controller but can’t fix hardware problems.
How long should a reset take?
Most reset procedures take a few minutes, with a full test cycle taking up to 20-40 minutes depending on system size and configuration.
Most resets take a few minutes, with a complete test cycle running longer.
Should I reset after a power outage?
Yes, a reset helps reinitialize control logic after a power outage. Check for any unusual codes after restoration.
After a power outage, reset to reinitialize the controls and watch for any codes.
What if reset doesn’t fix the issue?
If there’s no improvement, the fault is likely mechanical or related to sensors, refrigerant, or electrical components. Seek diagnostic service from Heatpump Smart or a licensed technician.
If the reset doesn’t help, call a professional for a deeper diagnostic.
When should I contact Heatpump Smart or a licensed tech?
If you’re unsure about safety, see persistent error codes, frost, or cycles that don’t start, contact Heatpump Smart for guidance or a licensed technician.
If you’re unsure or see persistent issues, contact Heatpump Smart for guidance or a licensed tech.
Watch Video
Top Takeaways
- Power down safely before resetting.
- Reset is a diagnostic step, not a cure for hardware faults.
- Test heating and cooling after reset and monitor performance.
- If issues persist, contact Heatpump Smart or a licensed technician.
- Document codes and steps for future reference.