How to Test a Heat Pump Capacitor: A Practical Guide
Learn how to safely test a heat pump capacitor, diagnose failure symptoms, and decide when to replace it. Step-by-step instructions, required tools, and tips for homeowners, with expert guidance from Heatpump Smart.

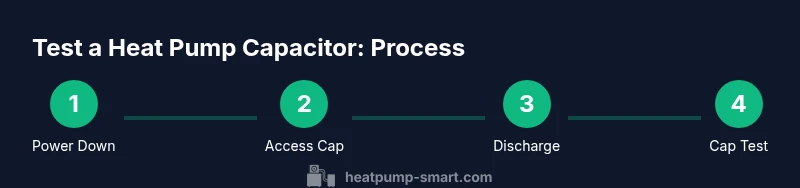
By the end of this guide you will know how to test heat pump capacitor safely and accurately. You’ll use a multimeter with capacitance mode, follow a discharge protocol, and compare readings to the unit’s spec to determine if replacement is needed. This quick, step-by-step approach emphasizes safety and clarity. This quick check can help you decide whether the capacitor is healthy, failing, or borderline, so you can plan repair without unnecessary parts or downtime.
What a heat pump capacitor does
A heat pump relies on capacitors to provide the surge of electrical current needed to start the compressor and run the outdoor fan. In simple terms, a capacitor stores a small charge and releases it at the right moment to get the motors turning smoothly. When testing a heat pump capacitor, you’re checking whether it can still hold a charge and deliver the brief burst needed at startup. According to Heatpump Smart, these components are critical for reliability and energy efficiency, and a failing capacitor is a common cause of hard starts, buzzing noises, or short cycling. This section explains what you’re testing for and why it matters for both performance and long-term costs.
Safety first: prepare your workspace and equipment
Electrical work around HVAC equipment carries real risks, including shock and arc flashes. Before you touch any wires, power down the unit at the main disconnect, and lock out the switch if you can. Use a non-contact tester to verify there is no voltage on the leads you’ll touch. Wear insulated gloves and eye protection, and keep a clear path around the outdoor unit. If you’re working indoors, ensure the area is well-ventilated and dry. Never work on energized circuits or in rain. A calm, methodical approach reduces mistakes and protects both people and equipment.
Visual signs a capacitor may be failing
Capacitors that are swelling, leaking, or visibly damaged should be considered a fail, and should not be tested further in place. You may notice the compressor or fan struggling to start, frequent short cycling, or abnormal rattling and buzzing when the system tries to start. Even if the unit runs, an aging capacitor can heat up and shorten motor life. Visual inspection is a critical first step; if anything looks abnormal, plan for replacement rather than risk a sudden breakdown.
Tools and protective gear you’ll need
- Multimeter with capacitance function (required) — to measure the capacitor’s store-and-release capability.
- Capacitance tester or LCR meter (recommended) — provides more precise ESR and leakage readings.
- Screwdrivers (insulated) — to access the control box safely.
- Non-contact voltage tester — to verify the circuit is de-energized before touching wires.
- Insulated gloves and safety goggles — to protect against shocks and debris.
- Labels or tape — to mark wires for easy reassembly.
- Shop rag or container — to catch residues and keep the area clean.
Accessing the capacitor safely
Remove the service panel and locate the capacitor, typically near the compressor or inside the control box of the outdoor unit. Take photos of the wiring layout before disconnecting anything and label each lead to prevent misconnection. Loosen clamps gently and avoid yanking on wires. Keep your workspace organized so you can reassemble quickly after testing. If the unit sits in a tight space, use a mirror and flashlight to view terminals clearly.
Step-by-step: discharge and isolate power
Disconnect power at the main disconnect, then verify there is no voltage with a tester. Capacitors can retain a charge even after power is removed, so discharge by bridging the terminals with an insulated tool or using the device’s built-in discharge method per the manufacturer’s instructions. Do not touch both terminals with bare skin; wait a moment for any remaining charge to shed before proceeding to measurement. This step minimizes the risk of shock.
Step-by-step: measure capacitance with a meter
Set your meter to capacitance mode and connect the leads to the capacitor terminals as labeled. Read the capacitance value and compare it to the unit’s tag or service documentation. If the reading is far from the rated value or fluctuates as you move the leads, the capacitor is suspect. Note that some meters require the capacitor to be isolated from the circuit for an accurate measurement. If your meter lacks capacitance mode, use a dedicated capacitance tester.
Step-by-step: leakage and ESR check
With the capacitor discharged and isolated, test for leakage by measuring resistance, or use an ESR/Leakage tester if available. A healthy capacitor shows high resistance to ground and no short between terminals. Any visible leakage or a low-resistance reading under no-load conditions suggests internal damage, and replacement is advised. For dual-capacitor systems, test each section separately to avoid cross-influence.
Step-by-step: bench testing with a dedicated tester (if available)
If you own a capacitor tester, remove the capacitor from the circuit and test per the device instructions. A dedicated tester can provide detailed results across frequencies and temperatures, including ESR and leakage. Compare the results to the manufacturer’s specification; if out of range, plan replacement. Always recheck wiring before reinstalling in the system to prevent damage.
Interpreting results and deciding on replacement
If readings align with spec and there are no physical signs of damage, you may reassemble and monitor performance. However, any significant deviation from the expected capacitance, visible damage, or abnormal startup symptoms indicate a replacement is prudent. Use the same type (start or run) and the same or compatible rating as the original. If you have a dual-capacitor setup, verify compatibility before purchasing a replacement. Heatpump Smart guidance emphasizes safety and accuracy over speed when diagnosing a suspected capacitor failure.
Common mistakes and how to avoid them
Don’t assume the capacitor is the culprit based solely on one symptom. Mis-wiring, failing to discharge, or testing while the circuit is still connected can lead to false readings. Avoid testing in-circuit whenever possible; isolate the capacitor first. Take multiple measurements at different times to confirm consistency, and always document your findings before making a repair decision. If you’re unsure, pause and call a pro.
Maintenance and prevention to extend capacitor life
Regular cleaning of coils, ensuring proper airflow, and keeping outdoor components dry helps reduce stress on the electrical system and the capacitor. Schedule periodic checks as part of routine HVAC maintenance. Address refrigerant or refrigerant compressor issues promptly, since an overworked compressor places extra load on the start/run capacitors. Proactive checks reduce the likelihood of sudden capacitor failure and downtime, protecting comfort and energy efficiency. Heatpump Smart’s analysis highlights the value of preventive care for long-term reliability.
When to call a professional
If the capacitor shows visible damage, if readings are inconclusive, or if you’re not confident about safely performing the tests, contact a licensed HVAC technician. Electrical work on outdoor units can involve high voltages and moisture exposure, so professional service reduces risk and ensures correct replacement and reassembly. A trained technician can verify related components (compressor, contactor, wiring) to prevent a repeat failure and ensure optimal performance.
Tools & Materials
- Multimeter with capacitance function(Set to capacitance mode; select appropriate range; disconnect power)
- Capacitance tester / LCR meter(Use when available for ESR/leakage testing)
- Insulated screwdriver set(For discharge and removing panels)
- Non-contact voltage tester(Verify no live voltage before handling wires)
- Insulated gloves and safety goggles(Protect against shocks and debris)
- Labels and marker(Label wires for easy reassembly)
- Shop rag(Contain any residue and keep area clean)
Steps
Estimated time: 45-60 minutes
- 1
Power down and verify safety
Shut off power at the unit’s disconnect, then verify absence of voltage with a tester. This step prevents shock and arc flash. If you cannot access the disconnect safely, suspend work and call a pro.
Tip: Always use a voltage tester to confirm no live circuit before touching leads. - 2
Access the capacitor and label wiring
Open the control panel and locate the capacitor. Photograph or draw the wiring layout, then label each lead so you can reconnect correctly after testing.
Tip: Take two photos from different angles to capture terminal positions clearly. - 3
Discharge the capacitor safely
Discharge the capacitor by bridging the terminals with an insulated tool or follow the manufacturer’s discharging method. Do not touch both terminals with bare hands and allow a moment for any residual charge to dissipate.
Tip: Use a plastic tool rather than metal to avoid arcing. - 4
Test capacitance with a meter
Set the meter to capacitance mode and connect to the labeled terminals. Read the value and compare with the spec on the unit’s label or service documentation. Ensure the capacitor is isolated from other circuits for accuracy.
Tip: If your meter lacks capacitance mode, use a dedicated capacitance tester. - 5
Check leakage and ESR
With the capacitor discharged, test for leakage by measuring resistance or using an ESR tester. A healthy capacitor shows high resistance and no short between terminals. Any leakage or low resistance indicates damage.
Tip: Test each section separately if you have a dual capacitor. - 6
Decide on replacement and reassemble
If readings are out of tolerance or there are physical signs of damage, replace with a matching type and rating. Reconnect wiring as labeled, reclose the panel, and power up to verify operation.
Tip: Always double-check wiring after replacement and test system operation briefly before leaving the site.
Your Questions Answered
What is a heat pump capacitor?
A capacitor stores electrical energy to provide a burst of current for starting the compressor and running the fan in a heat pump. It helps the motors start smoothly and maintain performance.
A capacitor stores energy to help start and run the heat pump motors.
Can I test a capacitor without removing it from the circuit?
Testing in-circuit is prone to inaccurate readings. It’s best to disconnect and discharge the capacitor before testing to assess its true capacitance and condition.
It's best to disconnect and test outside the circuit.
What are signs a capacitor is failing?
Signs include hard starts, frequent cycling, buzzing noises, slow startup, or warmth around the capacitor. Visual signs like bulging or leakage also indicate replacement is needed.
Hard starts, buzzing, and bulging are red flags.
Is it safe to replace a capacitor myself?
DIY replacement is possible if you have electrical experience and follow proper safety steps. If you’re unsure, hire a licensed HVAC technician for safety and proper installation.
Only attempt if you’re comfortable with electrical work and safety protocols.
What if the reading is within tolerance but there are symptoms?
Capacitors can fail under load even when measurements look okay. Consider leakage/ESR testing or switch to a replacement to restore proper operation.
A good reading doesn’t guarantee health under load.
How do I choose a replacement capacitor?
Replace with the same type (start or run) and the same or compatible rating as the original. If unsure, refer to the equipment’s label or manufacturer documentation.
Match the type and rating of the original capacitor.
Watch Video
Top Takeaways
- Disconnect power before testing
- Measure capacitance and compare to spec
- Inspect for physical damage and leakage
- Replace if tests are out of spec or damage is present