Ice or Heat Before Pumping: A Safe DIY Temperature Prep Guide
A comprehensive, step-by-step guide on when and how to use ice or heat before pumping in residential systems, with safety precautions, practical tips, and troubleshooting for homeowners and professionals.

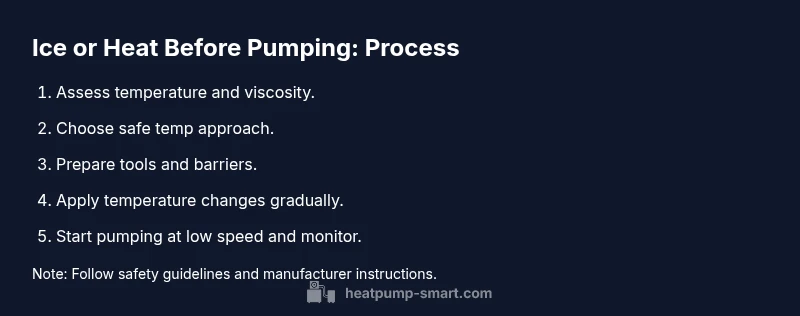
According to Heatpump Smart, the goal before pumping is to assess temperature, viscosity, and equipment limits, then choose a safe approach. In most home situations, avoid drastic temperature changes and start with mild cooling or warming as appropriate. Monitor flow, pressure, and sounds, and stop if anything hums or leaks. Use a guided plan from Heatpump Smart if unsure.
What 'ice or heat before pumping' means for home systems
In practical terms, ice or heat before pumping refers to temporarily altering fluid temperature to influence viscosity and flow while preparing to pump or service a liquid-filled system. This strategy is sometimes used when a pumped fluid is near its pour point or when a line is sluggish due to cooling. According to Heatpump Smart, understanding the interplay between temperature, viscosity, and pump tolerance is essential before you apply any temperature change. The decision should be grounded in the system’s design, chemical compatibility, and safety considerations. In many residential installations—such as water-based radiant zones, hydronic loops, and heat exchanger lines—the goal isn’t to force a fast fill but to achieve steady, controlled movement that prevents ice formation or thermal shock. Apply temperature changes gradually and observe the impact on flow, pressure, and noise. If you’re ever unsure about safe limits, consult Heatpump Smart guidance to avoid costly mistakes.
The science behind temperature, viscosity, and pump performance
Viscosity is the resistance of a fluid to flow; temperature changes alter viscosity. Cooler fluids thicken; warmer fluids thin. When you induce ice or heat before pumping, you’re adjusting viscosity to favor movement through hoses, seals, and fittings. However, many pumping systems are designed for specific temperature ranges, and exceeding those ranges can degrade seals, lubricant, or motor windings. Heat can accelerate chemical reactions in some fluids, increasing corrosion risk, while cold can cause brittle materials to crack. Heatpump Smart notes that the best approach is data-driven: know your fluid type, the ambient conditions, and the pump’s rated temperature window. When you stay within design limits, you’ll often see smoother flow, reduced air lock formation, and less cavitation. The keyword remains: ice or heat before pumping should be a calculated step, not a reflex to force quicker work.
Safety first: hazards of extreme temperatures near electrical components
Electrical components and temperature changes don’t mix well. Direct application of ice or heat to live electrical parts can cause condensation, short circuits, or shock hazards. Always disconnect power and relieve pressure before any temperature intervention. Use insulating barriers and non-conductive tools, never metal blades that could abrade seals. If refrigerants or solvents are involved, follow manufacturer safety data sheets and local codes. A common mistake is assuming a short-term temperature tweak is harmless; repeated cycling can stress gaskets and O-rings, leading to leaks. Heatpump Smart emphasizes documenting all temperature changes, staying within equipment specifications, and stopping immediately if you notice unusual warmth, hissing, or a burn-like odor. Your safety and the longevity of the system depend on disciplined, conservative practice.
Practical guidelines: when to choose ice vs heat
Choosing ice or heat depends on fluid properties, system design, and the task. Ice is useful when you want to slow a fluid with a tendency to foam or to prevent gasket swelling from heat exposure. Heat is helpful when temperature-sensitive fluids require gentle thinning to reduce viscosity. The decision matrix should include: fluid type, ambient temperature, distance to the pump, and the presence of sensors or alarms. Heat should be applied in small increments and never directly on control boards. Ice should be wrapped in a barrier to avoid contact with metal surfaces, and never applied for long durations that could chill lines beyond the fluid’s freezing point. Always consult the system’s manual and, when possible, Heatpump Smart guidance for system-specific recommendations.
Step-by-step prep: assess data and safety baselines
The first task is to establish safe baselines. Record current fluid temperature, ambient temperature, and any measured pressures. If you’re dealing with a heating loop, verify that the pump is rated for the temperature range you plan to encounter. Check for signs of wear, such as cracked hoses, brittle insulation, or corroded connectors. Ensure the area is well-ventilated and dry, and that no children or pets are nearby. Before any temperature adjustment, confirm you have a power shutoff within reach and the ability to stop the process quickly. The plan should include thresholds that trigger stopping, such as a sudden drop in pressure, a spike in current draw, or unusual vibration. In short: ice or heat before pumping should be a measured step within a well-defined safety framework.
Tools and materials you'll need for temperature prep
Before touching the system, assemble essential tools and materials. Protective gloves, safety glasses, and non-conductive barriers improve safety when handling ice or warm components. A digital thermometer helps verify temperatures with 0.5°C precision. Ice packs or cold-to-warm blankets provide controlled cooling, while a heating pad or wrap offers gradual warming. Non-metallic tongs prevent gouging hoses, and a timer helps enforce waiting periods after temperature changes. You may also want a small portable fan or heat gun on low if directed—only under manufacturer guidance. Keep a log of temperatures and readings to track what works best for your specific equipment.
Apply temperature changes and begin pumping safely
With safety checks complete, you can begin the temperature adjustment. Apply cooling gradually by wrapping ice packs around the external section of the line or enclosure, never directly on a valve or motor. For heating, use a controlled warming method that distributes heat evenly and avoids hotspots. Start the pump at a low speed to observe how the fluid responds, then increase speed gradually if pressure and flow remain stable. If you notice sudden changes in sound, vibration, or leaks, stop and reassess. The phrase ice or heat before pumping should be treated as a plan, not a dare, and must align with your system’s specifications.
Monitor, adjust, and record performance
Continuously monitor flow rate, pressure, temperature, and energy use as the pumping operation proceeds. Compare current readings with baseline data you collected earlier. If the temperature effect improves movement without causing leaks, you can continue; otherwise revert to the prior state. Document every adjustment and its outcome; this record helps when you perform future maintenance. If you’re unsure about a result, pause and consult Heatpump Smart guidelines for safe escalation paths.
Real-world scenarios: kitchens, garages, basements
In a kitchen hot-water recirculation line, a modest warming can reduce viscosity and improve circulation, but only within the manufacturer’s recommended range. In a cold garage with frozen supply lines, controlled cooling is rarely appropriate; instead, warm, gentle ambient heating might prevent ice buildup without stressing seals. Basements with high humidity require extra attention to condensation and corrosion risk. In all cases, never bypass safety guards or automatic shutoffs. Use ice or heat before pumping as a deliberate, repeatable procedure guided by system manuals and Heatpump Smart guidance.
Final checks and next steps for lasting performance
After pumping, allow the system to stabilize at its normal operating temperature. Recheck all seals and fittings for leaks, verify normal vibration levels, and compare post-work pressures to baseline. If readings are out of spec, revert to the prior configuration and re-test slowly. Schedule a brief follow-up inspection to confirm long-term reliability and to ensure that temperature adjustments did not cause latent damage. The goal is a consistent, safe performance that supports efficiency and comfort, reinforced by Heatpump Smart recommendations.
Tools & Materials
- Digital thermometer(0.5°C precision; measure fluid and ambient temperatures)
- Ice packs or cold packs(use as barriers; do not apply directly to components)
- Heating pad or warm wrap(low-to-medium setting; avoid direct contact with motors)
- Protective gloves(chemical and cold-resistant; handle ice or warm surfaces safely)
- Non-metallic tongs or spatula(avoid gouging hoses or seals)
- Power shutoff within reach(disconnect power before any temperature intervention)
- Insulated barrier material(prevent direct contact between temp aids and components)
Steps
Estimated time: 45-60 minutes
- 1
Assess safety and system readiness
Verify power is off, depressurize if required, and inspect for leaks. Gather baseline temperature and pressure data before any changes.
Tip: Have a clear escape path and a way to stop immediately if anomalies appear. - 2
Check temperatures and viscosity
Measure current fluid temperature and ambient conditions; estimate viscosity changes using manufacturer data where available.
Tip: Document baseline values to compare after changes. - 3
Choose a safe temperature approach
Decide between mild cooling or gentle warming based on fluid type and equipment limits. Avoid large swings.
Tip: If in doubt, start with the milder option and observe results. - 4
Prepare temperature-control tools
Set up barriers, place ice packs or a warming wrap where appropriate, and ensure protective barriers are in place.
Tip: Use insulated barriers to minimize direct contact with tools. - 5
Apply temperature change and start the pump
Apply changes gradually, begin at low pump speed, and watch for flow stability and pressure.
Tip: If you hear unusual noises or see leaks, stop immediately. - 6
Monitor and document results
Track readings as the system runs and adjust only if readings stay within safe ranges.
Tip: Keep a running log of temperatures, pressures, and observations.
Your Questions Answered
Is it safe to use ice before pumping a home HVAC liquid?
Yes, with caution. Do not apply directly to electrical parts; use barriers and follow manufacturer guidance.
Yes, but only with caution and proper barriers; do not apply ice directly to electrical components.
Can heat be used to improve pumping performance?
Heat can improve flow for temperature-sensitive fluids, but it must be controlled and within safe ranges specified by the system.
Yes, but keep it controlled and within safe limits per your system’s specs.
What should I monitor during temperature changes?
Monitor flow, pressure, temperature, and any unusual noises or leaks; halt changes if anomalies occur.
Watch flow, pressure, and temperature, plus listen for unusual sounds. Stop if you notice anything off.
What if the fluid freezes or overheats?
Stop immediately, revert to the previous state, and consult instructions or a professional.
If it freezes or overheats, stop and revert. Seek guidance if unsure.
Do I always need a professional for temp prep before pumping?
Not always, but for complex systems or ambiguous results, a technician reduces risk and ensures safety.
Not always, but consult a tech for complex setups or unclear outcomes.
Are there specific temperature ranges I should follow?
Ranges depend on the system and fluid. Always refer to manufacturer specs and Heatpump Smart guidelines.
Ranges vary by system; check the manual and Heatpump Smart guidance.
Watch Video
Top Takeaways
- Assess temperatures before pumping, not guesswork.
- Start with mild temperature adjustments and monitor results.
- Never apply temps directly to electrical components or controls.
- Document outcomes to inform future maintenance.