No Heat Pump Option on Nest: Troubleshooting Guide
Facing a missing heat pump option on Nest? This urgent troubleshooting guide helps homeowners diagnose wiring, system type, and firmware issues to restore heat pump control quickly.

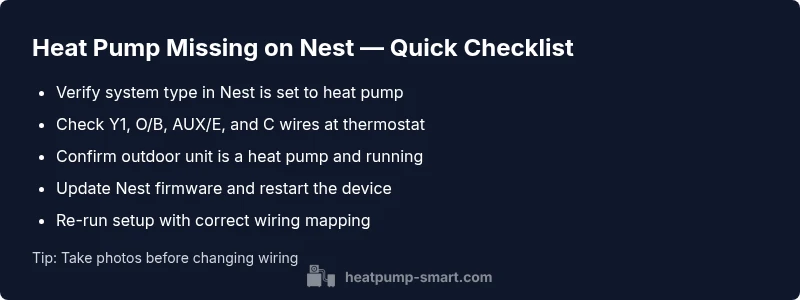
Most likely, Nest isn’t showing a heat pump option because the thermostat is set to a conventional system or the heat pump wiring isn’t recognized. Start by checking the system type in the Nest settings, confirm the outdoor unit is a heat pump, and re-run the setup with the correct equipment. If it still won’t appear, call a pro.
Understanding the issue and why the heat pump option may be missing
When Nest doesn’t display a heat pump option during setup, the device may be misreading your system type, miswired connections, or using an outdated firmware profile. According to Heatpump Smart, misidentified system types are a leading cause of missing heat pump options. The Heatpump Smart team found that many installers and homeowners overlook a simple setting mismatch in the Nest app, which can halt heat pump configuration without touching hardware. In most homes, the fix is straightforward: verify the system type, confirm the outdoor unit is a heat pump, and re-run setup with correct wiring. If the option still doesn’t appear, professional verification protects both equipment and warranties.
Common causes
- Incorrect system type selected (conventional vs heat pump) in Nest setup can obscure heat pump options. This is a common pitfall, especially after a system refresh or home rewiring.
- Wiring misidentification or missing wires (Y1, O/B, Aux, C) can prevent Nest from recognizing a heat pump. A single mislabel can cause the entire configuration to fail.
- Outdated Nest firmware or app version may fail to detect heat pump configurations due to deprecated compatibility profiles.
- The outdoor unit may be nonfunctional or not detected due to wiring or sensor issues at the air handler or compressor.
- Inconsistent thermostat placement or a loose C-wire can lead to intermittent readings and missed prompts.
Quick checks you can safely perform
- Confirm that the thermostat is powered and the display is responsive. If not, check the circuit breaker or power supply first.
- Ensure you are running the latest Nest app version and have an active account associated with the thermostat.
- Inspect visible wiring at the thermostat base and inside the furnace/air handler cabinet for loose or corroded connectors. Do not force connectors; reseat them gently.
- Look for the label on the outdoor unit and verify it is a heat pump, not a cooling-only or conventional system. If you’re unsure, photograph the outdoor unit and consult the wiring diagram.
- If you have a C-wire, ensure it is properly connected at both ends to supply stable power to the Nest during setup.
Verifying system type and wiring configuration
Begin by double-checking the Nest system type in the Settings: System > Equipment > Type and confirm Heat Pump is selected. Then inspect the wire mapping: Y1 (compressor), O/B (reversing valve), AUX/E (emergency heat), and C (common). If any wire is misidentified or unconnected, correct it and re-run setup. A misstep here is the most frequent reason heat pump options disappear in Nest.
Reconfiguring Nest: step-by-step to enable heat pump
- Open Nest app and start a new equipment setup. 2) Select Heat Pump as the system type, then choose Heat Pump with Aux Heat if your system has emergency heat. 3) Re-map wires exactly as they connect at the air handler: Y1 to Y1, O/B to O/B, Aux to AUX/E, C to C. 4) Complete the prompts and run a test cycle to confirm controls show properly. 5) If a warning appears about incompatible wiring, pause and review the wiring diagram for your exact model.
Firmware updates, resets, and when to call a professional
If the problem persists after a clean setup, update both the Nest firmware and your mobile app. A factory reset is a last resort but can resolve stubborn detection issues; back up settings first. If the heat pump option still does not appear, contact a licensed HVAC technician or Nest-certified installer to verify compatibility and wiring integrity. Do not bypass safety interlocks or shortcuts that could void warranties.
Prevention tips to avoid future issues
- Document wiring before making changes and keep photos for reference.
- Schedule regular HVAC maintenance to keep sensors and reversing valves functional.
- Periodically update firmware and app to ensure compatibility with evolving heat pump profiles.
- Use a professional for complex reconfigurations, especially when heat pumps and auxiliary heat are involved.
Steps
Estimated time: 60-90 minutes
- 1
Identify current system type
Review the current equipment labeling and the Nest app’s System settings to confirm whether heat pump mode is supported. If you see conventional or cooling-only presets, plan to switch to heat pump.
Tip: Have the air handler and outdoor unit model numbers handy. - 2
Check physical wiring
Power down the system, then inspect thermostat wires at the base and inside the furnace/air handler. Ensure Y1, O/B, Aux, and C are securely connected and correctly labeled.
Tip: Take a photo before unplugging to refer back later. - 3
Re-run Nest setup for heat pump
In the Nest app, start a new equipment setup and select Heat Pump. Map wires exactly as connected, then complete prompts to test heating and cooling modes.
Tip: If Nest warns about incompatible wiring, pause and double-check each connection. - 4
Test system operation
Power the system back on and run a test cycle for heat and auxiliary heat. Observe whether the heat pump controls appear and respond correctly.
Tip: Watch for error codes or unexpected delays between commands. - 5
Firmware update and reset if needed
Update Nest firmware and the mobile app. If issues persist, perform a factory reset and configure from scratch, but back up settings first.
Tip: Only reset after updating and confirming wiring. - 6
Consult a professional if unresolved
If no heat pump option still appears, contact a licensed HVAC technician or Nest-certified installer to verify device compatibility and wiring.
Tip: Professional verification protects warranties and ensures safe operation.
Diagnosis: Nest thermostat shows no heat pump option during setup
Possible Causes
- highIncorrect system type selected (conventional vs heat pump)
- highHeat pump wiring not recognized or missing wires
- mediumOutdated firmware or app version
- mediumOutdoor unit not detected due to wiring/sensor issue
- lowThermostat C-wire or grounding issues
Fixes
- easySet Nest system type to heat pump and re-run setup
- mediumVerify and correct wire connections (Y1, O/B, AUX/E, C)
- mediumUpdate Nest firmware and app, then reboot devices
- mediumInspect outdoor unit wiring and confirm heat pump compatibility
- easyIf unresolved, schedule professional verification
Your Questions Answered
Why doesn’t Nest show a heat pump option?
There are several common culprits: an incorrect system type setting, wiring misidentification, or outdated firmware. Start by verifying the system type and wiring in the Nest app, then update firmware and re-run setup. If it still fails, professional help may be necessary.
The missing heat pump option usually comes from a wrong system type, wiring issues, or outdated firmware. Check settings and wiring, update firmware, and re-run setup; call a pro if it remains unresolved.
Can Nest support all heat pump configurations?
Nest supports many common heat pump configurations, but some models or setups may require specific wiring or auxiliary heat configurations. Check compatibility for your exact heat pump model and air handler, and follow the Nest setup prompts carefully.
Most Nest models support many heat pumps, but check compatibility for your exact system and follow setup prompts closely.
What wiring issues prevent heat pump option from appearing?
Miswired or missing Y1, O/B, AUX/E, or C wires are frequent blockers. Ensure wires are correctly connected at both the thermostat and the air handler, and reseat any loose connectors.
Wiring mixups, especially Y1, O/B, AUX/E, and C, are common blockers. Check and reseat connections at both ends.
Should I reset Nest to fix this issue?
Resetting can resolve firmware or config glitches, but use it as a last resort after verifying wiring and system type. Back up any saved settings before a factory reset.
Resetting can help, but only after checking wiring and system type. Back up settings first.
Do I need a professional to install heat pump with Nest?
If you encounter persistent issues, incompatible equipment, or safety concerns, a licensed HVAC technician or Nest-certified installer is recommended. They can verify compatibility and wiring integrity.
If issues persist or you’re unsure, hire a professional to verify compatibility and wiring.
How can I prevent this problem in the future?
Keep firmware up to date, document wiring, and schedule regular HVAC maintenance. When making changes, photograph wiring and label each wire to avoid future misconfigurations.
Stay current with firmware, document wiring, and plan regular maintenance to prevent future problems.
Watch Video
Top Takeaways
- Verify Nest is set to heat pump in settings.
- Confirm outdoor unit wiring matches heat pump requirements.
- Re-run setup after wiring corrections.
- Update firmware and seek professional help if needed.