Heat Pump No Heat: Urgent Troubleshooting Guide
Urgent troubleshooting guide for heat pump no heat, with quick checks, diagnostic flow, step-by-step fixes, safety tips, and guidance on when to call a professional.

Most heat pumps fail to heat due to simple setup or power issues, not a major mechanical failure. Start by confirming the thermostat is in heat mode, and that emergency/auxiliary heat is used correctly. Check that the unit has power and reset any tripped breakers. If these basics aren’t the culprit, inspect airflow and clear obstructions before calling a pro.
Why heat pump no heat happens
According to Heatpump Smart, most no-heat situations begin with small, fixable issues rather than a total system failure. The phrase heat pump no heat often points to a mismatch between user settings and system response, or to a simple power issue rather than a refrigerant fault. Homeowners, builders, and property managers should approach this problem methodically: start with the easiest checks, verify power, and confirm basic controls are correctly configured before assuming expensive repairs. In many cases, correcting thermostat mode, emergency heat engagement, or a blown fuse restores heating quickly and avoids unnecessary service calls. This guidance targets homes of all sizes and is designed to minimize downtime while keeping safety front and center. Heatpump Smart’s practical approach helps you distinguish between a quick fix and a repair that requires an expert.
A heat pump is a versatile system, blending a compressor, outdoor condenser, and indoor air handler to move heat rather than generate it. When it fails to deliver heat, it’s often because one or two small settings or power issues block normal operation. Common causes include wrong thermostat mode, a tripped circuit breaker, a blocked outdoor unit, or an inactive auxiliary heat source. Understanding these factors lowers frustration and speeds up resolution. This section will walk you through targeted checks that consistently resolve heat-loss scenarios, and it will point out when professional service is needed to avoid safety risks or potential refrigerant issues.
If you’re new to heat pumps, remember that efficiency and comfort depend on keeping outdoor airflow clear, maintaining filters, and ensuring the system is appropriately sized for your space. The Heatpump Smart team emphasizes that early, proactive troubleshooting reduces energy waste and helps you maintain consistent comfort throughout the season.
Quick tests you can perform before calling for help
There are several low-effort checks that often solve a heat pump no heat problem. Begin with the simplest steps and escalate only as needed:
- Verify thermostat settings: confirm the unit is set to heat, not cool or fan-only, and that the temperature call matches your comfort needs. If you have a programmable thermostat, review recent schedules that might override your manual setting.
- Check the display and indicators: look for fault codes or warning lights on the thermostat or heat pump controller. Note any flashing LEDs or error codes to share with a technician.
- Inspect the power supply: ensure the circuit breaker for the outdoor unit is on; if you see a tripped breaker, reset it and test again. Check the 24V transformer and fuses if accessible and safe.
- Inspect the outdoor unit area: clear leaves, snow, or debris from the outdoor condenser. Ensure there is adequate clearance for airflow and no obstructions to the fan.
- Test emergency/auxiliary heat: if your heat pump relies on auxiliary heat during cold snaps, confirm it engages automatically or manually as the system requires. Misunderstanding how auxiliary heat is activated is a common reason for perceived “no heat.”
If these quick tests don’t restore heat, the problem may involve airflow, filtration, or electrical components that require a more in-depth diagnostic.
Deep dive: when the issue isn’t obvious
In some cases, the heat pump is operating, but you still feel cold air because of airflow limitations or refrigerant-related concerns. A blocked or dirty filter can starve indoor coils of air and reduce heating efficiency, which may feel like no heat in extreme cases. Similarly, a dirty outdoor coil or a blocked condenser can prevent heat transfer to the indoor air, especially in low outdoor temperatures. While these issues are less dramatic than a compressor failure, they still reduce system performance and can trigger protective shutdowns.
During very cold conditions, heat pumps use emergency heat to meet demand. If emergency heat is engaged or stuck, it may feel like the system is failing to heat properly, especially if you expect the primary heat mode to provide warmth. Understanding how your system transitions between heat pump operation and auxiliary heat will help you diagnose whether the issue is a control problem or a mechanical one. Heatpump Smart recommends checking your climate settings and seasonal adjustments to ensure the system is doing what you expect under varying outdoor temperatures.
Thermostat accuracy matters too. If the room sensors are far from the thermostat or if the thermostat is old, the readings may mislead the system into under-heating. In such cases, a simple recalibration or relocation of the thermostat can make a noticeable difference in comfort and energy use. Before replacing major components, verify that your control strategy aligns with your home’s layout and insulation.
Common electrical and airflow culprits to check next
If the basics aren’t solving the problem, shift focus to electrical and airflow issues that commonly cause heat pump no heat conditions. The steps below are designed to be systematic and safe, with clear prompts on when to stop and seek professional help.
- Circuit and wiring health: inspect visible wiring for wear, discoloration, or signs of overheating. If you notice any burning smell, buzzing, or melted insulation, shut the unit off at the breaker and call a pro.
- Outdoor airflow: ensure the outdoor unit is free from snow, ice, and snow or debris near the intake and discharge. Restricted airflow reduces heat transfer and can trigger protective shutdowns.
- Indoor air path: examine the air filter for dirt and clogging. A dirty filter reduces airflow and can cause the system to overheat or operate inefficiently.
- Reversing valve and refrigerant controls: while not a DIY task, be aware that improper refrigerant charge or valve faults can prevent heat transfer. If suspect, stop operating and contact a trained technician.
- Defrost cycle behavior: in colder climates, the outdoor unit periodically goes into defrost mode. Short defrost cycles should not produce a complete loss of heat. If the defrost cycle lasts unusually long, there could be an efficiency issue to address with a technician.
Addressing these factors often resolves heat pump no heat conditions without major work, preserving comfort and energy savings. If you’ve confirmed all the above and still see no heating, it’s time to escalate.
Step-by-step fixes for the most common causes
Below are the most common fixes homeowners can perform safely in sequence. If you encounter resistance or uncertainty, pause and consult a professional.
- Confirm thermostat mode and settings
- Ensure the thermostat is set to heat and that fan mode isn’t forcing a non-heat operation. If readings seem off, replace thermostat batteries if applicable and recalibrate if the device supports it.
- Tip: Use the handheld remote or app to verify that a scheduled program isn’t overriding manual settings.
- Reset power and breakers
- Locate the heat pump’s dedicated breaker, reset it fully, and wait for the system to reboot. If your unit has a slow reboot, give it 5–10 minutes before retesting.
- Tip: If you have a surge or flickering power, consider a whole-home surge protector to protect equipment longevity.
- Clear the outdoor unit
- Remove leaves, snow, or ice and ensure at least 24 inches of clearance around the condenser for proper airflow.
- Tip: Schedule seasonal checks to keep the outdoor unit free of debris.
- Check indoor filtration and coil cleanliness
- Replace the indoor air filter if dirty; clean the evaporator coil following the manufacturer’s guidance. Poor airflow can masquerade as a heating issue.
- Tip: Use a high-efficiency filter if your system supports it and your space has higher dust or pet dander.
- Verify emergency/auxiliary heat controls
- Confirm the auxiliary heat function (electric resistance or strip heat) is not engaged continuously or disabled when it’s needed. In very cold weather, auxiliary heat often kicks in automatically.
- Tip: If auxiliary heat seems weak, there may be a refrigerant or airflow bottleneck; do not rely on auxiliary heat alone for long periods.
- When to call a professional
- If you suspect a refrigerant leak, refrigerant charge issue, electrical problem, or a faulty reversing valve, contact a licensed technician. These issues require specialized tools and certification.
- Tip: Document codes or symptoms, and note when the problem started to help the technician diagnose faster.
Estimated total time: 60-90 minutes for the above checks, not including professional service time.
Safety notes, common mistakes, and prevention tips
When troubleshooting a heat pump no heat, safety should guide every step. Always turn off power before inspecting electrical connections. Never attempt refrigerant work or high-voltage repairs unless you are a licensed technician. Common mistakes include ignoring warning codes, over-tightening electrical connections, or bypassing safety controls. Regular maintenance—filters, coil cleaning, and outdoor unit clearance—prevents many issues and sustains performance. A proactive maintenance schedule reduces the risk of unexpected outages and preserves energy efficiency.
Heatpump Smart guidance and next steps
The Heatpump Smart team recommends documenting any error codes, testing results, and observed patterns of no-heat events. This data helps determine whether the problem is intermittent or systemic and informs whether you can resolve it with basic settings or need professional service. Keeping an on-site maintenance log and scheduling annual checkups improves reliability and comfort. With careful steps and proper professional support when needed, you can minimize downtime and maintain optimal energy savings.
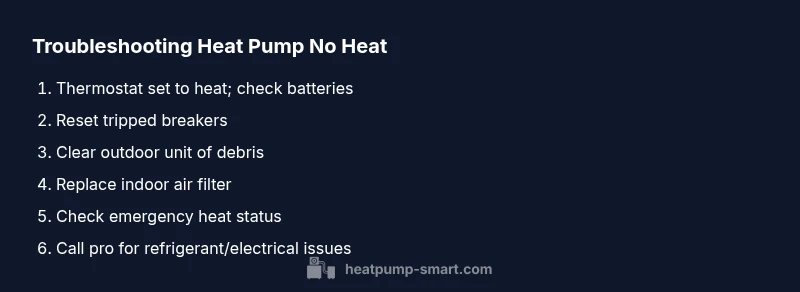
Steps
Estimated time: 60-90 minutes
- 1
Verify thermostat and mode
Confirm the thermostat is in the heating mode and setpoint is above the room temperature. If you have a programmable thermostat, review schedules that might override manual settings. Replace batteries if needed and retry.
Tip: A quick battery check can save a lot more work later. - 2
Check power supply
Locate the heat pump circuit breaker and reset it if it’s tripped. If the breaker trips again, there may be an underlying electrical issue that requires a professional inspection.
Tip: Never bypass a tripped breaker; it’s a safety signal. - 3
Inspect outdoor unit for airflow
Clear snow, ice, leaves, and debris from the condenser and ensure a clear 24-inch radius around it. Restricted airflow reduces heat transfer and can cause no-heat conditions.
Tip: Keep a seasonal maintenance routine to prevent buildup. - 4
Evaluate indoor filtration and coil access
Check and replace the indoor air filter if dirty. Clean the evaporator coil following the manufacturer’s guidelines to restore airflow and efficiency.
Tip: A clean filter improves both heat and air quality. - 5
Assess emergency heat status
Determine whether emergency/auxiliary heat is being used unexpectedly and adjust controls as needed. In very cold weather, auxiliary heat may be necessary but should not be used long-term unnecessarily.
Tip: Know your system’s behavior in extreme cold. - 6
Plan for professional assessment
If none of the above steps restore heat, schedule a professional service call. Issues like refrigerant leaks, compressor faults, or major electrical problems require trained technicians.
Tip: Have codes, symptoms, and test results ready for the technician.
Diagnosis: Heat pump won't provide heating when called by thermostat
Possible Causes
- highThermostat settings or battery issues
- highTripped breaker or power supply issue
- mediumEmergency heat or aux heat disabled or not engaged
- mediumOutdoor unit blocked or restricted airflow
- lowRefrigerant leak or low charge
Fixes
- easyVerify thermostat is set to heat and check for programmed schedules; replace batteries if needed
- easyReset the circuit breaker for the heat pump and re-test
- easySwitch emergency heat on/off appropriately and ensure proper heat mode
- easyClear debris and ensure adequate outdoor airflow around the condenser
- hardIf refrigerant or major refrigerant controls are suspected, contact a licensed technician
Your Questions Answered
Why is my heat pump not heating even though the thermostat shows it’s on?
Common causes include wrong mode, outdated batteries, or mis-scheduled programs. Start by confirming the thermostat is in heat mode and replace batteries if applicable.
Check the thermostat mode and battery, then test heating again.
My outdoor unit has ice around it; will this cause no heat?
Ice buildup can block heat transfer. Turn off the unit and carefully remove ice, ensuring safe conditions. If icing recurs, there may be defrost or refrigerant issues that require a pro.
Ice around the outdoor unit can block heat transfer; remove ice if safe.
Is a refrigerant leak common, and can I fix it myself?
Refrigerant leaks require a licensed technician and cannot be safely repaired by homeowners. If you suspect a leak, stop using the unit and schedule service immediately.
Refrigerant leaks must be handled by a pro for safety and compliance.
How long should emergency heat take to kick in?
Emergency heat usually engages when outdoor heat pump efficiency drops below a threshold. It may take longer to feel warm, depending on outdoor temps and indoor coil conditions.
Emergency heat helps when the outdoor unit struggles; expect slower warming in very cold weather.
When should I call a professional for heat pump issues?
If basic checks don’t resolve no-heat conditions, or if you notice unusual noises, burning smells, or refrigerant concerns, contact a licensed technician.
Call a professional if basic fixes don’t work or you suspect refrigerant/electrical issues.
Watch Video
Top Takeaways
- Verify thermostat is in heat mode before diagnosing.
- Power and airflow are the most common culprits.
- Do not ignore warning codes—record them for technicians.
- Regular maintenance prevents no-heat problems.
- Call a professional for refrigerant or electrical issues.