Where Does Heat Pump Dryer Water Go: A Practical Guide
Learn where heat pump dryer condensate goes, how to choose drainage methods, install gravity drains or condensate pumps, and maintain a leak-free setup for reliable home comfort.

According to Heatpump Smart, proper condensate drainage is essential for efficiency and reliability of a heat pump dryer. The question where does heat pump dryer water go is answered here with practical options for gravity drains, condensate pumps, and reservoir storage. We'll cover installation basics, safety tips, and maintenance to prevent moisture damage.
Understanding condensate and why it matters
Heat pump dryers remove moisture from laundry by extracting water from the air and collecting it as condensate. This condensate must be managed correctly to prevent water damage, mold growth, or nuisance leaks. In many homes, condensate is simply drained away through an approved outlet; in tighter spaces, a condensate pump or a small reservoir may be needed. Proper drainage also supports the unit's efficiency, since improper handling can reduce heat exchange performance. The key is to route the condensate to a safe, accessible drain location with appropriate slopes and traps if required by code. According to Heatpump Smart, understanding where the water goes helps you avoid damage and maintain dryer efficiency.
Drainage options overview: gravity drain, condensate pump, and reservoirs
Most heat pump dryers offer three practical drainage paths. Gravity drainage relies on a downward slope to an adjacent drain or sink. A condensate pump lifts the water to a higher location when gravity drainage isn’t possible due to layout or floor height. Some compact models include an integrated reservoir that you manually empty when full. Each option has trade-offs in terms of space, noise, power needs, and maintenance. Your choice should consider the dryer's location, local codes, and the availability of floor or wall drains. Heatpump Smart notes that the best approach balances reliability, safety, and long-term convenience.
Assessing your space: when gravity works and when a pump is needed
If your dryer is near a drain and there is a clear downward path with minimal bends, gravity drainage is often simplest and most cost-effective. When the machine sits above the plumbing vertical, or there’s no convenient drain nearby, a condensate pump becomes a practical solution. Reservoir models can be acceptable in low-use spaces or where you want to avoid any external piping, but they require regular manual emptying. In all cases, verify that the chosen method complies with local plumbing codes and that the route minimizes kinks, air gaps, and potential leaks.
Gravity drainage: components, routing, and common mistakes
A gravity drain typically uses a dedicated condensate hose or standpipe that leads to the building’s drain system. Key components include a straight route with a gentle slope (about 1/4 inch per foot), a trap or air gap per code, and secure connections to prevent leaks. Common mistakes include sharp bends that obstruct flow, missing traps leading to sewer gas risk, and routing the hose to a pool area where water can back up into the dryer. Ensure the hose is secured to prevent movement and that the discharge point is protected from backflow.
Condensate pump drainage: installation and considerations
A condensate pump is installed when gravity drainage isn’t feasible. The pump draws condensate and pumps it to a sink, laundry tub, or suitable drain. Important considerations include choosing a pump sized for your dryer’s condensate flow, wiring it to a dedicated outlet with a GFCI if required, and installing a high-water switch to prevent overflowing. Include a check valve to prevent backflow and a cleanout access for maintenance. Regularly test the pump by pouring water into the reservoir and listening for the pump cycle.
Reservoir drainage and shutoffs: lightweight, easy but manual
Some models include an internal reservoir that you must empty manually. This option minimizes external piping and is suitable for apartments or spaces where a permanent drain isn’t possible. The downside is more frequent maintenance, as fullness triggers a manual emptying cycle. To minimize interruptions, pair a reservoir with a simple reminder system or a scheduled maintenance routine. Always confirm that the reservoir design meets your local codes and dryer capacity.
Maintenance, inspection, and troubleshooting drainage issues
Regular drainage maintenance prevents clogs and guarantees continuous operation. Inspect hoses for cracks, secure fittings, and ensure the route remains clear of lint and debris. Flush lines periodically with warm water and a mild detergent if permitted by the manufacturer, and replace any worn seals. If you notice slow drainage, discuss with a licensed plumber whether a slightly larger drain line or a different routing is needed. Heatpump Smart emphasizes proactive checks to avoid moisture problems and to protect your home from mold growth.
Safety, codes, and best practices for homeowners
Always follow local plumbing and electrical codes when installing condensate drainage. Use GFCI-protected outlets for any condensate pump and ensure all connections are tight and leak-free. Keep condensate paths away from living areas to prevent accidental spills and water damage. If you’re unsure about code requirements, consult a licensed professional. The combination of correct slope, air gaps, and secure connections minimizes risk and preserves your heat pump dryer's efficiency.
AUTHORITY SOURCES
- Energy.gov – General guidance on heat pump systems and condensate drainage (https://www.energy.gov/energysaver/heating-and-cooling/heat-pumps)
- EnergyStar.gov – Best practices for energy-efficient home appliances and moisture management (https://www.energystar.gov/)
- ASHRAE – Standards and guidance on HVAC drainage and condensate handling (https://www.ashrae.org/)
Tools & Materials
- Measuring tape(To verify run length and slope requirements)
- Condensate hose (proper diameter)(Compatible with dryer exhaust port)
- PVC drain pipe (3/4 inch) or appropriate tubing(Choose length to reach drain with minimal bends)
- PVC fittings and couplings(Elbows and tees to route the line)
- Condensate pump kit (if gravity drain isn’t feasible)(Include power adapter and check valve)
- PVC cement and primer(For secure, leak-free joints)
- Hose clamps and zip ties(Keep hoses secure and tidy)
- Air gap or trap (per code)(Optional but recommended where required)
- Safety gear (gloves, safety glasses)(Protect during installation)
- Bucket or towels(Catch residual water during setup)
Steps
Estimated time: 60-120 minutes
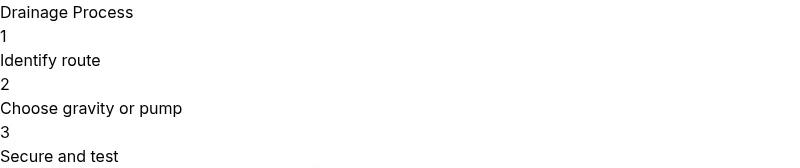
- 1
Identify drainage option and plan route
Survey the dryer's location relative to existing drains, space for piping, and the possibility of a vertical rise. Choose gravity drainage if a clear downward path to a drain exists; otherwise plan for a condensate pump or reservoir. Confirm that the route avoids kinks and potential nuisance leaks.
Tip: Draw a simple diagram of the route and note any potential obstacles before starting. - 2
Shut off power and prepare workspace
Unplug the dryer and ensure the area is dry and well-lit. Gather tools and lay out the components. This reduces the risk of electric shock and makes the installation smoother.
Tip: Keep a dedicated work area clear so small parts don’t get lost. - 3
Install gravity drain path (if feasible)
Attach the condensate hose to the dryer’s outlet and route it toward the drain with a consistent downward slope. Install a trap or air gap if required by local codes and secure the line with clamps.
Tip: Maintain at least a 1/4 inch per foot slope to prevent standing water. - 4
Install condensate pump (if gravity drain isn’t feasible)
Mount the pump in a stable location, connect the condensate hose to the pump inlet, and run the discharge hose to the chosen drain. Wire to a dedicated outlet with GFCI if required, and install a check valve to prevent backflow.
Tip: Test the pump with a small amount of water to confirm cycling and discharge. - 5
Ensure secure connections and proper routing
Tighten fittings with appropriate tools, use primer and cement for PVC joints, and avoid sharp bends. Keep lines off the floor and away from traffic to prevent damage.
Tip: Use a support clip every 18-24 inches to prevent sagging. - 6
Test drainage and check for leaks
Run a full dryer cycle and observe the drainage path. Look for leaks at joints, confirm water reaches the drain, and verify there is no backflow. If using a pump, listen for operation and check for unusual noises.
Tip: Have towels ready to catch any initial spills during testing. - 7
Set up maintenance and safety checks
Create a routine to inspect hose integrity, ensure slope remains intact, and clean lint or debris from lines. Schedule semi-annual checks or after heavy-use periods.
Tip: Mark a calendar reminder so maintenance isn’t forgotten. - 8
Document and verify compliance
Document the drainage method and route for future service visits. If required, obtain a permit or have a licensed pro confirm the installation meets local codes.
Tip: Keep reference photos and receipts with your home records.
Your Questions Answered
Can I drain heat pump dryer condensate into a laundry sink?
Yes, a laundry sink is a common discharge point for condensate when it is within reach and the drain has appropriate capacity. Ensure the sink drain can handle the added flow and that there are no backflow risks. If you use a pump, verify it discharges to a proper drain.
A sink is usually fine if it can handle the extra water and there’s no backflow. If you’re using a pump, make sure it empties into a proper drain.
What is the difference between gravity drain and condensate pump?
Gravity drain relies on downward slope to the drain and requires no power. A condensate pump is used when gravity drainage isn’t feasible due to height or routing. Pumps need power and may require maintenance to prevent leaks.
Gravity drain uses slope and no power; a condensate pump uses power and is needed when gravity isn’t possible.
Can condensate water be used for anything else?
Condensate water is generally near-pure water but can contain minerals and detergents. It’s usually best used for non-potable tasks or disposed of. Check local regulations and avoid using it in drinking water or garden irrigation without proper treatment.
Condensate is typically not for drinking. Use it for non-potable tasks or dispose of it according to local rules.
Is there any risk of mold from condensate drainage?
If condensate drains properly and is directed to a suitable drain, mold risk is minimized. Poor drainage can create damp conditions, so ensure lines are clear and venting is adequate. Regular maintenance helps prevent mold growth.
Mold risk comes from damp conditions. Proper drainage and regular maintenance protect your space.
How often should I inspect the drainage system?
Inspect the drainage system at least twice a year or after heavy usage periods. Check hoses, connections, and the discharge point for clogs or leaks and test pumps if installed.
Inspect at least twice a year and after heavy use to catch clogs early.
What should I do if the condensate line leaks?
Shut off power to the dryer and address the leak immediately. If in doubt, contact a licensed plumber. Temporary measures include placing a bucket under the line while you arrange professional help.
If you see a leak, turn off power and call a pro if needed. Use a bucket as a temporary catch.
Watch Video
Top Takeaways
- Understand condensate generation and drainage options
- Choose gravity, pump, or reservoir based on space and codes
- Ensure proper slope and secure connections to prevent leaks
- Test and maintain drainage regularly to prevent mold
- Consult a professional if codes are unclear