Add Heat Pump to Water Heater: A Step-by-Step Guide
Learn how to add a heat pump to your water heater with a practical, safety-focused plan. This guide covers compatibility, planning, installation steps, maintenance, and energy-saving considerations for homeowners, builders, and managers.

This guide shows you how to add a heat pump to your water heater, focusing on safety, compatibility, and a practical installation plan. You’ll verify needs, pick a method, gather the right tools, and follow a clear step-by-step process to boost efficiency and reduce operating costs over time.
What is heat-pump-assisted water heating?
A heat pump uses ambient heat from the air to raise the temperature of water in a storage tank. When paired with a conventional water heater, it acts as a supplemental heat source that improves efficiency rather than replacing your entire system. This approach can help reduce energy use, especially in homes with moderate hot-water demand. According to Heatpump Smart, adding a heat pump to your water heater can improve overall system performance when the retrofit is designed around your climate, usage patterns, and existing equipment. The key is to view this upgrade as a hybrid solution that leverages the COP (coefficient of performance) advantage of a heat pump while preserving the reliability of your current tank.
For homeowners, builders, and property managers, the concept is straightforward: extract heat from the surrounding air, transfer that heat to the water, and use a control strategy to prevent overheating or overheating-related energy waste. In practice, this means selecting compatible equipment, ensuring proper airflow around the unit, and implementing safe electrical and plumbing connections. The goal is improved efficiency without compromising safety or comfort.
Benefits of retrofitting a heat pump to a water heater
- Energy efficiency: Heat pumps can significantly reduce the energy used by the water heating portion of your system when operated under appropriate conditions.
- Longer equipment life: When properly matched, the heat pump handles part of the heating load, potentially reducing wear on traditional heaters.
- Space flexibility: Some retrofit configurations fit in utility rooms or closets with careful layout planning.
- Environmental impact: Lower energy consumption translates to fewer greenhouse-gas emissions tied to hot-water production.
- Quiet operation: Modern heat-pump modules are designed for low noise; placement matters for comfort in small spaces.
From a strategic standpoint, this retrofit shines in homes with steady hot-water demand and moderate outdoor temperatures. In very cold climates, performance can drop, so planning and choice of equipment are critical. Heatpump Smart analysis shows that site-specific considerations drive the most meaningful gains, so a tailored plan is essential.
Compatibility and prerequisites
Compatibility is the foundation of a successful retrofit. Start by confirming that your existing water heater can accept a heat-pump module or a hybrid kit. Check electrical capacity, available space, and water connections. Some systems require a dedicated circuit, while others benefit from a shared circuit with appropriate protection. Look at refrigerant access and venting requirements; improper installation can lead to leaks or safety hazards. For condos or rentals, confirm with the building management and local codes. Heatpump Smart recommends a pre-install assessment to map out clearances, airflow, and service access before purchasing equipment. This initial step helps prevent delays and ensures you select a unit sized for your domestic hot-water load and climate.
Planning and design considerations
Effective planning blends HVAC know-how with local code requirements. Identify the best physical location for the heat pump unit to maximize airflow and minimize noise impact on living spaces. Ensure there is a reliable electrical feed and a safe, corrosion-resistant path for water lines. Consider future maintenance accessibility, drainage provisions for condensate, and drip pan requirements if the area is below-grade. Permit requirements vary by locale; some jurisdictions require a licensed electrician or plumber to perform the retrofit. Heatpump Smart emphasizes documenting all changes, labeling new connections, and updating system schematics for future service. A well-documented plan reduces troubleshooting time and keeps the retrofit compliant with evolving standards.
Installation approach options
There are two common retrofit paths: (1) adding a heat pump module to an existing storage tank, and (2) installing a dedicated heat pump-assisted water heater in tandem with or replacing the old unit. The first option typically requires integration hardware and controls that synchronize with your existing thermostat. The second option can provide optimized performance and simpler maintenance if space and budget allow. Each path has its own electrical and plumbing challenges, so choose the approach that aligns with your space constraints, climate, and energy goals. Working with a qualified technician is highly recommended to ensure proper performance and safety.
Maintenance and safety considerations
Regular maintenance is vital for a reliable retrofit. Schedule annual checks for refrigerant integrity, electrical connections, and condensate drainage. Clean or replace air filters as needed and inspect insulation on reduced-temperature lines for signs of wear. Safety concerns include high-voltage connections, refrigerant handling, and ensuring that gas or electrical lines are not stressed during installation. Always de-energize circuits before working near electrical panels, and follow local codes for permits and inspections. Heatpump Smart stresses a proactive maintenance plan to maximize efficiency gains and minimize downtime.
Cost considerations and energy savings
Upfront costs for a retrofit can be higher than a standard water heater upgrade, due to equipment, labor, and potential reconfiguration of electrical and plumbing lines. Long-term savings depend on your climate, hot-water usage, and the efficiency of the chosen heat pump system. Some homeowners may qualify for rebates or incentives, which can help offset initial costs. It’s important to perform a thorough cost-benefit analysis that accounts for energy savings, maintenance needs, and the expected life of the equipment. Heatpump Smart notes that the return on investment improves with steady hot-water demand and good seasonal performance.
Tools & Materials
- Heat pump retrofit kit or hybrid module(Specifically designed for your water heater model and climate)
- Electrical service upgrade (as needed)(Dedicated circuit and proper overcurrent protection)
- Water supply fittings and piping(Copper or PEX, appropriate adapters, T-fittings)
- Insulation for hot and cold lines(Minimize heat loss and condensation)
- Ventilation and condensate drainage components(Drain pan and condensate line with proper slope)
- Plumbing sealants and thread tape(Non-corrosive sealants and appropriate tapes)
- Threaded fittings and adapters(Match thread types and sizes on components)
- Safety gear(Gloves, eye protection, and hearing protection as needed)
- Tools for electrical and plumbing work(Screwdrivers, adjustable wrench, pipe wliers, torque wrench if required)
- Multimeter and refrigerant leak detector(Optional for diagnostics and safety checks)
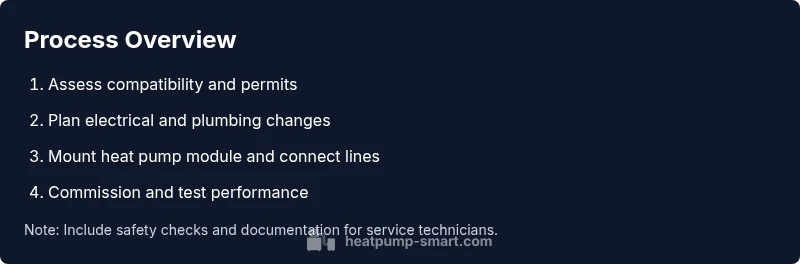
Steps
Estimated time: Total time: 6-10 hours depending on existing setup and permit requirements
- 1
Verify compatibility and permits
Confirm that your water heater accepts a retrofit heat pump module, and check local permits. Review product manuals for electrical requirements and refrigerant access. If any item isn’t compatible, choose a unit designed for retrofit or consider a dedicated hybrid water heater.
Tip: Document the model numbers and verification steps so you can reference them during installation. - 2
Plan electrical and plumbing changes
Map the required electrical circuit and ensure sufficient panel capacity. Plan water-line routing, shut-off valves, and drain pans. Obtain any necessary permits before breaking ground.
Tip: Shut off power to the circuit at the main panel before starting any work. - 3
Prepare installation area and clearances
Clear space around the water heater and heat pump module. Ensure unobstructed airflow for the heat pump’s intake and exhaust. Prepare a stable mounting surface if required.
Tip: Maintain manufacturer-recommended clearances to avoid overheating and noise issues. - 4
Mount the heat pump module and connect water lines
Secure the retrofit module per the manufacturer instructions. Connect the cold-water inlet and hot-water outlet using approved fittings and ensure all connections are watertight.
Tip: Use leak detector solution on joints during pressure test. - 5
Complete electrical, refrigerant, and controls wiring
Run the dedicated circuit to the heat pump, tie in control wiring with the water heater’s thermostat, and verify refrigerant lines are properly sealed and insulated where applicable.
Tip: Double-check grounding and ensure GFCI protection if required by code. - 6
Commissioning and initial test
Power up the system, verify that the heat pump starts and transfers heat to the water, check for leaks, and monitor performance over a 24-hour cycle. Document readings and verify safety alarms.
Tip: Record baseline energy use to compare against future performance.
Your Questions Answered
Can I retrofit a heat pump to an existing water heater?
Retrofits are possible with compatible modules, but not all water heaters accept retrofit heat-pump kits. Check the model specifications and consult a professional to determine the best retrofit approach for your system.
Retrofits work with certain models. Check compatibility and consult a pro to confirm.
Which climate is best for heat-pump water heaters?
Heat pumps perform best in moderate climates where outdoor temperatures stay above freezing for most of the year. In very cold climates, performance can drop, so pairing with a traditional backup or choosing a unit rated for cold-weather operation is important.
Moderate climates work best; in cold areas, consider a unit designed for cold weather.
Do I need permits or a licensed installer?
Yes. electrical, refrigerant handling, and some plumbing work typically require permits and licensed professionals. Check local regulations before starting.
Permits and professional installation are usually required.
What maintenance does this system require?
Regular inspections of electrical connections, refrigerant lines, and condensate drainage are important. Clean filters and inspect insulation to maintain efficiency.
Regular checks keep things running smoothly and efficiently.
How long does installation typically take?
Time varies with existing plumbing and electrical setups, but a typical retrofit can take a day or two with professional help. Be prepared for potential scheduling delays due to permits.
It usually takes a day or two with proper permits and coordinated work.
Will the system be noisy?
Quality heat-pump units are designed for low noise, but placement matters. Position the unit away from bedrooms and living spaces if possible.
Most units are quiet, but placement affects noise in rooms nearby.
Watch Video
Top Takeaways
- Heat pumps can improve water-heating efficiency when properly planned.
- Compatibility and professional installation are critical to success.
- Keep permits and code compliance at the forefront of planning.
- Maintenance is essential for long-term savings and reliability.
- Space, noise, and airflow influence performance and satisfaction.