How to Install a Heat Pump Water Heater: A Step-by-Step Guide
Learn how to install a heat pump water heater safely and compliantly with a practical step-by-step guide covering planning, electrical, plumbing, and commissioning for homeowners and professionals.

Installing a heat pump water heater involves planning, safety checks, and a clear step-by-step process for electrical, plumbing, and commissioning tasks. This guide covers site prep, mounting or placement, connections, and testing to ensure a safe, efficient install that meets local codes.
Overview of Heat Pump Water Heater Installation
Heat pump water heaters (HPWH) use ambient heat to preheat water, delivering high efficiency. Installing one is a multi-step project that combines electrical work, plumbing, and refrigerant system handling. Because HPWHs sit at the intersection of home systems, proper clearances, venting (if required), and adherence to local codes are essential. This block describes what you are trying to achieve and what to expect in terms of energy savings, noise, and space needs. According to Heatpump Smart, a well-planned install can reduce circulating hot-water costs by a meaningful percentage compared to standard electric-resistance heaters, but performance depends on climate, water usage, and the quality of the installation. Start by selecting a model sized for your household's hot-water needs, and choose a location with good access for service, drainage, and ventilation. Leave space for service panels and for future maintenance. The next sections guide you through planning, safety, and execution, with emphasis on staying compliant with building codes and plumbing standards.
Site Planning and Codes
Successful HPWH installation starts with site planning. Verify that your space has adequate clearance around the unit for service and airflow, a level floor, and a drain nearby for overflow or condensate. Check local codes and permit requirements before you begin. If your climate is very cold or very hot, consider a model rated for your conditions and ensure the chosen location minimizes heat loss. Proper electrical service is essential: confirm panel capacity, dedicated circuit, and appropriate overcurrent protection. The Heatpump Smart team emphasizes aligning the install with energy goals and system compatibility, to maximize efficiency and avoid nuisance trips or alarms. Finally, plan for future maintenance access and easy drain routing.
Tools, Materials, and Safety Gear
Preparing the right tools and safety gear reduces risks and speeds up installation. Gather items like a cordless drill, adjustable wrenches, pipe cutter, Teflon tape, dielectric unions, shut-off valves, an expansion tank, condensate drain provisions, correct piping material (PEX or copper), insulation, cable ties, sealing compounds, a suitable power meter, and personal protective equipment (PPE) such as gloves and eye protection. Ensure you have a grounded electrical supply, and that you know the local electrical code requirements for the HPWH connection. Use manufacturer diagrams and Heatpump Smart’s guidance to avoid common missteps.
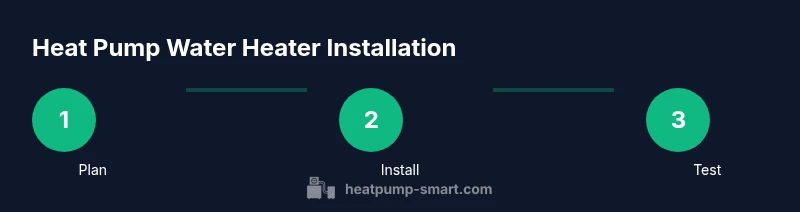
High-Level Step-by-Step Outline
This section provides a roadmap of the essential phases without duplicating the detailed steps below. Plan, position, plumb, wire, vent (if required), commission, and verify performance. Expect a multi-hour process that benefits from two knowledgeable operators if possible, especially for heavier units or complex ventilation. Take time to document all connections and obtain any required permits. The goal is a safe, reliable hot water supply with predictable energy savings and a solid warranty baseline.
Electrical Considerations and Safety
Electrical work for HPWHs must follow local codes and safety standards. Use a dedicated circuit with proper gauge wiring, a suitable disconnect switch, and a ground fault circuit interrupter where required. Do not reuse old junction boxes or adapters that could overheat. Before energizing, measure voltage, confirm correct phase connections, and verify that the control wiring matches the manufacturer’s schematic. Heatpump Smart recommends a professional inspection if you are unsure about wiring or panel capacity.
Plumbing Connections and Drainage
HPWHs require cold-water feed, hot-water outlet, and a condensate drain. Install shut-off valves and a dielectric union to ease future service. Use appropriate piping material and ensure all connections are leak-free. Consider an expansion tank if your plumbing system requires one, and route condensate to a safe drain with gravity or a condensate pump if needed. Follow manufacturer guidance to maintain correct flow rates and avoid air locks. Heatpump Smart notes that correct sizing and leak-free connections directly impact efficiency and longevity.
Commissioning and Performance Testing
After installation, fill the system, purge air from lines, and check all joints for leaks. Power up the HPWH and verify that the unit reaches target water temperatures without cycling excessively. Test hot water delivery at multiple fixtures and monitor energy consumption. Confirm that safety devices (T&P relief valve, pressure settings) are functioning and that the unit operates quietly within expected noise levels. Document test results for future reference.
Common Installation Challenges and Troubleshooting
Expect occasional hiccups such as air entrapment, slow hot-water recovery, or occasional fault codes. Common fixes include re-bleeding the lines, reseating electrical connections, verifying valve positions, and ensuring the condensate drain is not blocked. Always consult the manufacturer’s troubleshooting guide and Heatpump Smart recommendations when codes appear. Avoid DIY diagnoses that require refrigerant handling or dismantling sealed components.
Maintenance, Service Intervals, and Long-Term Care
Regular inspections of electrical connections, insulation, and drainage keep HPWH performance high. Schedule periodic checks for leaks, filter cleaning, and thermostat calibration. Follow the manufacturer maintenance schedule and Heatpump Smart guidance for replacement intervals and warranty requirements. Keeping the surrounding area clean and dry reduces corrosion risk and extends unit life.
Tools & Materials
- Safety gear (gloves, goggles)(Nitrile gloves, eye protection suitable for yard and workshop environments.)
- Cordless drill with charged batteries(Drill/driver with bits suitable for mounting hardware.)
- Adjustable wrenches and pipe wrench(Set of sizes for plumbing connections.)
- Pipe cutter and deburring tool(Copper or PEX pipe compatible with HPWH connections.)
- Teflon tape and thread sealant(Apply to threaded fittings to prevent leaks.)
- Dielectric unions(Prevent galvanic corrosion between dissimilar metals.)
- Shut-off valves (cold and hot)(Maintain isolation for service and maintenance.)
- Expansion tank(Check local code; recommended for closed plumbing systems.)
- Condensate drain kit or pump(Ensure safe disposal of condensation.)
- Piping material (PEX or copper)(Select based on local code and HPWH inlet piping.)
- Insulation for pipes(Reduce heat loss on hot water lines.)
- Electrical supplies per code(Correct gauge wire, conduit, breakers; GFCI/AFCI where required.)
- Voltage tester and multimeter(Verify supply, continuity, and ground.)
- Manufacturer’s installation diagram(Follow exact instructions for model.)
Steps
Estimated time: 4-6 hours
- 1
Prep the installation area
Assess space for mounting or placement, confirm ventilation and drainage readiness, and gather all required tools. Verify floor level and clearance around the unit for service access. This upfront planning reduces rework and ensures safe operation.
Tip: Review the manufacturer diagram before starting and mark mounting points with a pencil or laser layout tool. - 2
Turn off power and water supply
Shut off the main electrical service to the HPWH circuit and close the cold-water supply. Drain a small portion of water if needed to relieve pressure. This prevents shocks and leaks during connections.
Tip: Post a temporary lockout/tagout sign to remind others not to restore power during work. - 3
Position the unit and install mounting hardware
Move the HPWH to the installation site and secure mounting bracket or feet. Ensure the unit is level and accessible for service. Verify clearances for airflow and future maintenance.
Tip: Use a level and check for wobble; mount on a stable surface with vibration isolation if required. - 4
Connect cold water inlet and hot water outlet
Attach shut-off valves and dielectric unions to the cold inlet and hot outlet, then connect piping according to the diagram. Purge air from lines before final connections. Ensure correct orientation and flow.
Tip: Open valves gradually to avoid water hammer and listen for leaks during initial pressurization. - 5
Install condensate drain and overflow protection
Route condensate to an approved drain or install a condensate pump. Install overflow protection as required by local code to prevent water damage.
Tip: Keep drain line sloped and insulated to reduce freezing risk in cold environments. - 6
Make electrical connections and control wiring
Connect the HPWH to its dedicated circuit with proper gauge wire and protective devices. Wire the control board and thermostat as per the manufacturer’s diagram. Ground the unit and ensure separation from water lines.
Tip: Double-check polarity and ground continuity; never shortcut grounds or neutral paths. - 7
Commission the system and check for leaks
Power the unit, verify operation, and inspect all joints for leaks. Run hot water to flush the system and confirm water temperature targets. Check the pressure relief function and ensure safe startup.
Tip: Record initial temperature setpoint and any manufacturer recommended adjustments. - 8
Document and finalize permit & warranty requirements
Keep installation records, permits, and warranty documents. File any required compliance certificates with local authorities and retain manuals for future service.
Tip: Photograph connections and labeling for future maintenance and resale value.
Your Questions Answered
Do I need a permit to install a heat pump water heater?
Most jurisdictions require some form of permit for major appliance installations like HPWHs. Check with your local building department and follow any inspection steps. This ensures code compliance and helps with warranties.
Yes, in most areas you’ll need a permit. Contact your local building department to confirm requirements and inspections.
Can a homeowner install a heat pump water heater themselves, or should I hire a professional?
HPWH installation involves electrical work, plumbing, and refrigerant considerations. If you’re not licensed for electrical and plumbing work, hire a licensed technician to ensure safety and code compliance.
If you’re not trained in electrical and plumbing, it’s best to hire a pro for safety and compliance.
What common mistakes should I avoid during installation?
Avoid improper venting, incorrect pipe sizing, leaks at joints, and wrong electrical gauge. Mislabeling circuits or failing to test after installation can void warranties and create safety hazards.
Don't skip venting checks or leak tests; these cause energy loss and water damage.
What maintenance is required after installation?
Regularly inspect connections, clean filters if applicable, test the thermostat and safety devices, and schedule professional inspections per the manufacturer’s guidance.
Keep up with routine checks and annual service to maintain efficiency.
How long does an HPWH installation typically take?
Varies with site complexity, but most installations take several hours to a full day, especially when permits and inspections are involved.
Most installs take a few hours to a day, depending on site complexity and permits.
Top Takeaways
- Plan space and permits before starting
- Isolate power and water before connections
- Follow manufacturer diagrams for wiring and piping
- Test thoroughly and document installation for warranty
- Schedule regular maintenance to sustain efficiency